• Welcome to the Checkmate Community Forums forums.

    You are currently viewing our boards as a guest which gives you limited access to view most discussions, articles and access to our other FREE features.
    By joining our free community you will be able to:

    » Interact with over 10,000 Checkmate Fanatics from around the world!
    » Post topics and messages
    » Post and view photos
    » Communicate privately with other members
    » Access our extensive gallery of old Checkmate brochures located in our Media Gallery
    » Browse the various pictures in our Checkmate photo gallery

    Registration is fast, simple and absolutely free so please, join our community today!

    If you have any problems with the registration process or your account login, please contact support by clicking here or by using the"contact us" link at the bottom of the page.

1986 Starflite restoration

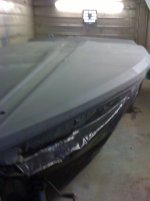
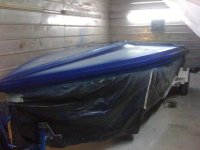
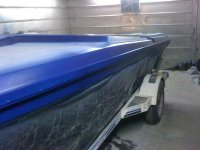
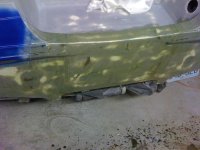
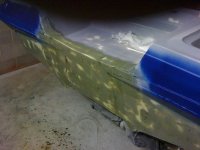
well the base was good to go so I shot the pearl that went on good but once again its really hard to see so the second coat of Imron had runs in it and some spots on the side is lacking clear in places, so I stopped not just because of the runs but my GOD the bugs, oh how I cant wait to get her back in that paint booth 1 so I can see 2 no bugs or leaves etc., I think I will sand the bottom shoot 1 more coat on it and save the sides for the paint booth,
IMG_0276.jpg

IMG_0278.jpg

IMG_0277.jpg
 
Okay I wet sanded and took all the runs out and in so doing took some of the pearl with them so I shot pearl again and went over it all with a few light coats, so in all with the sides and bottom I used 3 qt of Tamco Imron and 1 qt. activator, It looks alot better and we will see tomarrow how well it turned out,should I wet sand it with 1000 then 2000?? or leave it be???
 
now that the bottom is done waiting on 5 guys to come over to help flip it back over and the tricky part of getting it back on the trailer and back on inside, had to replace the hydrolic trim lines on the motor as they were bad and one was leaking, the bottom lower unit was pitted so I sanded and filled them in and sanded again, getting that ready for primer when I primer the top of the boat, I will be so glad to get her back in the booth, I would firmly sudjest to anyone considering doing the bottom of there boat outside to erect a shelter for it.
 
Well here is the update, tommarow the boat will be flipped, so I primed and sanded and sanded the motor and covers and shot the first coat of blue pearlit all, will do the rest before she is flipped, oh did I say sand oh and I sanded again and again, this is redundant LOL.
IMG_0279.jpg

IMG_0281.jpg

IMG_0287.jpg
 
I have a question the two plastic water ways on the lower unit, a past owner plugged half of the holes with caulking, why was this done????other than to starve the motor of water for cooling....
IMG_0289.jpg
 
Pics of finished bottom pearl?

well I should had taken some when I got done with it, I will take one tomarrow but I am sure she has bird crap all over her by now, the pis above were the first go around, then the second turned out nice, in the shade it looks really white but when the sun hits that pearl she lights up like a roman candle.
 
here is the 2nd coat of base on the motor and 1st coat on windshield and cooler covers, let me tell you prepping that motor and cover for paint was a pain in all with paint it took me a day and a half just on that.

IMG_0294.jpg

IMG_0297.jpg

IMG_0301.jpg
 
can not forget the pic of the motor cover and yes thank God its back in the paint booth, sanded all day, taped the sides off and she is about to get primer on it tommarow, I just want to give much respect to all the guys and gals that restore there Checkmate because to anyone that never has, really has no clue on all that goes into a restore:banana:
IMG_0299.jpg

IMG_0302.jpg
 
Looks good!! Most restorations takes twice as long, supplies and money!

yes I can only imagine if I had to replace the entire floor and transom, I got lucky the transom was replaced at some point and time.but do to the cracks on the transom skin that I repaired, I still have to add a few layers of glass over the back transom to beef it up.
 
primer went on yesterday, spent all day sanding,then put some extra skin on the transom, got board so I went ahead and shot the first base coat of blue.
 

Attachments

  • IMG_0303.jpg
    IMG_0303.jpg
    64.4 KB · Views: 35
  • IMG_0307.jpg
    IMG_0307.jpg
    48.5 KB · Views: 37
  • IMG_0308.jpg
    IMG_0308.jpg
    54.3 KB · Views: 38
I should had put the extra skin on her awhile back but had to flip it and when your relying on others had to do what I had to at the time, but no biggie.
 

Attachments

  • IMG_0309.jpg
    IMG_0309.jpg
    54.1 KB · Views: 39
  • IMG_0310.jpg
    IMG_0310.jpg
    48.8 KB · Views: 39
Looking good!!:thumb: What brand of paint did you go with?

well for the top I use a rust-olium topside navy blue, I picked up a Nason pearl blue toner on Ebay for $30 and added 3/4 cup to 1 quart topside, thinned it with Xylene and did a test to see how well the products react and cured, it did just fine, we all know how much color base costs so I decided to think outside of the box and it paid off with my quart of pearl blue cost me about $14 vs. $70/$120 I will be using Nason 2k clear over all the top, I would had gone with Tamco products again as I used them for the bottom but I have to order them online and I just as well have the Nason because if I need more I can just pick up what I need at the store, even though it costs a arm and a leg.
 
Back
Top