• Welcome to the Checkmate Community Forums forums.

    You are currently viewing our boards as a guest which gives you limited access to view most discussions, articles and access to our other FREE features.
    By joining our free community you will be able to:

    » Interact with over 10,000 Checkmate Fanatics from around the world!
    » Post topics and messages
    » Post and view photos
    » Communicate privately with other members
    » Access our extensive gallery of old Checkmate brochures located in our Media Gallery
    » Browse the various pictures in our Checkmate photo gallery

    Registration is fast, simple and absolutely free so please, join our community today!

    If you have any problems with the registration process or your account login, please contact support by clicking here or by using the"contact us" link at the bottom of the page.

Transom Time

Seperating the deck

I just seperated the deck on my MX15 and had a tough time with the splashwell, too. I have a forbe(a 2X3 glassed to the transom inside) and had to cut it to gain prybar access under and between the splashwell. Seperate the top seam of the deck from the transom from the rear. I took a 5' 1X1 and raised the deck at the center of the bow up front to make the splashwell pull a little as I used an airsaw(or sawzall) to cut the inner transom skin of glass and mat at the joining area only about a 1/4" deep. Be careful not to cut the skin(gelcoat). I took a snapon prybar(other brands will work) and pryed VERY carefully until I heard it start seperating and popping. The 1X1 did the rest as I GENTLY pried it apart from the bottom of the splashwell away from the trasnsom. I did this AFTER I seperated the top seam of the deck from the transom from the rear. Mine started popping and as I took the prybar and started seperating and helping it along it POPPED off and the whole deck jumped to the side(I didn't have anyone there to hold it just in case) and landed a little swauker jawed on the hull.....be careful, it jumps off and shifts...have someone hold it to steady it as it pops apart. I hope this helps ya.
 
I just checked out your pics

The forbe runs just under the splashwell on the inside along the transom horizontally. Cut it out so you can dig behind the splashwell. Chris Spaeth educated me on that.
 
I have that same 2x3 glassed in under my splashwell on the transom too. I will try cutting that out to pry from underneith. Did yours have a almost concrete type cement holding it together because thats what mine has and boy is the stuff tuff. I already have the whole upper deck removed and loose except for the splashwell. So Ill try your technique tomorrow and see what happens. thanks for your help. Check out the pics I took you can get a good idea of where I stand. Here is the full album, latest pics are in there.
http://pg.photos.yahoo.com/ph/willy...=&.done=http://photos.yahoo.com/ph//my_photos
 
Make sure you use a chopped strand mat between the laminate layers of plywood for your transom. The easiest way is to cut your patterns for both pieces(they should be slightly different because of the transom angle), and then glass between and screw every three inches over the entire surface. This will make sure you have a nice bond with no air pockets(start in the middle and screw in a circular pattern so all excess resin will be squeezed out). I also like to rough up the wood surface with a 40 grit sanding disc on my grinder to help promote adhesion. Good luck, it will all be worth it in the end!!
 
Aqua, I ordered 1 1/2 chopped strand mat today from US composites. That was the heaviest they had. As far as screwing the pieces together do you leave the screws in once its hardened or do you take them out. If I leave them in should I use a stainless screw? What have you found to work best as far as attaching the ply to the existing transom fiberglass. Thanks
 
forbe correction

It's not a forbe-it is called a thorpe which is structural. I am replacing mine with knees.
 
I removed the thorpe from the inside tonight to try to gain access to free up the back of the splashwell. I still cant get it apart. The cement seems to go up about 6 inches so what i think i am going to do is cut out the wood from the inside around the well and lift it off and hopefull that will work. Then i can deal with getting the back side of the splashell clean after its apart. Boy am I itch. The pantyhose trick works very well for cutting down the itchies but it doesnt get everything. But thanks to whoever posted the pantyhose trick because it does help alot.
 
The bonding must be pretty good

If the transom is saturated enough it will pull apart when you trim through the skin.
We use duct tape and pull the itchies out...it also gets the hair....OW
 
more pics

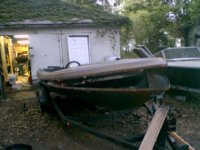
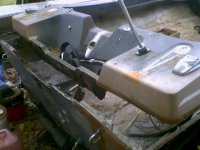
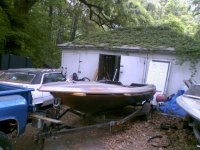
heres the interior after we gutted it and a front shot of the split hull.
 

Attachments

  • 72 stripped floor.JPG
    72 stripped floor.JPG
    39.8 KB · Views: 28
  • 72 top split.JPG
    72 top split.JPG
    45.3 KB · Views: 26
Kary said:
If the transom is saturated enough it will pull apart when you trim through the skin.
We use duct tape and pull the itchies out...it also gets the hair....OW
most of the wood is still in pretty good shape, well pretty solid at least. There is about a one foot circle around where the motor mounts that is soft, the rest is solid but wet to the touch. If i waited another year im sure it would have been soft enought just to tear out. I already cut the glass out around the splashwell on the inside of the transom but it was still holding pretty well so today I will cut out the first layer of wood from the inside. From the outside playing with prybars and chisles i was able to seperate the two layers of plywood just behind the splashwell. Wish me luck
 
Got it!!!

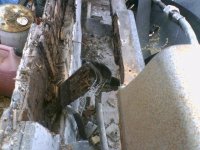
cutting out the wood from the inside worked great, feels good to be getting somewhere. Turns out the wood inside wasnt as good as I thought but nowhere near as bad as the 73. heres some pics
 

Attachments

  • Rear split.JPG
    Rear split.JPG
    45.6 KB · Views: 34
  • nasty wood.JPG
    nasty wood.JPG
    57.4 KB · Views: 37
Out with the nasty

This is how far I got today with limited time, Hopefully tomorrow I will have time to get it all out. Here is also a pic of the factory graphics, does anyone have any idea if I can get these same ones anywhere?
 

Attachments

  • ol school graphics.JPG
    ol school graphics.JPG
    47 KB · Views: 23
  • wood removal 1.JPG
    wood removal 1.JPG
    51 KB · Views: 34
Thanks Chris ,Im hoping to have one of the two afloat for t he summer. After the transom I am going to regelcoat the top of the 72, does anyone know the flashtime between coats for gelcoat? Im going all original, It is orange metal flake that fades to black in the center. Should look good. Im going to go wild on the 73. I still need seats in any condition if anyone has any.
 
TruckinMatt,
You want to make sure you remove all wood from the transom. I use a flapper 40 grit disc on my grinder for this, as it is more gentle than a grinding disc. You just want to make sure your surface is clean.
If your surface is fairly smooth, then your next step would be to pattern your 1 1/2 oz. chopped strand mat. I like to use two layers to mount the transom wood to the original transom glass.
Before I forget, you DO want to remove the screws you used for laminating the transom wood. If you don't strip the heads keep them for future use.
Next, use structual putty from your local marine supplier(this will be a polyester/vinylester product which is capatable with your M.E.K.P hardner your using with your resin) if it is not, then it is a "bondo" for above waterline applications only, DO NOT USE THESE PRODUCTS, only use "marine-below the waterline" products.
Using this structual putty you want to lay it in the bottom of the hull, and the two corners, so that when you put your transom wood in place(wich you have already pre-wetted out with resin) it will make this putty ooze out of the joint.
Next, wet out your transom wood, especially on the back side and the two sides and lower edge so that it will have a good chemical bond with the structual putty.
Now you wet out your C.S.M. and apply to the transom glass, followed by the next layer of C.S.M. Now put your transom wood in place, and start screwing from the outside of the transom into your wood. Again starting in the middle and working in a circular pattern. Once the screws are in you want to smooth out the structual putty that has oozed out of the joints.
I like to use a plastic putty knife that I cut a 1" radius on the two corners. This radius will give you great strength and allow easy glassing.
You now have one of two choices: you can either take a break and wait for your glass to fully cure before you continue, or, you can try and finish the job now. Remember that if your resin starts to kick, your job will be ruined and you'll have to grind off any faulty resin.
If you let the resin cure, then you need to scuff up the surface with the grinder to prep for the next step(I'm assuming your using waxed resin, which I also use).
Cut strips of your C.S.M. about 4" wide and then some 6" wide. You also want to cut C.S.M. in the pattern of your transom plus 4" extra on the two sides and the bottom, two layers of this pattern.
You want to wet out the area of the radiused joint, and lay down the 4" tape so that the center of the tape is at the radius. Next do the same thing with the 6" tape. Then wet out the C.S.M. and apply both layers to the inside of the transom. Make sure you have your corners notched so you don't have any puckers in the glass. This is a good time to also glass in any transom knees if you are doing so. At any rate once your glassing is all done, you want to roll out any air bubbles with a resin roller that you will find at your local fiberglass supplier.
Your done for now, so grab a cold drink, and get some fresh air!!
 
Hey aqua, you can use MEKP to make bondo harden. I used to use it to prank a fellow worker, he would get ready for the next day by laying out a big glob of filler on a putty board, so that we was ready for the next morning. He would just toss it out if I used the benzoil peroxide to harden it. But then I disovered that MEKP wont change the color of the bondo. What fun that was. :rof:
 
Back
Top