-
Welcome to the Checkmate Community Forums forums.
» Interact with over 10,000 Checkmate Fanatics from around the world!
You are currently viewing our boards as a guest which gives you limited access to view most discussions, articles and access to our other FREE features.
By joining our free community you will be able to:
» Post topics and messages
» Post and view photos
» Communicate privately with other members
» Access our extensive gallery of old Checkmate brochures located in our Media Gallery
» Browse the various pictures in our Checkmate photo gallery
Registration is fast, simple and absolutely free so please, join our community today!
If you have any problems with the registration process or your account login, please contact support by clicking here or by using the"contact us" link at the bottom of the page.
You are using an out of date browser. It may not display this or other websites correctly.
You should upgrade or use an alternative browser.
You should upgrade or use an alternative browser.
Entertainer floor repair
- Thread starter W Vaughan
- Start date
yellowfiero88
Well-known member
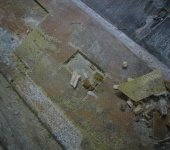
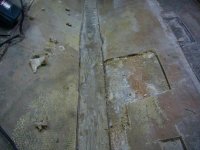
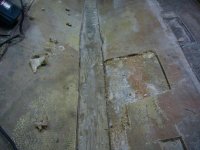
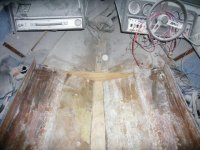
I did from the transom to the dash all at once! Once you get the wet core out, clean it then grind it with 36g. Your then ready to glass it back together. Acetone will help wick out moisture but if its wet, IMO remove it!
finished the hull repair
Well i finished to pad and core relacement today. I may have gone a bit overboard. 2 layers of 1 1/2 oz mat under core
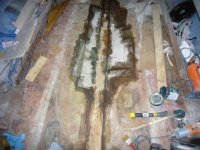
then 2 more layers over the entire repair area.
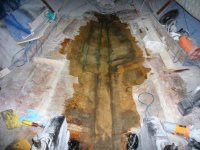
The dark areas are the filler i used between pad and core and new core and old.
Then finished it off with a layer of 24oz woven roving.
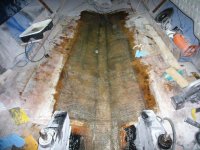
I'm pretty sure it was too heavy but its what i had. 2 gallons of resin so far.
Well i finished to pad and core relacement today. I may have gone a bit overboard. 2 layers of 1 1/2 oz mat under core

then 2 more layers over the entire repair area.

The dark areas are the filler i used between pad and core and new core and old.
Then finished it off with a layer of 24oz woven roving.

I'm pretty sure it was too heavy but its what i had. 2 gallons of resin so far.
More progress
Well i've gotten a little more done. Had a little help yesterday.
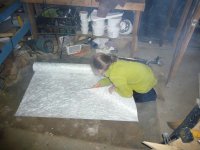
Hannah my 10 yr old has actually taken quite a bit of interest in the project. Talk about making a daddy smile.
We got the new stringers cut and coated with resin and glued in place.
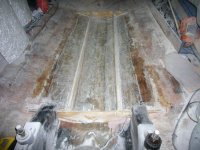
After the PL premium set up good we got them glassed in with 2 layers of 1 1/2 oz mat.
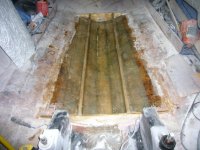
Is this enough? Its way more than what was there from the factory i know but I want to really get it right this go round. Will be gluing the floor down tomorrow hopefully and starting on the new engine stringers. One of them seems really dry and the other has just a slight amount of moisture but i'm not taking any chances with them. have some white oak to laminate new ones up with then i know i will not have to worry. Weather down here has been great the last few days making me really motivated to get to the lake but i'm trying to do things right and not get in too big of a rush.
Well i've gotten a little more done. Had a little help yesterday.

Hannah my 10 yr old has actually taken quite a bit of interest in the project. Talk about making a daddy smile.
We got the new stringers cut and coated with resin and glued in place.

After the PL premium set up good we got them glassed in with 2 layers of 1 1/2 oz mat.

Is this enough? Its way more than what was there from the factory i know but I want to really get it right this go round. Will be gluing the floor down tomorrow hopefully and starting on the new engine stringers. One of them seems really dry and the other has just a slight amount of moisture but i'm not taking any chances with them. have some white oak to laminate new ones up with then i know i will not have to worry. Weather down here has been great the last few days making me really motivated to get to the lake but i'm trying to do things right and not get in too big of a rush.
yellowfiero88
Well-known member
Looking good Will! I would say you have it stronger than checkmate did originally. You might get you some rubber nitirle exam style gloves to wear. Keeps the fiberglass splinters out of the skin when cutting the glass. I learned the hard way......took a dang week of itching to get em all out!! I hate fiberglass!
yellowfiero88
Well-known member
Now thats thinking with your dipstick!!! I would have NEVER thought of that, thats a great ideal!!
yellowfiero88
Well-known member
LOL, you ain't kidding there. Think we were that smart at their age?
Moving right along
Made some more progress this weekend.
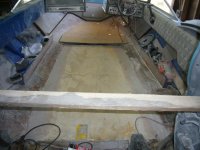
Rear section of floor is in and ready for glass. Front section is cut to fit.
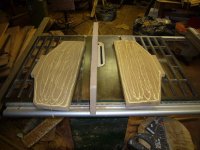
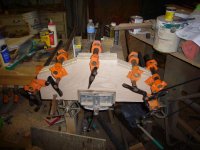
New engine mount is glued up and ready to be fit to hull. Ended up only replacing one side. The other side was dry and besides that even after cutting the glass i couldn't get it to turn loose. I will just glass it back up and it will be fine.
Made some more progress this weekend.

Rear section of floor is in and ready for glass. Front section is cut to fit.


New engine mount is glued up and ready to be fit to hull. Ended up only replacing one side. The other side was dry and besides that even after cutting the glass i couldn't get it to turn loose. I will just glass it back up and it will be fine.
yellowfiero88
Well-known member
Looks like your making good progress. I will try and give you a buzz wed night. It has been crazy up here the past couple days and by the time I sit down..... its to late to call you!
bigredinohio
Active member
Looks like you're making good progress. You're glassing is very clean and it's pretty cool your daughter is involved in the project. It definitely makes everything more worthwhile.
Thanks for the compliments. It has been really great getting my daughter and son both involved in this project. Theirs is next. I ordered a set of plans for the glen L TNT the other day. We are going to build it together when I get the entertainer out if the shop. They are super excited about a boat of their own.
pretty good weekend
I had another pretty good weekend of progress.
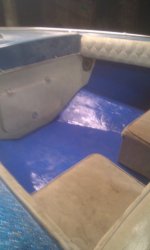
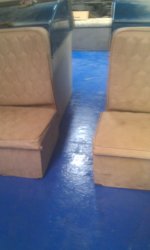
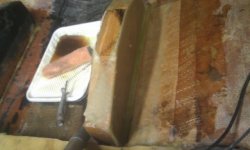
Im still not sure what i'm going to finish the floor with. put a little paint on it just to see what it looked like. I'm thinking i am going to do snap in carpet. the floor was finshed with 2 layers of 1 1/2 oz mat and 1 layer of 4 oz cloth. I took my time keeping it all smooth so the paint doesnt look bad, just the wrong color. another couple hours on the engine log and it will be done i hope. Looking like the middle of next month i will get to splash this thing!
I had another pretty good weekend of progress.


Im still not sure what i'm going to finish the floor with. put a little paint on it just to see what it looked like. I'm thinking i am going to do snap in carpet. the floor was finshed with 2 layers of 1 1/2 oz mat and 1 layer of 4 oz cloth. I took my time keeping it all smooth so the paint doesnt look bad, just the wrong color. another couple hours on the engine log and it will be done i hope. Looking like the middle of next month i will get to splash this thing!

