• Welcome to the Checkmate Community Forums forums.

    You are currently viewing our boards as a guest which gives you limited access to view most discussions, articles and access to our other FREE features.
    By joining our free community you will be able to:

    » Interact with over 10,000 Checkmate Fanatics from around the world!
    » Post topics and messages
    » Post and view photos
    » Communicate privately with other members
    » Access our extensive gallery of old Checkmate brochures located in our Media Gallery
    » Browse the various pictures in our Checkmate photo gallery

    Registration is fast, simple and absolutely free so please, join our community today!

    If you have any problems with the registration process or your account login, please contact support by clicking here or by using the"contact us" link at the bottom of the page.

"Spare" 454 Build-up... 96 L29 Vortec 7400 to Marine Motor

I got a 75 shot of NOS .That would put it in the hp range for cheap.pressure wash the oil off it and go!!
if you require machine work will It go in front of the 540 or after. I would look for a new machine shop and divert my $ for the 540. If done right you should not need a backup motor .:lol:

:lol:Cast pistons love nitrous! Lets doooo it! You are right, if done right, i wont need a spare.....but i am learning at least! Isnt education supposed to be priceless! Haha

We all cant be da man like you Sling!:thumb::cheers:
 
:lol:Cast pistons love nitrous! Lets doooo it! You are right, if done right, i wont need a spare.....but i am learning at least! Isnt education supposed to be priceless! Haha

We all cant be da man like you Sling!:thumb::cheers:
Just think how clean it would be after a few shots!.sound's like ur 540 will be the chit when you get it done. I need that 454 motor for my truck.I have worn it out this year.
 
Last edited:
Dude is your 540 really that far off? I thought it was almost done last year I'd concentrate on that. But anyway I'm curious and I'm excited to see the finished product... and I might need to borrow it when your done while I freshen up my big motor.
 
Im just having a contingency plan. The same things you guys are saying i was saying the same thing last spring. If anything i can break even or make a few bucks selling it as rebuilt if 540 proves debugged. Besides, im getting antsy, i want a motor to work on! I can only look at parts in boxes for so long ya know.

I have about 90% of what i need for the 540 on the shelf. I just need my block back! I also need a little head work done but that is for sure going to different shop! They would have been done if my prefered machinist at my usual shop (didnt have capability to do block work i needed) hadn't of quit to go drive a tow truck. He quit before he could get to my heads.
 
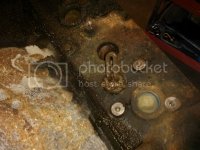
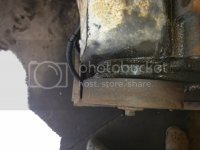
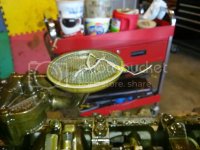
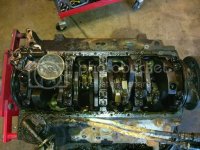
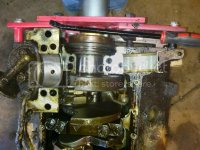
Alrighty, got some more tear down done last night! Got the oil pan off, all looks purdy good! Found a couple large machine shavings in the oil pump screen but they appear to be something maybe left over from original block machining operations when it was in GM's hands. I pulled the rear main cap cause I was curious. No marks on crank, bearing looked a bit worn, and good cross hatching under the bearing on main cap surface. The thrust surface of the bearing looked like nice even wear too with no galling. The oil pan is rusty, but solid and should clean up. I just need a good parts washer because this thing is DIRTY! between all the dirt stuck to the outside from GM's typical leaky oil cooler lines and the sludge inside, I've got my work cut out but after a good cleaning should be a pretty straight forward refresh. Now I just need to go buy a harmonic balancer puller. I'm getting tired of borrowing them.

Think a block heater would be useful on a marine engine?
1003131711a_zps0841ce96.jpg

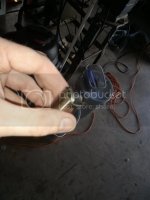
This block is already equipped with a 24x crank sensor. Awesome! The 540 does not have one from factory:
1003131711b_zps17c5e898.jpg

Here are the large machine shavings I found:
1003131735_zps5a2bfe65.jpg

Here is what she looks like after the pan pull. I found no sign of shavings in the bottom pan sludge either. As Martha would say, "It's a good thing":
1003131735a_zps2428d2de.jpg

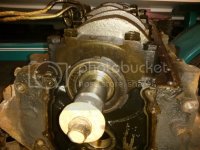
Here is what I found when I pulled the rear main cap. Promising sign!
1003131749_zps021eccdc.jpg
 
Well, seeing as Harbor Freight was having a parking lot sale on Friday, I ventured over and bought a parts washer, cheap balancer puller set, set of number/letter stamping dies for numbering parts, and some left handed drill bits to deal with that one broken exhaust stud. Of course I went armed with coupons and saved an extra $45! That place is great for cheap occasional use tools.

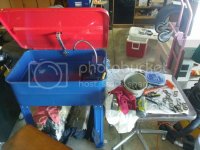
I didn't do much more diss-assembly to the block besides pulling the harmonic balancer (which came off, but was very, very tight. Impact gun was groaning). But what I did do was assemble my new washer, bought 10 gal of mineral spirits (which cost as much as darn washer!), and did a bunch of cleaning up of what I had already pulled off.

Here is a pic of my makeshift washing station.
1013131709_zpsde5c01dc.jpg

I got the heads all dissassembled. There were a couple tight valves but that seemed to stem from a bit of corrosion/dirt from sitting. Everything should clean up nicely. Valves should be Inconel too but I will be able to see more once the carbon is off. Nothing appeared to be bent, galled, heat cracking.
1012131848_zpsea06885b.jpg

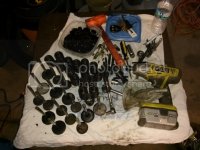
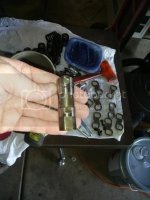
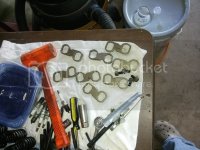
Got the dogbones and lifters all cleaned up nicely. Also did the oil pan, oil galley shield, and spider keeper. Lifters all roll smoothly, no collapsed lifters, and cleaned up nicely so there should be no problem reusing them.
1013131709b_zpsb46c1516.jpg
1013131709c_zps52b15237.jpg
1013131709a_zps5ec1902d.jpg

I have one cylinder head soaking right now and I will get the other one soaking within the next few days. Once those are clean, I will begin disassembling the shortblock....and you guessed it.....more cleaning!
 
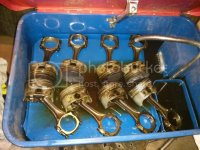
I did some more dissassembly last night. Got all the pistons and the crank out. Everything still looks real good for the chance at a straight forward rebuild. I got all 8 pistons out and the crank removed. Over the past week or so I have been dissassembling heads and cleaning them. That took a bit of scrubbing for sure.

Here are all 8 pistons out. No noticeable slop in the wrist pins either. All pivot freely.
1028131912_zps2f393bcd.jpg

Here are what the crank rod surfaces look like. Not bad. I have to check dimensions on it yet but I can't feel any ridges or grooves.
1028131913a_zpsa51b9d23.jpg

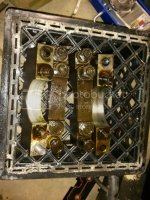
This is pretty representative of what the rod bearings all looked like. Worn but no failures/debris.
1028131914c_zps882a34f1.jpg

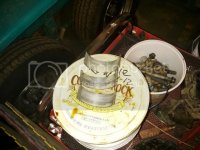
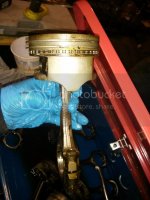
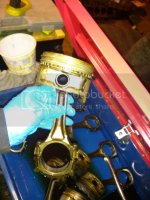
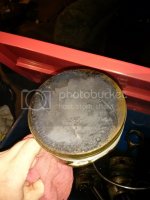
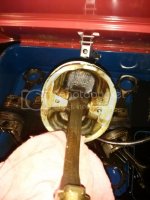
Here are a few of the cast pistons/rods. Not the beefiest stuff but should hold up fine for this mild build. I bet this used some oil because the oil rings were on the sticky side/worn.
1028131915_zpsf1caa733.jpg
1028131915a_zps3ec1a2fd.jpg

Being that this motor was equipped with a factory crank sensor, I was hoping for a 28 tooth reluctor wheel. I should have realized that in 96 those probably didn't exist. This has a 4 tooth reluctor wheel haha. Vewwy ssophisticated!
1028131916_zpsc2b07e16.jpg

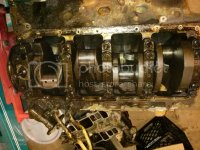
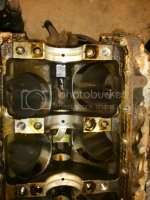
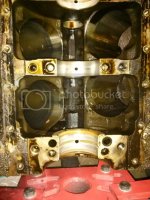
Here are a couple of the empty block. Crank bearings all looked like same amount of wear as the rob bearings. Good cross hatch under bearings and no spun ones. I don't know what kind of oil was used in this thing but good lord it stunk bad when I started popping main caps off. Smelled like a stale refinery when I finished. Cylinders have some wear but you can still see some cross hatching. I will check roundness and if within tolerance, run a good ball hone through to refresh them.
1028131923_zps9b809e4c.jpg
1028131923a_zpsd3704afd.jpg
1028131924_zpsd63b82af.jpg

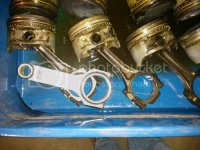
Now for S & G I placed one of the Manley (Engine Pro) 4340 H-beam rods next to these 3/8 factory rods. Slightly noticeable difference...haha.
1028131945a_zps11af0e43.jpg

I have a bit of scrubbing to do on these. Just a bit of carbon build up. For sure cast pistons though.
1028131955_zps7d8b6fd9.jpg
1028131955b_zps73756f8f.jpg

Now all that is left to do is a bunch of cleaning, a bit of measuring, then time to start re-assembling!:banana::bounce: I will start to order some parts once I finish hemorrhaging money on my truck repainting/rust repair that is going on now.
 
Thanks Ron, love all the pics and dialogue. This is great stuff for a magazine mechanic. I disassembled one motor in my life and never assembled one.
 
When you do the rust repair make sure to carve out as much of the foam that's between the inner and outer skin and do NOT reinstall new foam.
Yea, thats the plan. Doing both complete front fender replacement. Going to patch the one rear quarter Other quarter that has no rust we will get inside, remove foam ,and spray an inhibitor.
 
:thumb:

If you haven't made a quarter patch yet you may be able to use one of the front fenders for the patch. They usually have the same radius.
 
That would work except the fronts are rotted worse in the same area as the rears. might be able to make something work though.
 
Here is the best information I have found about doing port work on these L29 heads.

http://www.chevelles.com/forums/show...highlight=l-29

http://www.hotrodders.com/forum/bbc-...cs-171714.html

http://www.fullsizechevy.com/forum/g...g-results.html


So basically, the route I will take with these heads are very similar to what was done in the above articles with decent results:
-retain stock valves
-Gasket match
-light clean up/smooth of entire runner
-blend bowls
-short side radius reworking
-remove vortec vane in intake runners
-smooth chambers and light valve de-shrouding if possible.

Any other thoughts on this? This is gonna take a while with a die grinder for sure, but my time is cheap!

Progress update: Almost all of the parts have been cleaned and inspected. I will be ordering components to re-assemble the short block very soon.
 
Your wife will be so proud of you when you drag in those metal shavings in the house and laundry. Those little buggers can get in some rough places.
:)
 
Your wife will be so proud of you when you drag in those metal shavings in the house and laundry. Those little buggers can get in some rough places.
:)

I brought home a case of tyvec coveralls from work just for doing this! That should help a bit.
 
I do too. It would progress quickly if I had a block. I am hoping by the time I get done assembling the long block of this 454, my other block will magically appear and I can then shift back to big powah. But, in the mean time this will keep me occupied and give me hope.

And if i end up having to run the 454 for a bit, at least I am setting tjem up to use same rigging and efi so the 548 tuning and install should be a breeze.
 
VORTEC HEADS

Just throwin it ou there for ya. I have built one starting out the way your going. My experience led to me to ditch the vortec heads so I could run the cam I wanted. Their is no factory L29s with inconel exhaust valves. I dont even think Merc used had them, but I could be wrong. I ended up running a used set of Gen VI square ports with new springs and valves. The stock pistons dont have much valve relief and I ran into problems on the intake. No contact, but too close for comfort. I lost some compression going to the larger chamber 119's but gained clearance I could live with. Was never gonna enter offshore race with it, but it would consistently push a 251 to 64-66 mph. Completely stock bottom end. New bearings only. original rings. Still have the shortblock in the garage.
 
Back
Top