• Welcome to the Checkmate Community Forums forums.

    You are currently viewing our boards as a guest which gives you limited access to view most discussions, articles and access to our other FREE features.
    By joining our free community you will be able to:

    » Interact with over 10,000 Checkmate Fanatics from around the world!
    » Post topics and messages
    » Post and view photos
    » Communicate privately with other members
    » Access our extensive gallery of old Checkmate brochures located in our Media Gallery
    » Browse the various pictures in our Checkmate photo gallery

    Registration is fast, simple and absolutely free so please, join our community today!

    If you have any problems with the registration process or your account login, please contact support by clicking here or by using the"contact us" link at the bottom of the page.

BOBS BIGFOOT NOSE CONE KIT INSTALL

illMATTic

Well-known member
well ups just dropped of my Bob's low water / bigfoot nose cone kit today. i ordered it from bobs machine at 3 pm on tuesday and i received it today. now that is service.

i plan to install this kit after this weekend. i will post a detailed "how to" as i am doing the install. this is the first one i have done. it doesnt look all that hard.

for those of you who are wondering what one of these does here you go.

there are two reasons i am installing this kit.

1) the low water pick up design is needed when raising the engine to 2" below the pad or higher. there are water inlets on the very bottom edge of this kit. these aid in getting the proper amount of water into the engine for optimal cooling.

2) the sleek nose cone design ensures smooth water flow around the lower unit. at speeds of 80+ you may encounter "blow out" with out one when using a "chopper" style prop. this is caused by the rounded design of the lower unit intended for speeds below 80 mph. water normally flowing around the lower unit to the prop is separated to the point where the prop loses its bite on the water. i have never experienced this yet but have heard i do not want to.

the kit comes with everything you need to intall the cone.
expoxy3.jpg
 
I have one of those just begging to be installed. A step by step will be great.
Going to base line mine before I install.
 
i put one on my 200 merc years ago,if i remember we tack welded it first then used the epoxy.got to make sure the thing is on straight!!
 
well i started the install last night.

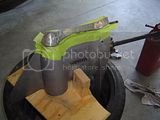
i first started by removing the lower unit from the mid. i mocked up a jig to hole the LU while doing the install. i then set the cone on the LU and traced a line around it so i know right were to put it once i was ready. then i used be grinder with 60 grit to prep the LU surface. i didnt go nuts, just enough to ensure proper adhesion. after cleaning both pieces i taped of the drain plug.

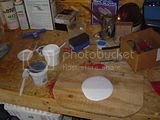
now for the fun part. this epoxy they supply you is some mean stuff. it is a 1 to 1 mix ratio. there is a white and a gry. the white is about the concistancy of that marshmallow topping that comes in a tub. it is thick. i found out you want to mix just about all that is supplied so get a large mixing board. take the mixed putty and fill the inside of the nose cone that is sitting in your jig just about to the top. let it sit for a bit so the air bubbles rise out. you have plenty of working time. it sets in 7 hours and cures totaly in 72 hours:irked: . now take your LU and set it right into the nose cone. adjust it so your lines match up and brace it. you can use a putty knife to skim any extra off that may ooz out.

in my install i didnt fill enough into the cone so i had to mix more and spread it into the setup. i made a mess. and by now i was getting a bit frustrated. i had this stuff all over my arms, floor, and now my camera. :pissed:

this is as far as i have gotten on it. i will post fotos as soon as i get more time.

tonight i plan to drill the hole for the water inlet. wish me luck.
 
cool thats the one I have. grab some A&N fittings for the hose.
it will be great to finally see if the nosecone actually slows it down. I highly doubt it will. you should definitely run it with the 26 first just to see if the numbers are diffrent. It looks like your gonna shatter the ever so sought after 80mph mark!:lol:
 
i have all of the filler spread on the LU. i still do not have he hole drilled and tapped due to me being a cheap ass. a drill and tap needed for this will cost 45 bucks. it is an oddball size drill bit. a 23/32 drill is needed for the 1/2-14 npt tap. the tap has to be a non tapered style.

i think i will just get the cone installed and worry about the water inlet later. i want to be on the water this weekend.
 
it is all together now but i cant build any water pressure. i think i may have overtightened the pump housing bolts causing the housing to lift in the areas between the bolts. :sick:
 
photos finally

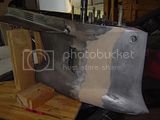
mark and grind the case for better bonding.
th_DSC02035.jpg

this stuff is a 1 to 1 mix. it is really soupy.
th_DSC02036.jpg

next, get it all lined up and pour it in. fill it right to the top.
th_DSC02038.jpg

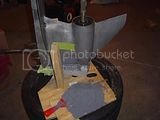
you have to cut back a portion of the fin to make room for the water inlet.
th_DSC02041.jpg

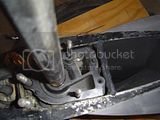
you first drill a pilot hole all the way through. then bump up to 9/16". then you make the large hole. you stop before you go all the way through. filler has also been added.
th_DSC02046.jpg

your 9/16" hole must come in below the pump housing directly into the water cavity.
th_DSC02047.jpg

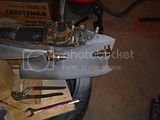
since i didnt have a drill press, my hole on the left wasnt quite accurate. i used jb weld on the threads to make sure it would not come loose. i did a quick primer job to get back on the water.
th_DSC02048.jpg

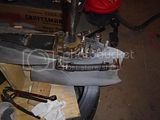
finished.
th_DSC02049.jpg
 
. the white is about the concistancy of that marshmallow topping that comes in a tub. it is thick.


Awesome marshmallow refrence:drool:
 
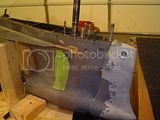
In the bottom two pics, it looks like the LU narrows up now between the new nose install and the old case. Optical illusion? If not, you may have a problem, I think it's supposed to be a smooth transition
 
In the bottom two pics, it looks like the LU narrows up now between the new nose install and the old case. Optical illusion? If not, you may have a problem, I think it's supposed to be a smooth transition

jw, it is only in the fotos. it is a smooth transition. i noticed it when i posted them and went out and checked it.
 
Very cool. What was the difference in speed and handling. I have one to install also. Going to be fun.

i think adding the cone scrubbed off a couple mph with the same setup. it did however allow me to jack it up .5" above the bottom.

you will also want to make sure your cooling system is in order. my water psi skyrocketed. it blew out the rubber diaphram around my popet valve. cost me 3 bucks but 4 days off the water.
 
you will also want to fill in the water cavity below the pump housing ans fill over the inlet holes. you want to do this so the cavity does not stay full of water and freeze in the winter. i didnt do this since i was in a super big hurry to get on the water. i only siliconed over the holes and just pulled it off when i put the boat away.
 
IM thinking of doing this myself talked to bobs and they wanted 399 installed.Ive done everything myself on this boat, would you do it again or pay the extra couple hundred Im thinking with my rebuild this winter id like to be able to run the motor up another 1/2" but still need water pressure. I dont have as many options as the mercs.
 
So with the motor jacked to the moon did you gain your speed back and maybe picked up a few????

i never jacked it up with the laser II. after i jacked it up i ran my 28P chopper. it ended up being the same as the laserII 26P due to more slip. the laserII lost 2 mph running it at the same level before the cone install. the chopper was too low in the water to get any top end before the cone. you can see more results under my "prop and nose cone" thread.
 
Back
Top