• Welcome to the Checkmate Community Forums forums.

    You are currently viewing our boards as a guest which gives you limited access to view most discussions, articles and access to our other FREE features.
    By joining our free community you will be able to:

    » Interact with over 10,000 Checkmate Fanatics from around the world!
    » Post topics and messages
    » Post and view photos
    » Communicate privately with other members
    » Access our extensive gallery of old Checkmate brochures located in our Media Gallery
    » Browse the various pictures in our Checkmate photo gallery

    Registration is fast, simple and absolutely free so please, join our community today!

    If you have any problems with the registration process or your account login, please contact support by clicking here or by using the"contact us" link at the bottom of the page.

MX-16 Video Restoration with Tim

Nice work. 3 out of 4 crazy boat restoration guys say that marine ply is unnecessary. Good quality AB exterior (good one side) ply is just as good. You'll be covering it with epoxy to keep moisture out. I dealt with unwanted holes by feathering the hole larger on the inside with a grinder, put masking tape across the outside, cut up small pieces of mat for the inside of the hole and larger for feathering out, laid it up with epoxy/cab mix, before it fully cured I pulled the tape off. After it cured I ground a bit on the inside before clamping in the transom. You'll be cutting a lot of that damage away if you're still planning on removing the splash well. What shaft length motor are you using? I think we'er all envious of your warm garage. :drool:
 
Thanks guys! Yeah "Good One Side" is exactly what I think I will use. I have been looking and am not finding anyone with "Marine" ply in stock round here.

As for snow - yessir! Won't make any boat progress tonight. I did patch two spots with some biaxial tape earlier though.

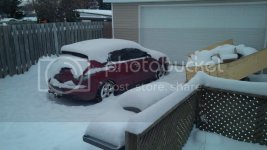
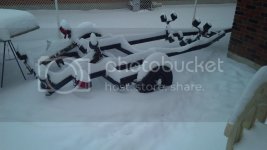
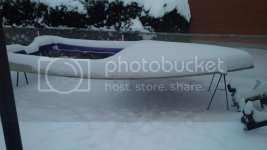
Here is what I'm dealing with instead of working on the boat:

:brickwall:

IMG_00001142_zps1c8acdec.jpg

IMG_00001143_zps2a21d72e.jpg

IMG_00001144_zps8d9e1c7e.jpg
 
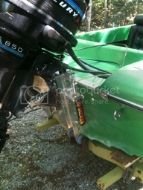
I spent a lot of time mocking up my jack plate before I cut the transom down. I think I had the plate and leg on and off 15 times before I got right. This was before I removed the deck and transom. I put my motor together with a 21" shaft and leg. If you have a 25" you will need to keep the transom higher and remove less of the splash well. Here is a link explaining shaft length. http://www.leeroysramblings.com/OB_shaft_length.htm :cheers:

picture.php
 
Hey thanks! I checked here:
http://shop.evinrude.com/media/document/ModelNumberReference.pdf

It explains that the "L" in E115TLCSA is for the shaft length and indicates a 20" shaft.

Question, with your jack plate and splash well modification, does your motor have enough room to tilt all the way forward? I ask because I am actually leaning toward a complete removal of the splash well and going flush or near flush all the way across.

Thoughts?
 
does your motor have enough room to tilt all the way forward?
Thoughts?

Yes. I worried about that, which is why mocked it up before I started cutting. I wanted my jack plate to sit right at the edge of the transom. You can see in the pic that I ended up cutting down the original height buy a couple of inches. If I were to do it again I would cut the sides flush with the sides of the well. Those nubs that I left were a pain in the tush to sand. The biggest problem I had with getting a full tilt was adding a second bracket for dual cable steering.
 
I wanted my jack plate to sit right at the edge of the transom. You can see in the pic that I ended up cutting down the original height buy a couple of inches.

Mark - So you actually took a few inches off the top of the transom? Interesting... I hadn't considered that. I think, when I get there, I will mock the motor up and see where it should be.

I think I want my motor at original depth but set back the thickness of the jack plate. Maybe an inch or two higher wouldnt hurt.
 
Also Mark, three more questions:

What glass did you use to make the new splash well floor? Is that Biaxial or just some mat?

My Home Depot does not list A-B ply, but from looking I imagine I was Fir over Spruce. Is this ideal?
http://www.homedepot.ca/product/23-32-inches-183mm-4x8-sanded-fir-plywood/966442

If so, which way out should the "Good" side of the wood face? I guess that may not matter because every side of it will be bonded to something, wont it...
 
Last edited:
Hey Tim, I used 4 layers of mat on my splash well. I crossed the pattern and made each layer a bit larger than the previous. In the first 2 pages of my resto thread you can see that I used paper to make my pattern. I read in a boat restoration book to put the first good (A) side toward the outer transom skin, then B sides back to back (cab/epoxy mix to fill the voids) leaving the second A side facing forward. You can see in the pics that I cut the panels on the diagonal. When you put them back to back the grain of the 2 panels form an X.
Cover the bike and leave it till spring. You don't have time for that. :poke:

Hahahaha @ cover the bike lol. I wish I could. It just have this vision of how it should look and I can't seem to leave it alone. I have promised not to spend money on the bike until the boat is done :)

Thanks for the info. I have lots of mat so I will use the Styrofoam and garbage bag technique that I saw a wise man once use ;)

I know what you mean about those two humps at the top of the splash well that you had to sand around. I think I am going to cut them off and make it flush.

Next step - finish prepping the outter skin to accept the new ply :) Was the sanded fir I linked the right stuff you think?
 
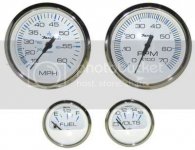
Hey all. Thanks! The gauges I got are 80mph :) I could only find this pic lol. Good catch!

Okay I will hunt around for a lumber yard and see what I can turn up. 7 ply exterior grade it is. I am at a stand still right now anyway because I need a DA to put the finishing touches on the transom skin and other stuff, and I am not allowed to buy a DA so close to Christmas lol. I think I may not have to buy one :sssh:

I got the gauges from these guys:
http://www.possummarine.com/

I came across them somehow via the internet and it was the best deal I could find on the gauge set that came with the 4 gauges that I wanted. I do not want trim or anything, just the four pictured and they had that packaged for under $200.
 
Back
Top