• Welcome to the Checkmate Community Forums forums.

    You are currently viewing our boards as a guest which gives you limited access to view most discussions, articles and access to our other FREE features.
    By joining our free community you will be able to:

    » Interact with over 10,000 Checkmate Fanatics from around the world!
    » Post topics and messages
    » Post and view photos
    » Communicate privately with other members
    » Access our extensive gallery of old Checkmate brochures located in our Media Gallery
    » Browse the various pictures in our Checkmate photo gallery

    Registration is fast, simple and absolutely free so please, join our community today!

    If you have any problems with the registration process or your account login, please contact support by clicking here or by using the"contact us" link at the bottom of the page.

MX-16 Video Restoration with Tim

Thanks Rob. I checked it this morning pulling the car out of the garage and it is solid! What's the rule? Apply epoxy in a hot shop and then let the shop cool down to decrease cure time?

Usually works that way cause I turn it up to 72 degrees to work out there and then down to 60 degrees when I am done for the night :)


That depends on your mix ratio. You can slow or speed up cure time depending on the mixture. For example if I need to work on a large area (floor) I'll slow the cure rate down (less hardener) to maximize the time. That gives you more time to work. Opposite is true for something like a small patch job that needs multiple layers of fabric. Warm temps help as well.
 
Ladies and Gentlemen... MERRY CHRISTMAS!!!!!

I wish you and all of your loved ones the best! From Tim and Family. God Bless!

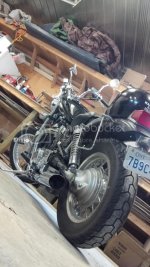
Tonight I sanded and opened up any air holes in my CSM job from yesterday, and then patched them with more CSM. But the real story is the two hours I spent polishing the bike! I will leave you with my Christmas special: Shiny Motorcycle

IMG_00001194_zps7b15aef9.jpg

IMG_00001195_zps95773d0e.jpg
 
Here's the transom hole layout for the motor.


•The top pair of holes is spaced 12 and 7/8-inch on center; each hole is 6 and 7/16-inch from the engine bracket centerline.
•The bottom pair of holes is spaced 9 and 7/8-inch on center; each hole is 4 and 15/16-inch from the engine bracket centerline.
•The spacing between the top and bottom pair of holes is 8-inches on center.
•The centerline of the top holes is 2-inches below the top of the engine bracket. The holes in the transom should be 1 and 7/8-inch below the top of the transom. In no case should they be closer than 1 and 3/4-inch to the top of the transom. Holes located 1-7/8-inch below the top of the transom will produce a slight gap between the transom and the engine mounting bracket. This gap can be filled with an appropriate spacer or shim to help bear the engine's weight onto the transom.
•When locating holes on the transom, do not assume the top of the transom is a straight or true edge. Determine the transom vertical centerline by measuring equal distances from the hull's chines. Align the engine mounting holes to the true vertical centerline of the transom, not to the top edge of the transom.

I wish I had this information last summer as it would have saved a lot of time.
Thanks Rob B. - I printed this info for future use!!!
 
Yeah they were in the original design cause the wheels were further out. After it changed they weren't needed but I didn't get around to removal till a few days ago :)

Got two more clamps to make today and then put the final touches on my template before its go time!
 
Well as you saw in the above video, I was ready to start putting the first layer of 3/4 ply in to the transom. Now it's done :)

I am posting this before the video is done processing on youtube so if it is not working please give it a few mins.

 
Tim you can add a layer of CSM before the second 3/4" plywood or just glue the second to the first piece. Here's a typical transom layup schedule: The layup for standard transoms is CSM,3/4 ply,CSM,3/4 ply, 1708,1708 and two extra layers of 1708 around the perimeter (8 inch tabbing).
 
I forgot your boat is the same size as redstrat's. Follow his restoration and you'll be fine. I overkill most of my projects, it's a engineering thing!!:o
 
Okay sounds good. So when this is cured I will cut another 3/4 ply, gently sand both and paste it in for my full 1 1/2 inch thickness. Then I can use two layers of 1708 for the inside skin? Do I need roving?
 
Okay sounds good. So when this is cured I will cut another 3/4 ply, gently sand both and paste it in for my full 1 1/2 inch thickness. Then I can use two layers of 1708 for the inside skin? Do I need roving?

You're correct!! Make sure you overlap/stagger the 1708 along the sides and bottom. You don't need roving unless you do a layup like CSM, roving, CSM, CSM. When using 1708 you can go: CSM,1708,CSM,1708,CSM. That builds a nice inside skin. I would have all my pieces cut out before the layup, then make sure to wet it out completely.
 
Awesome thanks! Here is my next issue. The marine place I am getting all my stuff from doesn't have 1708 Biaxial cloth. This seemed odd to me so I called around to all the places I have sourced stuff from and same story. 6 inch biaxial tape = no problem. But anything more than 6 inches wide = No way. Biaxial cloth is simply unavailable.

I looked also at ordering it from several websites and everywhere I look, shipping is actually more expensive than the cloth!!!

I am stuck in a rut right now so I am going to keep looking :(
 
Here's what woven roving is used for: Provides high tensile and flexural strength in laminates. Usually is sandwiched between layers of mat. Hope this helps and not confusing.
 
Awesome thanks! Here is my next issue. The marine place I am getting all my stuff from doesn't have 1708 Biaxial. This seemed odd to me so I called around too all the places I have sourced stuff from and same story. 6 inch biaxial tape = no problem. But is a sheet? No way. Biaxial cloth is simply unavailable.

I looked also at ordering it from several websites and everywhere I look, shipping is actually more expensive than the cloth!!!

I am stuck in a rut right now so I am going to keep looking :(

Can you get woven roving?
 
Back
Top