-
Welcome to the Checkmate Community Forums forums.
» Interact with over 10,000 Checkmate Fanatics from around the world!
You are currently viewing our boards as a guest which gives you limited access to view most discussions, articles and access to our other FREE features.
By joining our free community you will be able to:
» Post topics and messages
» Post and view photos
» Communicate privately with other members
» Access our extensive gallery of old Checkmate brochures located in our Media Gallery
» Browse the various pictures in our Checkmate photo gallery
Registration is fast, simple and absolutely free so please, join our community today!
If you have any problems with the registration process or your account login, please contact support by clicking here or by using the"contact us" link at the bottom of the page.
You are using an out of date browser. It may not display this or other websites correctly.
You should upgrade or use an alternative browser.
You should upgrade or use an alternative browser.
Project "Wasted Income"
- Thread starter yellowfiero88
- Start date
- Status
- Not open for further replies.
yellowfiero88
Well-known member
That is such an understatement right now. Details later.......
yellowfiero88
Well-known member
 That is such an understatement right now. Details later.......
Hey JW, did Andy tell you what had happened or was this in regards to the bracket??
On a even more sad note, I am getting my bling in now that I ordered last week. Yesterday this came in
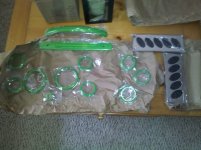
Don't think it will help the cause now

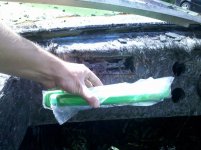
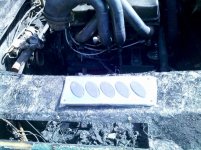
Cup holders will be here later this week also
Guess I will get on the phone to Eddie marine and see if they will let me ship it back to them.....
RNGRDVE
Well-known member
yellowfiero88;534865 Don't think it will help the cause now :brickwall: [ATTACH=full said:65636[/ATTACH]
....
That gives a whole new meaning to O-**** handle.
cturboaddict
Active member
That sucks.....
airagitated
New member
OH man! What the he*l happend?
yellowfiero88
Well-known member
http://checkmate-boats.com/forums/showthread.php?t=21881OH man! What the he*l happend?
Its all in there, the short.....damn it, no pun intended........electrical fire. The only original part of the wiring from the boat is where it started.
airagitated
New member
Yeah, I just saw that other post. So sorry about your boat. I spent the whole fist half of the day reading about this build. Then I got to the last page and all that came to mind was WTF! Again sorry for your loss.
yellowfiero88
Well-known member
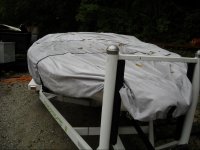
Started the dis assembly over the weekend. I am recycling all the wire, aluminum, and steel on the boat. I did get pretty far and there is some good parts there that were only smoke damaged. The motor looks great minus the valve covers and the powder on the headers. A rag across the block reveals the pretty green paint under the black smoke! I will still send it to the machine shop before it gets sold! Headers are going to my powdercoat guy tomorrow for a fresh coating !
!
I have had lots of calls on the parts but its amazing how stupid people are on their offers. I am offering parts for 1/3 to 1/2 of replacement cost but they still want to offer 1/3 - 2/3 of that asking price.
Should get the bobcat and pull the motor this week then its a trip to the dump of the final resting place of the majority of the boat.
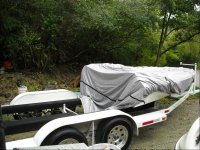
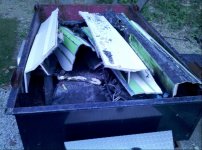
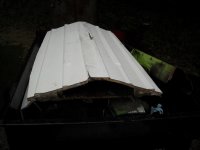
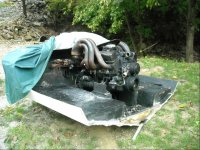
 !
! I have had lots of calls on the parts but its amazing how stupid people are on their offers. I am offering parts for 1/3 to 1/2 of replacement cost but they still want to offer 1/3 - 2/3 of that asking price.
Should get the bobcat and pull the motor this week then its a trip to the dump of the final resting place of the majority of the boat.


Well I talked to the salesman and the dealer about the paint and they both said it was anti fouling but its not! good thing they are the ones selling the product. As a matter of fact the salesman knew little about the product and was less than helpfull with his input.
It is STAIN resistant, has dupont teflon, and is recomended for underwater applications! Anyway I was very nervous about how I was reading about preping the surface. "Sand with 80 grit, wipe down, then apply". LOL, 80 GRIT?!! I know what paint jobs look like with 80 grit scratches in them. But, I did what the MSDS told me to do and it came out very nice. The first coat I misted on as I do with all my paints so that it would seal against fish eyes and provide a tack coat for the rest of the coats. After that dried, I started hammering it on. I sprayed a total of 2 sprayable gallons on it (1 gallon of paint, 1 gallon of hardner) I am happy with how it turned out. It is way more than what I needed but I wanted a thick coating that will last for years to come. Directions state to buff 12-24 hours after final coat is applied. I waited about 20 hours to start and i think it would be easier to sand and buff a rock! this stuff is great! I got her shined all up and ready for some color to be added to the mix. The rest should be fun as I am going to use base coat/clear coat and it might just be a somewhat loud paint job!


Brain that looks like it came out really good, I'm so sorry to read what happened to the boat a tragic end I always worry about something like that happening with the boat in the garage and im sleeping above it.
I was wondering if you could give me a little more insight into what you did after putting the epoxy on the bottom. I had my 283 done this winter, it was too much of a project for me to take on and I am brand new to the restoreing so I am learning as I go. The boat had black bottom paint that they sanded off and then the gel under was stained yellow so they used the interlux underwater epoxy. I am wondering what needs to be done if I can give it a smoother/glossy finish by wet sanding and buffing. Any input would help, Thank you and congrads on your new purchase but nothing can replace the hours put in to 'wasted income'
yellowfiero88
Well-known member
What interlux paint did they use? Was it the performance VC epoxy? I can say from experience that yes it can be sanded and buffed. It will also go from a flat to a semi-gloss paint and will clean easier when smoothed out. I will PM you my number, give me a call and I can go over the paint buffing 

checkmate stacey
New member
Engine and Exhaust
Curious- what size engine did it come with? I've got a 260 in my entertainer but since its a 350ci base I figuired I could build it rather easily.
As far as the exhaust, could you post a pic of how that look inside? Mine goes out the Alpha 1 outdrive but I was thinking to core the transom and put it out stern- figuired I'd gain a couple of HP.
Sorry to hear about your problems but the boat definitely has potential- love the graphics.
yellowfiero88
Well-known member
It came with the 260hp 350ci motor. Good base for power. As far as a picture, what do you need? This boat is long burnt up but I do have another enchanter I might be able to help you with exhaust layout
checkmate stacey
New member
I would think a pic of the enchanter would be a good example- yes please- I'm just trying to firguire out what the level of effort is plus the cost- my kids don't leave me much time to work on it.
BTW I have been completely unsuccessful in trying to firguire out how to post pics- seems your a pro at it- could you give me a how to pls?
Much thanks for the help
BTW I have been completely unsuccessful in trying to firguire out how to post pics- seems your a pro at it- could you give me a how to pls?
Much thanks for the help
- Status
- Not open for further replies.

