-
Welcome to the Checkmate Community Forums forums.
» Interact with over 10,000 Checkmate Fanatics from around the world!
You are currently viewing our boards as a guest which gives you limited access to view most discussions, articles and access to our other FREE features.
By joining our free community you will be able to:
» Post topics and messages
» Post and view photos
» Communicate privately with other members
» Access our extensive gallery of old Checkmate brochures located in our Media Gallery
» Browse the various pictures in our Checkmate photo gallery
Registration is fast, simple and absolutely free so please, join our community today!
If you have any problems with the registration process or your account login, please contact support by clicking here or by using the"contact us" link at the bottom of the page.
You are using an out of date browser. It may not display this or other websites correctly.
You should upgrade or use an alternative browser.
You should upgrade or use an alternative browser.
Enticer Overhaul
- Thread starter teamhart2
- Start date
teamhart2
Well-known member
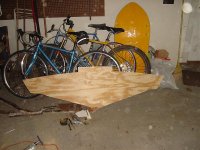
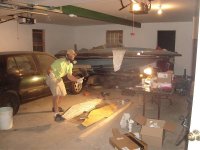
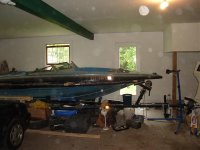
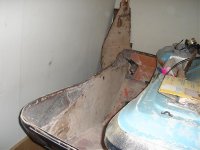
got some new pics today while cleaning out the transom skin, as you can see the deck has been pulled and shifted a few feet forward like Gus did, and then the transom was pulled out. Gonna pick up transom and knee materials tommorrow and hope to have the cut out and assembled transom mostly ready to go in by the end of the weekend. Gonna go with a double layer of 3/4 with a third 1/2 inch plywood trimmed to fit the splashwell instead of the weird two 3/4 and then a modified 1/4 or whatever came from the factory. I figure thatll hold. The transom skin is pretty uneven, so I figure Ill prolly have to use at least a double layer of 1.5 matt to get a good stong bond. any thoughts?


Looking good.
I had the same wave when I installed mine.
Make sure you rough up the inside. I used 80 grit.
When you test fit your first piece of transom wood you will be able to see how everything will go together. I think I used 2 layers of glass then installed the 1st piece.
You have to make sure the 1st piece of transom in installed tight against the outer skin. I have seen people use clamps to hold it.
I used screws. I pre-drilled holes in the outer skin and then installed the transom and screwed it to the outer skin. Once the 1st part had set I repeated the process on the 2nd piece. I screwed this to the first piece. Same with the 3rd. The screws that where installed through the skin where removed and filled. The rest are still in there and glassed over.
Old Hickory
Active member
175checkmate,
Are you saying to put a couple layers of glass next to the skin; then clamp the rebuilt transom to the wet glass?
I was going to sand all the old pink adhesive off and then use 3M 5200 to bond the new transom to the outer skin; then glass over it. I assumed that was the way to do it. I'm glad I read this because I just cut my coosa(dbl layer 3/4" B26 and a layer of 1/2" B20) and will be bonding the layers tomorrow and probably glue it in this weekend and glass over. Thanks
Hick
teamhart2
Well-known member
Yea Oldhick, from what Ive seen on here it looks like most people are throwing a layer of mat in to bond the transom to the skin, despite that it looks like at the factory they use that bondo stuff to bond it to the skin. I think im going to fill any lowish spots with some thinned out fiberglass putty and while its still setting up so it can squish around put a layer of mat on the skin and another layer of mat on the transom, then clamp the crap out of them, I hope this will give me a good bond and avoid any voids between the two. Also Im gonna put a good amount of fiberglass putty around the edges and press the new transom into it to get good contact around all the edges (there were some voids under the transom and behind the factory bondo when I pulled it apart) plus hopefully itll squish out and I can go around with a spoon and get a nice curved fairing to help out with the fiberglassing afterwards.
teamhart2
Well-known member
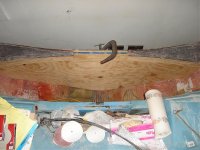
another good day today for work, seeing some decent progress despite setbacks. got the old pad plywood cleaned out, and a new pad piece cut and glued in place. I decided to go with the polyurethane PL premium adhesive for the pad, an idea I stole from OldHick, in addition to it being stong, Im not sure I would have gotten good bonding with fiberglass without putting a ton of putty and mat in there because of all the uneven spots on the glass that was there. Also cleaned up the transom a bit and filled in the spot where I cut the second two pieces different than the first.
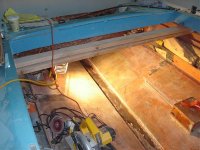
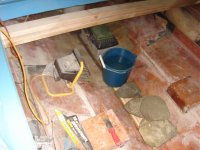
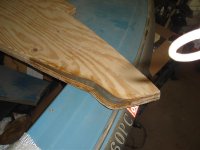
ready by July????? maybe if I keep this pace up


ready by July????? maybe if I keep this pace up

175checkmate,
Are you saying to put a couple layers of glass next to the skin; then clamp the rebuilt transom to the wet glass?
Yep, thats what I was saying. I filled in all the low spots and ground off the high spots on the skin. Then wetted out 2 layers of glass then clamped the wood to the skin. I used a bit less hardener in the resin to increase the working time. Once it was set in place, ( I screwed mine instead of using clamps) I was able to remove allot of the excess that squeezed out.
Once the first piece of transom was in place and set, I put a layer of glass on the new wood and ran it up the side of the boat about 10". I then sanded it flat, then repeated the process for the remaining 2 pieces. Once the finial piece of the transom was in place i covered it with 3 layers of glass, each running up the side of the hull 12". Overkill, oh yea.
teamhart2
Well-known member
so I put the transom in today.... bout as close as you can come to disaster I think haha. Had everything ready to go, 2x4s with screws ready to screw into the transom through existing holes and everything..... threw three layers of mat on the transom and then filleted in some structural putty around the edges, and then tossed it in. Two problems: 1 my screws were too long and werent pulling the 2x4 tight against the outer skin and 2 not enough putty around the sides. So I ditched the screws and luckily have the boat against a wall in the back and basically pressed the transom in with boards and clamps and then kept the skin as tight as i could with braces against the back wall.
Hoping I got it all tight, had a lot of resin squeezing out so I think I got it pretty good, wont know till tommorrow though. dunno what Ill do if theres gaps. The putty issue isnt terrible, can just throw some in there and fill the gaps around the sides like they had originally, but better.
Hoping I got it all tight, had a lot of resin squeezing out so I think I got it pretty good, wont know till tommorrow though. dunno what Ill do if theres gaps. The putty issue isnt terrible, can just throw some in there and fill the gaps around the sides like they had originally, but better.
Old Hickory
Active member
th2 & 175cm
I'm getting ready to build my version of transom clamps; I'll be getting the materials in the morning and will have them done by this weekend. Just in time to clamp my transom. I'll post pics when I get them done. I was planning on using the PL premium to bed my transom. But you guys are giving me some doubts; makes me nervous since D-Day is coming this weekend.....I'll be bedding and glassing the coosa.
Hick
teamhart2
Well-known member
why are we giving you doubts about the PL Hick? I think the PL is prolly a good way to go with the transom, like I said the only reason I didnt was I already had all the glass ready to go. Plus with the PL you wont have as much of a time constraint to get everything together. I had to go into panic mode when I realized my clamping method wasnt working in order to get it together, but I think youd be a bit more relaxed working with the PL.
Old Hickory
Active member
I get a little wishy washy up to the point of no return it has more to do with the fact I have never worked with glass and composites before. I can say I have read thousands of pages on boat building in general over the last several years trying to prep myself for this moment. But until you actually do it, and are successful, that seed of doubt will be there. I'm going to hold my breath, trowel my PL polurethane on and clamp her tight. see what happens.
Hick
Hick
teamhart2
Well-known member
I hear ya Hick, from what I can tell as long as you are thinking things through and making sure its good, itll be stronger than when it was originally made. The majority of my previous boatbuilding experience was with wood boats so this glass stuff is mostly new to me.
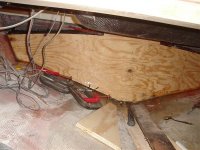
On a positive note, upon close inspection it looks like my panic clamping worked just as good as my initial plan. After covering every inch of the transom pushing with my hammer handle and banging on it I cant find anywhere that doesnt look/sound bonded. Im glad I put on the third layer of mat though, it looks like theres plenty of gap filling there as where the old holes in the transom have been filled to the same level as the outside of the fiberglass skin with the mat. Im feeling a whole lot better than I was last night when I ended up unsure of what the result would be and completely covered in resin.
the new pad glued in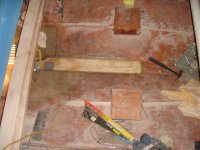
transom before install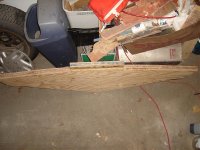
transom glassed in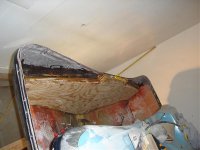
On a positive note, upon close inspection it looks like my panic clamping worked just as good as my initial plan. After covering every inch of the transom pushing with my hammer handle and banging on it I cant find anywhere that doesnt look/sound bonded. Im glad I put on the third layer of mat though, it looks like theres plenty of gap filling there as where the old holes in the transom have been filled to the same level as the outside of the fiberglass skin with the mat. Im feeling a whole lot better than I was last night when I ended up unsure of what the result would be and completely covered in resin.
the new pad glued in

transom before install

transom glassed in

Old Hickory
Active member
th2,
looks great; It's turning out real nice; remind me, how many sheets of 3/4 ply did you use?
check my blog, I've got 2 new entries; you can leave comments on the blog
Hick
looks great;
 It's turning out real nice; remind me, how many sheets of 3/4 ply did you use?
check my blog, I've got 2 new entries; you can leave comments on the blog
Hick
teamhart2
Well-known member
Thanks for the kind words guys, I actually think its coming out pretty good
OH, the transom is two sheets of 3/4 and a sheet of 1/2, not sure if Im gonna have to trim for the splashwell or not. I figured since I wasnt using marine ply I might as well beef it up a bit. Still deciding if I am going to do just knees or knees and a thorp type crosspiece. Plan is to bond 3/4 and 1/2 plywoood for the knees which are gonna be slightly closer to center than where the old knees/inside of the foam boxes were and continue them up about three feet to support the back bench as well. Also the floor is only going back as far as the back seat, all open from there back, just gonna glass on some mounts for the tank and maybe for batts etc.
after dinner went back out and filled all the edges with the structural putty and filleted a nice round edge, looks way prettier now, Ill get some pics up.
Old Hickory
Active member
.......OH, the transom is two sheets of 3/4 and a sheet of 1/2, not sure if Im gonna have to trim for the splashwell or not. I figured since I wasnt using marine ply I might as well beef it up a bit. Still deciding if I am going to do just knees or knees and a thorp type crosspiece. Plan is to bond 3/4 and 1/2 plywoood for the knees........
Thanks; same thickness as mine. Awsome job BTW !
Another question for you...actually two....Are you going to encapsulate your transom before installing the knees and stringers? Or are you going to glue and bond your knees and stringers to the unencapsulated transom, and then encapsulate them all together?
Hick
Last edited:
teamhart2
Well-known member
My current plan is to do two layers of mat and tape around the edges and then a layer of roving the same size as the transom over the whole thing, and then a layer of roving that extends out over the tape. Then Im gonna glue and glass the knees on. No stringer will be coming this far back, as from what I can tell the stringers only function is to hold the floor so thats all the new one is gonna do.
I thought about bonding straight to the transom with the knees, but I figured Im not gonna be encapsulating the knees as much as I am the transom, probably just a single layer of mat and glass, plus working around all those corners to get the transom covered how I want could be a pain. Also the knees will extend up and over the transom to where the hull meets the deck so I figure they can cover over the transom glass.
still got a bit to do eh? haha
teamhart2
Well-known member
Was outta town this weekend, so I didnt get much done, I am getting my list of stuff to put this thing all back together ready and starting to pick stuff up, got a battery holder, the drains for the splashwell and transom and a bilge pump this weekend.
Anyone know an easy way to flange the drain tube without buying one of the tools to do it?
Anyone know an easy way to flange the drain tube without buying one of the tools to do it?

