• Welcome to the Checkmate Community Forums forums.

    You are currently viewing our boards as a guest which gives you limited access to view most discussions, articles and access to our other FREE features.
    By joining our free community you will be able to:

    » Interact with over 10,000 Checkmate Fanatics from around the world!
    » Post topics and messages
    » Post and view photos
    » Communicate privately with other members
    » Access our extensive gallery of old Checkmate brochures located in our Media Gallery
    » Browse the various pictures in our Checkmate photo gallery

    Registration is fast, simple and absolutely free so please, join our community today!

    If you have any problems with the registration process or your account login, please contact support by clicking here or by using the"contact us" link at the bottom of the page.

Enticer Overhaul

Got the new pad glassed in last night, quite a big glass job. Went with a double layer of mat and 9 oz cloth , and then a layer of heavy roving over the top, I hope this will be strong enough, The core I redid was covered with a layer of mat and then two layers of the heavy roving but that seemed like a lot over this whole area, plus itll have more glass over it where the stringer is going later anyways.

Just out of curiosity, would 2 layers of 9 oz cloth be equivalent to one layer of 18 oz cloth? cause thats basically what I did.

pics to come
 
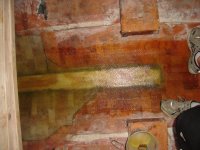
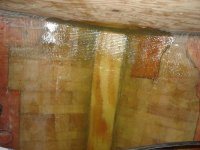
Few pics of the new pad all glassed in

hard to get it all in one shot since the splashwell is in the way, it was kind of a pain to glass that way too, hopscotching back and forth over the back deck.:banana:

front
DSC01489.jpg


and back
DSC01490.jpg
 
transom glassing

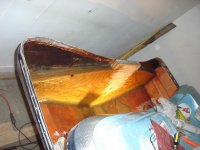
Got started on glassing the transom in last night, got a layer of mat covered by two layers of cloth in around the edges, decided against doing a second layer of mat between the two layers of cloth since there will be a layer of heavy roving over the top of it and it seemed a bit much.
DSC01494.jpg
DSC01495.jpg
 
Nice work there. Are you planning on another layup before the resin cures completely or allow it to cure and then grind away again?

Also, now would be a good time to start dying your resin so you end up with a durable, presentable bildge area without having to paint it later.
 
Im using laminating resin, so no need to worry about the cure up but I have been giving it a quick sand between layups since dirt and dust collects on the sticky surface have some wax additive to throw in for the end.

Im gonna throw on a layer of mat and roving covering over the whole transom to the edges and then a bigger piece of roving to extend out over the tape i did last night---- hopefully tonight.

Dunno if Im gonna color the bilge, Id like to leave it clear to keep an eye on the wood- any reason not too? Ill be the only one looking back there.
 
Personal choice, I suppose. I'm not sure how much your actually going to be able to "keep an eye on". I can't see much of mine with the dual battery trays flanking the fuel tank. I couldn't see the floor or transom in mine when it's all together.
 
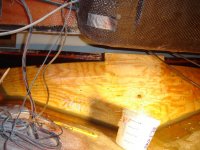
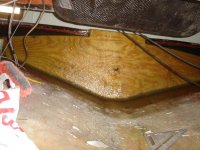
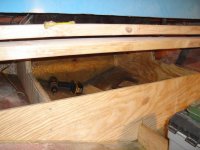
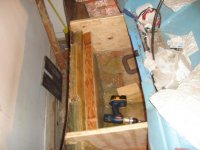
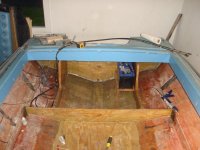
Got the transom finished off with a full layer of mat and then two layers of roving late last week, Fitted and glued the knees and a thorp between them and also got the back for the floor glued in. Cut and glued in the stringer, just going with a single center stringer like from the factory, but its 1 inch ply and using 3/4 for the floor which I also got all cut out yesterday. So gonna spend the next few days glassing it all in. still could use some tips on flaring the draintube when I put it in.
DSC01497.jpg
DSC01503.jpg
DSC01504.jpg
 
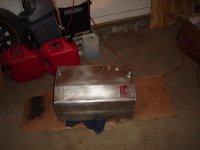
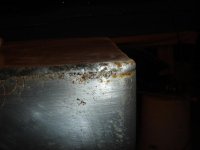
also cleaned out the gas tank, had some debris sittin on the bottom, scrubbed the outside with some steel wool, that bad area cleaned up ok but looks a little pitted so I may either fill it with water and check for slow leaks or take it to a autoshop and see if they can pressure test it to make sure.DSC01505.jpg
DSC01507.jpg
 
I am glad that you are posting all of these pics. I am planning on pulling my floor in Nov. or Dec. to maybe glass in some transom supports and remove the rest of the foam down there. I think the single stringer is all that you'll need. Great job.
 
Hart, you're doing an awesome job!!!!! I just started the glass work last week. I had to patch a crack that I made and sealed the transom wood in resin. Should be starting the layup soon. Thanks for the pics.
 
Thanks guys, Got the knees pretty well glassed in yesterday, and went to throw the deck back on today, ended up having to grind off a bunch of my new beautiful transom just to get it on, and gonna have to do a bunch more to get all the old rivet holes to line up :pissed:

in other news I got some new tires put on the trailer wheels today, and picked up a big ass deep cycle battery to run everything, although Im gonna keep the old batt in the boat for now to make sure I get back if I run the tunes too long.

Also did the full water test on my gas tank and found a pinhole leak, dropped it off at a motorcycle shop today the guy said hell see what he can do which is good.
 
TH2,

Looking real good:thumb:; how much of the bondo did you grind out along the edges? I'm grinding right now and have everything even to the bottom; but still have bondo showing. Should I get it out completely?
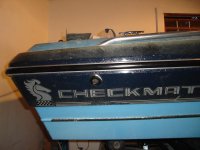
Also, the paint or coating the factory used to cover the inside of the rear of the boat; is it a resin based coating?; did you grind all of that stuff off as well or did you glass over it?

Hick
 
OldHick,
I went around with a disk sander with 60 grit or so and sanded the bondo down pretty good, there was still some flecks of it in the recesses of the roving from the factory, got most it out then just glassed over it. That bondo is supposedly milled glass filler so it should be fine if theres a little left, but I went till I had mostly glass showing.

As far as that black stuff goes, no idea, the way mine was set up almost all of it got torn out with the wood and everywhere it didnt I got rid of it before glassing, most of what was left was where theyd glassed something down so I just slid a chisel under there and yanked that layer of glass off, if you have it on the inner layer of the hull it could be a pain to get off, maybe someone else will know what it is and if you can just glass over it.
 
The transom came out great. I had to take a grinding disc to my new one as well. Getting the deck to fit back on was a lot of fun.
 
Getting Closer!!!

Well had a long past few days in the garage, got the deck on and riveted as well as the rubrail with the new insert I ordered from checkmate, although it is black instead of the blue one I had, think it looks ok. Also put the bilge pump thu hull on, got the stainless steel one which looks pretty snazzy with my checkmate decals I think.
DSC01512.jpg
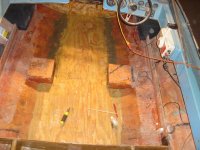
Also got the stringer glassed in and the floor glassed onto it and then glassed the whole thing over, made a little battery platform of sorts and got that in too, and drilled some of my transom holes. Almost forgot to put the transom eyes on before I put the deck on, those suckers would have been just about impossible to do after.
DSC01510.jpg
DSC01508.jpg

Still have to get the gastank back and make some mounting blocks for it, think I can just put supports under the mounting plates or should I have some support for the tank under its belly????, dont know if it was designed to sit on the floor a little or have a gap under it.
 
I was trying to understand how your fuel tank was going to mount myself. Doesn't it mount further back? In between the transom knees? If so then wouldn't your batt. tray be in the way?

I would think that you would want support under the bottem of the tank and not just under the mounting flanges. If it were a tank the form fir to the bottem of the boat you'd prolly be okay.

Have you thought about how any water that might get under the floor is going to be able to drain back past your rear bulkhead? I don't see any drain hole at the keel line. Might not be too late to add one if you haven't conidered it.
 
So I went back and looked at some old pics from before I pulled the tank out, and there was def like a quarter inch gap under it, although Im not sure if when really full the belly sat down on the floor, anyone know more about this? I was planning on just putting in some blocks for the screw tabs and leaving it empty underneath but maybe Ill put a support under it if it needs one.

Should be just enough room next to the batt between the knees for the tank.

Ill throw up some pics of the drainage, both the forward and back bulkhead on each end of the floor have two about 1 inch drainage holes on both sides of the stringer.
 
It floats

Well guys I know I havent gotten everything updated on this thread yet, but the boat is back together and I threw it in the water this weekend. Ran like a champ.

Heres the list of things I gotta post about that I did to finish it up.
Patched the hole on the outside of the pad and put new gelcoat over it (the evercoat gelcoat paste kit was pretty easy to work with).
Got the engine on, mounted it at the next higher hole than I was previously mounted at- raised it about an inch.
Got the interior all put back in and back together
Mounted the amp and temp mounted the speakers - the setup cranks
Got the gas tank platform all built, still waiting on the repair for that, so running off a portable flat 6gallon tank for now.
Got the bilge connected.

Pics of all the above to come.:surf:
 
TH2, The work you have done looks really great.
I was looking at a picture showing your transom, battery mount. Are your knees going to double as your seat mount, or where your rear bench seat will sit on? Are you putting floatation foam back in in the rear?
 
Back
Top