• Welcome to the Checkmate Community Forums forums.

    You are currently viewing our boards as a guest which gives you limited access to view most discussions, articles and access to our other FREE features.
    By joining our free community you will be able to:

    » Interact with over 10,000 Checkmate Fanatics from around the world!
    » Post topics and messages
    » Post and view photos
    » Communicate privately with other members
    » Access our extensive gallery of old Checkmate brochures located in our Media Gallery
    » Browse the various pictures in our Checkmate photo gallery

    Registration is fast, simple and absolutely free so please, join our community today!

    If you have any problems with the registration process or your account login, please contact support by clicking here or by using the"contact us" link at the bottom of the page.

1975 Vmate restoration

Will, when I rebuilt my battery box a few years back I left off the front edge, allowing it to be slid in, rather than having to be lifterd up and over into it. It's such an awkward lift angle, and as the battery tied down to it as well, I really didn't see the point in leaving the front edge. I suppose it could offer some containment if the battery was to actually leak, but I figured if I could tip it to that extend, not having a full battery box was not going to be my biggest problem.
Anyway, something to consider if you haven't glassed it in yet.
 
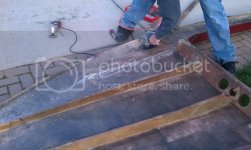
Need to find something other than the grinder to remove the old carpet glue from the hull ...

Go to Harbor Freight web site and look at tool # 67707, the multi function tool. There is a knife blade that is used with that tool. No teeth just a knife edge. I used one on Sims boat to remove the carpet and glue. It worked so well that Sim grabbed it and started using it himself. He loved it.
 
Go to Harbor Freight web site and look at tool # 67707, the multi function tool. There is a knife blade that is used with that tool. No teeth just a knife edge. I used one on Sims boat to remove the carpet and glue. It worked so well that Sim grabbed it and started using it himself. He loved it.

I have that . Works good for cutting but the scraper blade burns right up Ive tried it already lol
 
I used my Harbor Freight varible speed polisher/sander with a sanding disk turning at very low speed. It's very time consuming. If you speed up the rpm's, the glue will heat up and won't sand but rather gum up the disk and spread.
 
Well I got home at a little after 2 am from work and I walk through the garage to come in the house and I seen that the fan was inside the boat . So I looked inside and looks like my dad was here while I was at work . He has the carpet glue all off the driver side of the boat and also looks like he was working on the back of the boat too Since the D/A was Laying behind the boat . He must have gotten bored lol . Im off today and its going on 3 am so I Should probably get some rest . Have to still pick up a few more things for the boat . Than I have to get back here and clean the boat all out and try to start getting ready to glue everything in place and start glassing over everything . I Cant believe we have gotten this far in such little time . Hasnt quite been a month yet and it already going back together ... Its a real good feeling :D
 
Got out today and covered the battery box in resin and cleaned up most of my mess in the garage . Went and picked up some 5200 today and some stainless screws And the drain tubes for the motor well . Ive over done it and my lower back is letting me know it . But I did get some stuff done though .....
 
Planned on being at work till atleast 5 am Since it is a wed and our busy night of the week . But I went to go get a hilo to start loading But they were all being used so I got the option to leave and I took it and was out at 10:15 pm . So that means im working on the mate tonight and ill be up early in the morning to do some more . I HAVE TOMORROW OFF !!! :D .

And I can see my dad was here working on filling in the holes from the speedo water pick up . It was in 2 different places . It was moved when the trim tabs were installed . He got them all glassed back up ....

IMAG0148.jpg
 
Had another very busy day with the boat today . Dad was out working on the transom still and I glued the stringer in place with PL premuim . Than I flipped the deck over and started looking at the broken board underneath . So I cut that out and dad ground down the old resin . Than I decided to cut the whole dash board out . The steering helm hole was all chewed up . Who ever owned this years ago hacked it all up . And I didnt like the way that it looked .

Stringer being glued in Place . ( See Brian those John deer Weights are muli-purpose) lol .
IMAG0152.jpg

Old lighter had to go

IMAG0155.jpg
 
Side piece under the deck where it was cut out
IMAG0154.jpg

New side piece made
IMAG0157.jpg

The dash board removed . It was actually Cedar
IMAG0156.jpg
 
My new Stainless Trim pump bracket showed up today too . Now I have to make something and glass it to the hull for the pump to sit in ...

IMAG0151.jpg
 
( See Brian those John deer Weights are muli-purpose) lol .
LOL, I know they would look good as counter weight on my 318. Then again, I got a 5' scraper blade that works great. Downside is it makes the tractor almost 12' long with blower and blade. My caddy is NOT sitting outside especially in the winter :thumb:
 
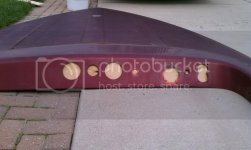
Well here is what was done today before I head to work here in a few . Made the new dash board and glassed in the steering helm hole . Making alot of progress . Going to do more in the morning and than on sunday when I have the day off again ....

New dash board and side panel
IMAG0158.jpg

Set in place to see how it fit
IMAG0159.jpg

Clamped in a piece of wood to fill in with glass
IMAG0160.jpg

Got some grinding to do tomorrow and a little more patch work but its started anyhow
IMAG0161.jpg

Glassed in from the back side turned out really good and this was alot easier than I was thinking
IMAG0162.jpg
 
Another productive morning . Finished repairing the hole in the dash for the helm . Now off to work I go :(

IMAG0163.jpg
 
Looks GREAT Will!!!!! you guys are hauling ass on it. Great to have your dad help. Thats very cool also. Keep up the great work! I check in from time to time
 
Looks GREAT Will!!!!! you guys are hauling ass on it. Great to have your dad help. Thats very cool also. Keep up the great work! I check in from time to time

Its nice cuz he works on it in the evening while im working lol . Keeps him busy....
 
Spent all day working on the top half of the boat . Glassed up all the rivet holes from the under side . Some one at one time drilled all kinds of holes in it and added more rivets . Looks like the rub rail had came loose and that was the way they fixed it . Got my side brace all glassed in today too . Still need to do alittle more glassing on the under side . Than its time to get back to the inside of the boat ....
 
Got all of the rivet holes in the deck filled today . Than I started on the hull doing the samething but it got late and I had to quit . But 3/4 of the hull is done on the inside anyhow .... Also Glassed the transom cap . It had some stress cracks in it so I ground the gel down and built it all back up ...

Deck all fixed up
IMAG0166.jpg

Transom cap built up
IMAG0165.jpg

Glassed the inside of the hull
IMAG0164.jpg
 
lovin' the deck on jackstands :thumb:

have you poured the seacast yet? i'd like to see pics of that process

LOL The jack stands work great . Havent poured the seacast just yet . My dad still has something he is going to do to it first . Im really not sure what since ive been busy working on other parts of the boat .
 
Back
Top