I might have a set of pull off vortec heads if you are interested! They came off of a 40 hour 1 year old freeze broke motor. I think the intake got reused on the reman motor but the heads are just taking up space. Ill have to check and make sure they are still good for you tho!
-
Welcome to the Checkmate Community Forums forums.
» Interact with over 10,000 Checkmate Fanatics from around the world!
You are currently viewing our boards as a guest which gives you limited access to view most discussions, articles and access to our other FREE features.
By joining our free community you will be able to:
» Post topics and messages
» Post and view photos
» Communicate privately with other members
» Access our extensive gallery of old Checkmate brochures located in our Media Gallery
» Browse the various pictures in our Checkmate photo gallery
Registration is fast, simple and absolutely free so please, join our community today!
If you have any problems with the registration process or your account login, please contact support by clicking here or by using the"contact us" link at the bottom of the page.
You are using an out of date browser. It may not display this or other websites correctly.
You should upgrade or use an alternative browser.
You should upgrade or use an alternative browser.
1988 Vision redo
- Thread starter Kurtster
- Start date
Kurtster
Well-known member
I might have a set of pull off vortec heads if you are interested! They came off of a 40 hour 1 year old freeze broke motor. I think the intake got reused on the reman motor but the heads are just taking up space. Ill have to check and make sure they are still good for you tho!
Sure, take a look at them and see what you think ---- we may have a deal in the making

What degree of "freeze" did the mota have ---- did it pop a f-plug or did it crack the block down in the lower half or did it crack in the higher region?
Did those heads by chance get magnifluxed?
It was a pretty good freeze. Blew the side of the block out and blew out the inside water jacket into the can valley. The heads have not been touched other than pulling them off of the motor and inspecting them visually. However I will not sell you junk. We will work something out to make sure they are good before any money is spent on them! 
Kurtster
Well-known member
It was a pretty good freeze. Blew the side of the block out and blew out the inside water jacket into the can valley. The heads have not been touched other than pulling them off of the motor and inspecting them visually. However I will not sell you junk. We will work something out to make sure they are good before any money is spent on them!
Awesome ---- PM me and let me know what you find
Kurtster
Well-known member
Been off the grid for a while as I was dealing with some personal issues and also doing some traveling.
Now that I'm back, the continued work forward on the Vision will be slow and sporatic as I am in the middle of packing up my life and moving south.
While I was away I misplaced a sim card with a bunch of photos of removing my engine / the transom assembly / the outdrive / the trim pump assy / the steering assy / etc...
So until I can find those photos, I'll pick it up from this point.
Obviously my Vision now has a big hole in the backend, -- I have such a big hole......wait, what !!!!!
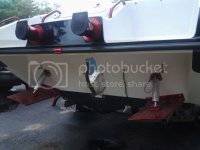
While I wait for the delivery of my new complete transom assy from Merc I'm taking this opportunity to redo the outdrive {again}.
Also will be a great time to do a nice wet sand and buff to the stern.
I am very very pleased to find absolutely no moisture damage at all in the stern once I finished removing the transom assy {and a little surprised}
Now that I'm back, the continued work forward on the Vision will be slow and sporatic as I am in the middle of packing up my life and moving south.
While I was away I misplaced a sim card with a bunch of photos of removing my engine / the transom assembly / the outdrive / the trim pump assy / the steering assy / etc...
So until I can find those photos, I'll pick it up from this point.
Obviously my Vision now has a big hole in the backend, -- I have such a big hole......wait, what !!!!!

While I wait for the delivery of my new complete transom assy from Merc I'm taking this opportunity to redo the outdrive {again}.
Also will be a great time to do a nice wet sand and buff to the stern.
I am very very pleased to find absolutely no moisture damage at all in the stern once I finished removing the transom assy {and a little surprised}
Kurtster
Well-known member
Started the cleaning and grinding and sanding and filling outside as this is a pretty dirty and dusty process.
At this point I have already grinded down to bare metal the areas where marine tek filler now resides.
Keep in mind this outdrive was completely rebuilt last year -- everything internal was replaced, so really only the outer case is original.
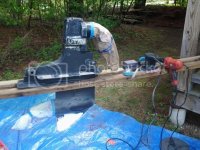
http://s1062.photobucket.com/user/kurster/media/outdrive2014-2.jpg.html
The skeg was especially pitted and in need of smoothing.
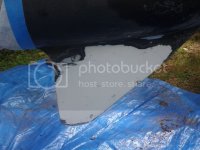
At this point I have already grinded down to bare metal the areas where marine tek filler now resides.
Keep in mind this outdrive was completely rebuilt last year -- everything internal was replaced, so really only the outer case is original.

http://s1062.photobucket.com/user/kurster/media/outdrive2014-2.jpg.html
The skeg was especially pitted and in need of smoothing.

Kurtster
Well-known member
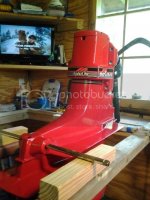
Well, after a couple of days of fun and enjoyment {yup I really love to do this stuff}.....this is what I ended up with.
She looks brand new from the do over.
Yes, this is a "slut red" outdrive and will hopefully look awesome when I get it back on. {boat porn at it's best}
She'll also look great when I get my 22p prop {my favorite prop} back from the shop being labbed.
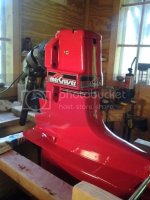
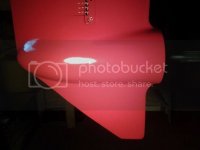
So the next step will be wet sand an buff stern / do a real intense cleaning and some repaint in the engine compartment.
I have a nice spare 350 mag from my Scorpion that is clean and rock solid that I will be using as a spare mota while I do a pan up rebuild on the Visions original mag.
She looks brand new from the do over.
Yes, this is a "slut red" outdrive and will hopefully look awesome when I get it back on. {boat porn at it's best}
She'll also look great when I get my 22p prop {my favorite prop} back from the shop being labbed.


So the next step will be wet sand an buff stern / do a real intense cleaning and some repaint in the engine compartment.
I have a nice spare 350 mag from my Scorpion that is clean and rock solid that I will be using as a spare mota while I do a pan up rebuild on the Visions original mag.
oddly excitered
Member
Welcome back!!
Kurtster
Well-known member
Didn't really plan on making a big project out of cleaning up my engine compartment while I wait for my new transom assembly to be delivered.
Ya right......
Any way, after I examined the situation long enough I realized it was ridiculous not to treat the engine well with as much anal detail as given the rest of this boat.
So this is what I'm starting with, I had already cut and pulled the carpet up,---- by the way, who the hell thought is was a good idea to put carpet in an engine well ---- {I digress..... }
}
This pic is not pretty and somewhat embarrassing.
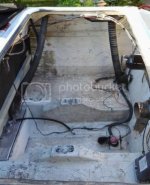
I used a bilge coat paint from West Marine, -- a little pricey but I've used it before and it holds up extremely well when apply correctly.
After filling a bunch of screw holes in the floor and other areas {screws in the floor, another brilliant idea } -- and then after lots of sanding and a good alcohol bath this is what I have after the first thin primer coat.
I'll apply two more coats but before that I'll be doing a bunch of re-routing of wires and hoses ---- wires and hoses just never seem to be neat and organized but I'll take care of that.
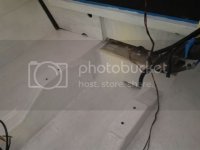
I'll be replacing every piece of hardware in this compartment including every screw and hose clamp.
The battery bracket was especially tough to deal with in that I want to clean it and recoat it.......ahhhh that reminds me, I have a 1/4 box of slut red powder sittin in the shop
The original paint coating was extremely difficult to strip off, but with multiple applications and a little persuasion from my trusty old field knife it eventually came off.
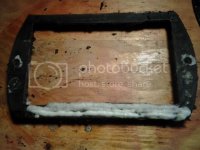
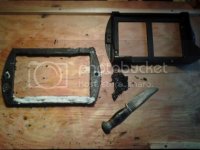
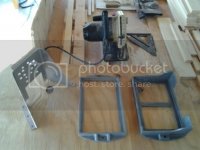
Here are the pieces I'll be baking in the oven for the slut red powder coating.....had to purchase a new drive trim pump bracket as the old one was too rough to bother cleaning.
Well, on my way to the marine store for a bunch of assorted small parts including screws / washers / bilge hose and clamps and fasteners / wire tubes and fasteners / couple of rolls of gauge and color matched wires / etc.....
Ya right......

Any way, after I examined the situation long enough I realized it was ridiculous not to treat the engine well with as much anal detail as given the rest of this boat.
So this is what I'm starting with, I had already cut and pulled the carpet up,---- by the way, who the hell thought is was a good idea to put carpet in an engine well ---- {I digress.....
 }
}This pic is not pretty and somewhat embarrassing.

I used a bilge coat paint from West Marine, -- a little pricey but I've used it before and it holds up extremely well when apply correctly.
After filling a bunch of screw holes in the floor and other areas {screws in the floor, another brilliant idea
 } -- and then after lots of sanding and a good alcohol bath this is what I have after the first thin primer coat.
I'll apply two more coats but before that I'll be doing a bunch of re-routing of wires and hoses ---- wires and hoses just never seem to be neat and organized but I'll take care of that.

I'll be replacing every piece of hardware in this compartment including every screw and hose clamp.
The battery bracket was especially tough to deal with in that I want to clean it and recoat it.......ahhhh that reminds me, I have a 1/4 box of slut red powder sittin in the shop

The original paint coating was extremely difficult to strip off, but with multiple applications and a little persuasion from my trusty old field knife it eventually came off.


Here are the pieces I'll be baking in the oven for the slut red powder coating.....had to purchase a new drive trim pump bracket as the old one was too rough to bother cleaning.

Well, on my way to the marine store for a bunch of assorted small parts including screws / washers / bilge hose and clamps and fasteners / wire tubes and fasteners / couple of rolls of gauge and color matched wires / etc.....
DropTop5.0
Well-known member
Kurt, I'm going to need to see this boat in person one day. Let me know when you make to Carolina and lets run our boats for a bit. Awesome!!!


Kurtster
Well-known member
Kurt, I'm going to need to see this boat in person one day. Let me know when you make to Carolina and lets run our boats for a bit. Awesome!!!
Thanks Chris, I'll definitely take you up on that, I can't wait to get down south and start trailering around to different sweet water locations.
Should be an awesome time having a Pulsare and a Vision running side by side.
By the way Chris, how's your new jack plate working out?
Kurtster
Well-known member
Yesterday I did a long arduous inspection of the wiring quality throughout the engine compartment.....
I must say the original factory wiring from 24 years ago is in excellent condition {although a little dressing up and neatening up is in order}.
However, there are a few areas of wiring not original from factory that need repair or replacing,--mostly poor butt connector crimping and even worse, twist connections with electrical tape.
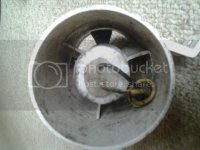
One wire problem I found of great concern to me was the wiring inside the vapor blower housing, it's a little hard to see in the pic but the white wire has corrosion on the sleeve exposing the bare wire --- I am ocd paranoid of poor wire connections in engine compartments --- there's not many places worse than the blower to have a loose sparking power wire.
So to the trash this blower goes.
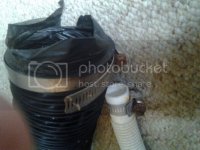
Other things getting addressed are the simple hardwares that need replacing such as these "so called" ss hose clamps --- ss {stainless steel} products are NOT all created equal --- stainless steel can come in a few different quality standards, ie....good / better / best, if you can get the grade known as 316 grade ss on whatever part your purchasing then your getting the best quality {but very expensive}
These are ss hose clamps but obviously have rust/corrosion on the screw heads ---- to the trash they go.
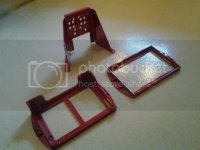
It was really too hot to sit inside the engine compartment for too long yesterday, so I threw my battery brackets and trim pump bracket in the oven @ 600 deg for a couple of hours while I hopped on the Harley and went for a nice cooling ride through the country side {was awesome}
When I got back I had some slut red parts waiting for me to cool down slowly.
I must say the original factory wiring from 24 years ago is in excellent condition {although a little dressing up and neatening up is in order}.
However, there are a few areas of wiring not original from factory that need repair or replacing,--mostly poor butt connector crimping and even worse, twist connections with electrical tape.

One wire problem I found of great concern to me was the wiring inside the vapor blower housing, it's a little hard to see in the pic but the white wire has corrosion on the sleeve exposing the bare wire --- I am ocd paranoid of poor wire connections in engine compartments --- there's not many places worse than the blower to have a loose sparking power wire.
So to the trash this blower goes.

Other things getting addressed are the simple hardwares that need replacing such as these "so called" ss hose clamps --- ss {stainless steel} products are NOT all created equal --- stainless steel can come in a few different quality standards, ie....good / better / best, if you can get the grade known as 316 grade ss on whatever part your purchasing then your getting the best quality {but very expensive}
These are ss hose clamps but obviously have rust/corrosion on the screw heads ---- to the trash they go.

It was really too hot to sit inside the engine compartment for too long yesterday, so I threw my battery brackets and trim pump bracket in the oven @ 600 deg for a couple of hours while I hopped on the Harley and went for a nice cooling ride through the country side {was awesome}
When I got back I had some slut red parts waiting for me to cool down slowly.

Gimme Fuel
Well-known member
looks awesome! I should get myself one of those powder coat kits one of these days.
DropTop5.0
Well-known member
Thanks Chris, I'll definitely take you up on that, I can't wait to get down south and start trailering around to different sweet water locations.
Should be an awesome time having a Pulsare and a Vision running side by side.
By the way Chris, how's your new jack plate working out?
I'm very happy with the the Jackplate going back to 10 inches but I'm still set too low. I was about 7" below the pad, now I'm at 5" and I need to go up another 1" or 2" and check water pressure. Sounds like I should be good at around 3" below the pad.
The boat planes quicker with the new plate but I did notice I had a little more cavitation with sharp turns. Being relatively new to boating everything is trial and error. I bought two different props over the winter and borrowed one from my brother so I have four props to play with when I get time. Maybe at the Chesapeake bash I'll do some experimenting.
Kurtster
Well-known member
I have four props to play with when I get time. Maybe at the Chesapeake bash I'll do some experimenting.
Some of the best boating fun can come during prop testing ---- a great excuse for an afternoon of white knuckle runs
atc250r
Well-known member
At the risk of derailing this thread if you were closer I'd tell you come by and we could raise the motor a couple of holes here in no time Chris. You can try plugging the top 3 or 4 holes on the sides of the lower with stainless allen head pipe plugs. That's what's done on mine and you can jack it up a bit more.
Parts look great Kurt!
Parts look great Kurt!

