• Welcome to the Checkmate Community Forums forums.

    You are currently viewing our boards as a guest which gives you limited access to view most discussions, articles and access to our other FREE features.
    By joining our free community you will be able to:

    » Interact with over 10,000 Checkmate Fanatics from around the world!
    » Post topics and messages
    » Post and view photos
    » Communicate privately with other members
    » Access our extensive gallery of old Checkmate brochures located in our Media Gallery
    » Browse the various pictures in our Checkmate photo gallery

    Registration is fast, simple and absolutely free so please, join our community today!

    If you have any problems with the registration process or your account login, please contact support by clicking here or by using the"contact us" link at the bottom of the page.

'79 Eluder with water poisoning - finally started restoration

groundloop

Active member
Bought this '79 Eluder (which was listed for sale here) a few weeks ago and was finally able to tear into it this past weekend. The seller said the only thing wrong with her was a soft spot in the deck, up in the bow. Well, I had a pretty good idea that there was more to the story than that, and when I inspected her my suspicions were confirmed. The foam under the deck was so soggy that water was standing in the in-floor drink holders, the battery box was mush, and there was standing water under the deck in the bow. I went ahead with the purchase anyway because cosmetically she's in pretty good shape, a few scrapes and scratches but nothing too bad.

aEluderForSale2-1.png


AEluderForSale1.png


Just looking at this speedometer is motivation to keep working on this boat. One of these days that speedo needle is going to come to life......

AIM000097.png


One of the things the seller told me was that the bilge pump worked.... I bet it didn't do very well suspended in mid-air. Right now it's plumbed up to empty into the splashwell, don't know if I like that or not - anybody have any opinions on this?

Also in this photo you can see one of the jack-plate mounting bolts doesn't have any washer or backing plate - I found the backing plate laying in the bilge.

AIM000084.png


The bilge drain was loose and pushed part way in for some reason.

AIM000085.png


I poked at the foam boxes (I don't know if that's the proper name, but that's all I've ever heard them called) with a screwdriver, pure mush. I was able to dig wet wood out with my fingers, it was like a wood pulp milk shake. I'm pretty sure the structure of these boxes play a part in transferring load from the transom, as the fore-aft face is 3/4" thick.

AIM000107.png


It appeared that there had been some unfused wires attached directly to the battery, not sure what they went to. A few of them appear to have gotten somewhat warm at one time or another.

AIM000099.png


The "soft spot" in the bow is shown here after I took out the dog-house and the carpet. All the wood was gone, the only thing left was the layer of fiberglass.

AIM000118.png


Here's the bow after the deck was removed. So far I'm not seeing any significant rot in the balsa core (even where the screws which were used to mount a hot-foot throttle went all the way through the core and pierced the hull). The stringer was pure mush though.

AIM000128.png


Shown here is foam under the main deck before I removed it. It was so soggy that it spewed water when I stepped on it.

AIM000134.png


And here's where I left off last night. About half the foam is out and I'm estimating that what I've taken out so far weighs over 150 pounds. Between wet foam and soggy wood I'll bet this boat was 400 pounds overweight. The foam popped right out using that skinny shovel.

AIM000135.png


So far it appears that the transom is OK. Rapping on it from the outside produces a solid sound all over, and I drilled a few small holes in it from inside and the wood seemed solid. HOWEVER, considering how wet every other piece of wood in this boat was I'm still skeptical. Once the foam boxes are out of the way I'm going to see if I can take a few samples with a hole saw.
 
Last edited:
Wow. Best of luck to ya on the project. Looks like you're moving right along. Sucks to see a mate that's full of water like that.
As for the bilge pump emptying into the splashwell- I've never worried about mine. As long as the hoses don't leak and you don't have cracks in the splashwell, it's perfectly fine.
 
Well, at least for me, this boat was a good choice because the cosmetics and upholstry were pretty decent. I wouldn't want to attempt any major gelcoat repair or a paint job. Likewise, I've got zero experience doing upholstry, and try to avoid paying someone else to work on my toys. Now the fiberglass I can do, I've got tons of experience with that.
 
Last night I finished tearing out the foam boxes on both sides of the transom. The wood on the starboard box was total mush, and on the port side wasn't quite as bad (but still plenty of nasty rotted material). Some of the foam in the boxes was wet, but not as bad as under the deck. Here's all the foam from just one side.

AIM000136.png


For the longest time I couldn't figure out how so much water got into the foam boxes, but I think I found something tonight (and it may be something others need to keep an eye on) - the seal on the uderside of the rub rail is torn up in that general area. My theory is that water spray seeped in under the rub rail and worked it's way under the foam and finally got soaked up by the wood. Here's an attempt at a photo of the underside of the rub rail.

AIM000146.png


I also came across something in the box area which I wish someone could explain to me. In between the foam and the side of the hull was a thin sheet of high density foam (looks like Clark foam). It was glassed in along the top and bottom, but no glass anywhere else. I'm sure it's there for a reason, but my little brain can't figure it out. This foam sheet was totally soaked with water.

AIM000137.png


My enthusiasm just took a hit tonight. Several days ago I drilled some 1/4" holes into the transom and at the time it seemed like the wood was ok (but I still wasn't totally convinced - especially considering how wet every other peice of wood was in this boat). Tonight I drilled out some 1" holes with a spade bit to get a better look (and also collected the shavings in zip-lock bags so I can determine moisture content in our lab at work). I found black wood in one of the holes, which I bet isn't good even though it all felt solid enough. I was really hoping not to have to do transom surgery on this boat, especially since I just finished replacing the transom in my little fish-n-ski 2 weeks ago. But, if the transom is wet it'll be far easier to replace it now than after the boat's all back together. Here's a photo of the test holes I bored (NOT all the way through).

AIM000141.png


And here's a close up of the one that's questionable.

AIM000138.png
 
Today at work I measured the moisture content of the samples taken from the Eluder's transom last night - NOT GOOD. Of the total weight of those samples about 48% was water. (In other words 48% moisture content on a wet basis).

I found out that wood working people normally express moisture content in terms of % of dry wood weight (and I think that's how the pocket moisture meters read also). Doing the calculations on my results yielded a moisture content on a dry basis of around 95% (in other words the amount of water in the transom weighs nearly as much as the wood). That's WET. That's soggy wet - I'm sure that some serious rot can't be far behind, from what I could find that number should only be around 15% or so.

So, I'm facing reality and realizing there's really no way around that transom coming out. What's a bit scary is that when I drilled small holes in the transom and poked around everything seemed solid. Anyway, I need to get my drill charged up 'cause I'll be drilling out about a gazillion rivets this weekend.
 
this is getting. good. nice pics good writing. looking foward to more if this. keep up the good work. it will be worth it when shes floating again. how fast did it go before? i wonder if it will be quicker with all the weight out of her?
 
Previous owner claimed 58-ish as I recall with the Evinrude 150. You'd think it should be at least a little faster after losing a few hundred pounds.
 
Today at work I measured the moisture content of the samples taken from the Eluder's transom last night - NOT GOOD. Of the total weight of those samples about 48% was water. (In other words 48% moisture content on a wet basis).

I found out that wood working people normally express moisture content in terms of % of dry wood weight (and I think that's how the pocket moisture meters read also). Doing the calculations on my results yielded a moisture content on a dry basis of around 95% (in other words the amount of water in the transom weighs nearly as much as the wood). That's WET. That's soggy wet - I'm sure that some serious rot can't be far behind, from what I could find that number should only be around 15% or so.

So, I'm facing reality and realizing there's really no way around that transom coming out. What's a bit scary is that when I drilled small holes in the transom and poked around everything seemed solid. Anyway, I need to get my drill charged up 'cause I'll be drilling out about a gazillion rivets this weekend.

You can take a look at my old transom. It felt solid too until I pulled it out. The transom was completely wet and rotting while the boat hasn't been on water in years. Come to think of it, almost all the wood in my boat was wet and rotting!

Good luck with the rivets this weekend. As others have posted, you're doing a great job :thumb: and I look forward to seeing more pictures of your progress.
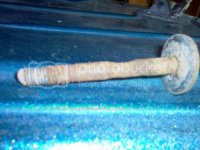
 
I took off the jack plate and started drilling out rivets from the rub rail in preparation for lifting off the cap. Drilling the rivets went slower than when I did this on my other boat because the steel mandrel was still in about a third of the rivets. On about half of those I found that I could push the mandrel in with a nail-set, on the others the mandrel just wouldn't budge and the best solution I could come up with was to carefully grind the rivet down with a diamond cutting wheel on my dremel.

I found something interesting when I removed the jack plate - a perfect example of why we use stainless hardware in boats. I hope this photo does justice to just how dangerous this was - in the middle of the mounting bolt about half it's thickness was gone.


AIM000169.jpg
 
I remember this all too well. My transom felt solid also but decided to go ahead and replace it, just that much more peace of mind. You have a great looking boat there and it will all be worth it in the end. Good luck.
 
Yeah i was reading this and went outside and started tapping on the transom!

Just to add a little more scare to ya, I had tapped all over this transom and it sounded perfect. No hint whatsoever of problems.

I've drilled into the transom in a few more places, and cut fiberglass off in a few patches just to look at the wood. Overall it's very wet and is showing a few signs of rot, but it's still fairly strong (which unfortunately means it's going to be a bitch to take out - unless bigredinohio can share his secret of popping the transom out in one piece). I maybe could have let it go for a season or two, but have no doubt that the rot would have accelerated and caused problems before too long (and who knows, maybe it would have failed next month, no sense taking chances). I was really really really hoping not to have to do the transom, but now's the time to do it rather than put all the work into this boat and then have to take it all apart in another year or two.

I'm pretty sure that the problems with the transom were caused by the drain plug insert being loose (I can't figure out why that would have happened :confused:), and a couple of jack plate mounting bolts not being well sealed. Once wood starts to get wet it seems to really suck in the moisture.

I really think I need to have my f*&*&ing head examined, just two weeks ago I finished replacing the transom, stringers, and deck on my other boat (which will be on craigslist the instant this Checkmate gets wet). Took me 6 weeks of evenings and weekends to do it all, now I'm starting all over again :eyecrazy: :brickwall: (but I'm not looking to set any speed records this time around).

In any case I'm nearly ready to lift the cap off (it'll hang from the rafters in my garage until I'm ready for it again in a few weeks) so that I can get the transom out and beging the process of putting everything back together (which is infinitely more fun than the tearing apart).
 
Did you have any stress cracks on the transom?


For the Eluder, NO. No outward signs of problems at all.

For my other boat, yes. There was a single crack visible on the top of the transom. Plus the wet wood had expanded and a gap was starting to show between the transom and cap. But then again, all the fiberglass in that area was a lot thinner than on my Checkmate.
 
I've drilled into the transom in a few more places, and cut fiberglass off in a few patches just to look at the wood. Overall it's very wet and is showing a few signs of rot, but it's still fairly strong (which unfortunately means it's going to be a bitch to take out - unless bigredinohio can share his secret of popping the transom out in one piece).

All I did was cut the top fiberglass that covered the transom to move my cap forward to allow working space. Then I took my grinder and removed the fiberglass that tabbed the transom in from the inside.

After that, I used a rubber mallot, chisel, (wide) pry-bar, piece of thin alum plate and 1x that I cut into wedges and slowly worked them down being careful not to penetrate the outer skin. I worked the chisel (approx 1") on the top busting out the bondo/concrete stuff and then used it to pry between the outer skin and wood. Once started, I just worked back and forth going deeper and deeper until it gave way.

Note that my outer fiberglass skin has a lip on the inside and you don't want to gouge that too bad when working. If you have any other ???'s, just ask but that's the basics of what I did. I think Old Hickory or someone did the same method which I based my principles from.
 
A little more progress. Got the cap off and started attacking the transom. To get the cap off there's filler between the splashwell and transom that had to be removed (or at least the bond broken). I had tried cutting through the filler from underneath but wasn't having much luck with that route so just went ahead and cut off some of the fiberglass from above the transom to facilitate easier access (which means cosmetic repairs later on).

To cut out that section of fiberglass I started out using my Dremel with a diamond cutoff wheel (figuring I could be more delicate with the Dremel than with a grinder and salvage the piece I cut out for later replacement as well as limit any collateral damage). Hey, it worked doing it that way for my other boat, but did I ever mention that the fiberglass over the Checkmate's transom is THICK compared to the other one? That poor little Dremel was bogging down, getting hotter and hotter, until finally in a shower of smoke and sparks it gave it's last breath of life.

It was getting late so I gave it up for the night, only to turn on my computer and see a post by SunTime where he had used a bottle jack from below to help pry the cap off at the transom with no cutting. :yell: Damn, I bet that would have worked - the filler used by Checkmate isn't as strong as on my other boat (but is certainly strong enough for it's intended use, it was perfectly intact after 30 years) and probably would have separated nicely with that method.
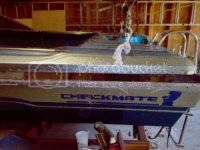
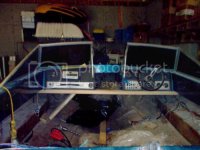
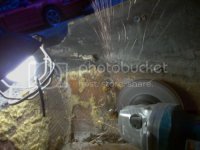
I got back to work on it last night and with come-alongs hanging from the rafters in my garage pulling up, and me underneath chiselling away filler and pushing on the underside of the splashwell, the cap came off. It'll hang in the garage for the duration.

AIM000173.jpg


I didn't like the idea of the passenger and driver consoles hanging unsupported so ran a 2x4 under them, fastened to the sides with angle brackets.

AIM000174.jpg


The transom hold-downs were in good shape (they're stainless), but for some reason non stainless nuts were used on them and a couple of the nuts were almost completely eaten away. (Maybe being embedded in wet foam had something to do with it). The other two weren't much better, so all 4 nuts had to be forcibly removed with a grinder. Ever notice that grinders are a lot like camp fires, no matter how what you do the sparks always hit you in the face (yes I was wearing goggles).

AIM000186.jpg


Next the transom comes out. Hopefully I'll be lucky enough to pop it out in one peice instead of having to chisel and grind it out one bit at a time. I found that the transom is thinner in the area directly behind the splashwell, only 1 inch there. Looks like I'll have two options when building a new transom, either use 3 pieces of 1/2" plywood with that area cut out of the third piece, or use 2 pieces of 3/4" and use a router to cut out that section. (I don't own router yet, so I may have just found a good excuse to get one !!!!)
 
Back
Top