• Welcome to the Checkmate Community Forums forums.

    You are currently viewing our boards as a guest which gives you limited access to view most discussions, articles and access to our other FREE features.
    By joining our free community you will be able to:

    » Interact with over 10,000 Checkmate Fanatics from around the world!
    » Post topics and messages
    » Post and view photos
    » Communicate privately with other members
    » Access our extensive gallery of old Checkmate brochures located in our Media Gallery
    » Browse the various pictures in our Checkmate photo gallery

    Registration is fast, simple and absolutely free so please, join our community today!

    If you have any problems with the registration process or your account login, please contact support by clicking here or by using the"contact us" link at the bottom of the page.

'79 Eluder with water poisoning - finally started restoration

After that, I used a rubber mallot, chisel, (wide) pry-bar, piece of thin alum plate and 1x that I cut into wedges and slowly worked them down being careful not to penetrate the outer skin. I worked the chisel (approx 1") on the top busting out the bondo/concrete stuff and then used it to pry between the outer skin and wood. Once started, I just worked back and forth going deeper and deeper until it gave way.


Well, I started out trying that method and it didn't work out too well. My transom was very wet throughout, but still had good adhesion to the fiberglass skin. The instant I started to tap a pry bar or wood chisel between the plywood and skin, the skin bulged out and some hairline cracks formed in the gelcoat. Since the gelcoat is in pretty good condition I wanted to avoid doing anything to screw it up, so abandoned this method in favor of my good friend Mr. Wood Chisel. It took about 5 hours to get all the wood chipped out. (I imagine I'd have had better luck with this if the transom had been more rotted and delaminated from the rear skin). I did manage to get the fiberglass off the forward face in one piece so that I'll be able to use it as a template.

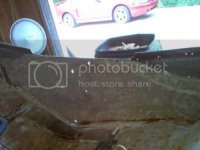
Here's my very wet transom (which is HEAVY!!!) :

AIM000192.jpg


and here's the rear skin after grinding off all remnants of plywood and filler:
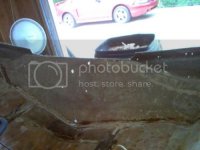
AIM000194.jpg


I also found that most of the wood in the box structures under the gunwales (anyone know the proper name for them?) is wet and rotting, so those are coming out as well.
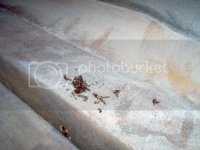
AIM000195.jpg


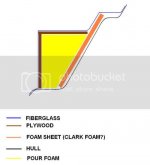
Being an engineer, I like to try and understand why things are built the way that they are. These boxes have a sheet of stiff foam (approx. 1/8" thick) between them and the side of the hull, and are constructed like this:
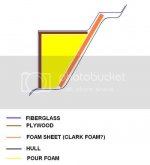
agunwale_box.jpg


The part I understand is that by using the foam sheet between the box and hull, and allowing it to "float" without being bonded to the hull, there is a small amount of flex built into the side of the hull. The part I haven't figured out or had explained to me yet is why is is it desireable to build flex into the sides like that. If anyone can explain this please speak up.

It would be easier (and cheaper) to rebuild these without that sheet of foam, but I'll probably include it to stay close to the original design's intent. If anyone else has to rebuild these in the future that foam is pretty close to what used to be called Clark foam, and is now available under the name "Last-A-Foam" from Wicks Aircraft or Aircraft Spruce (in the past I've had better service from Wicks Aircraft and prefer to use them whenever I have a choice).
 
I had similar issues with the foam floatation chambers/boxes at the back of my 82 Eluder I/O. I found the problem replacing the motor mount stringers that are beside the flotation chambers on the I/O model. My chambers did not have the Clark/sheet foam in them. Only the plywood and pour foam. As I was taking everything apart to replace it was apparent the factory had built the boxes, glassed them in place and then drilled 1/2" holes in the top at both ends to pour/spray the foam in. These holes were then glassed over to seal. As my boat is an I/O and a couple years newer maybe none of this applies. But from what I could tell everything was suppose to be solid, If I was going to put the sheet foam back in I would make sure that it was truly suppose to float in there, are you sure the sheet was not bonded to the hull with a filler?
Keep up the good work, Checkmates are worth the effort.
Rob
 
are you sure the sheet was not bonded to the hull with a filler?


Positive. I now have those removed, and was able to verify that they were constructed exactly as I drew them. I've been thinking about it and unless I can find a good reason to do otherwise will just glass the plywood directly to the hull when I rebuild these boxes (without the sheet foam). That will make the hull sides stiffer, but I can't think of any reason why that's a bad thing. I'll just have to put the cap back on the hull before I glass these (and the decking) to the hull, to make sure that the hull isn't twisted at all.

I still haven't totally figured out how these got so waterlogged. Along the length of them (they're about 6 ft. long) there were a few low spots where they met the hull, which would have allowed water to collect and sit for long periods of time. I'm thinking this boat was stored outdoors uncovered, and probably from time to time a thunderstorm would give them a good soaking.
 
Well, I started out trying that method and it didn't work out too well. My transom was very wet throughout, but still had good adhesion to the fiberglass skin. The instant I started to tap a pry bar or wood chisel between the plywood and skin, the skin bulged out and some hairline cracks formed in the gelcoat. Since the gelcoat is in pretty good condition I wanted to avoid doing anything to screw it up, so abandoned this method in favor of my good friend Mr. Wood Chisel. It took about 5 hours to get all the wood chipped out. (I imagine I'd have had better luck with this if the transom had been more rotted and delaminated from the rear skin). I did manage to get the fiberglass off the forward face in one piece so that I'll be able to use it as a template.

Here's my very wet transom (which is HEAVY!!!) :


AIM000192.jpg


and here's the rear skin after grinding off all remnants of plywood and filler:

AIM000194.jpg


I also found that most of the wood in the box structures under the gunwales (anyone know the proper name for them?) is wet and rotting, so those are coming out as well.

AIM000195.jpg


Being an engineer, I like to try and understand why things are built the way that they are. These boxes have a sheet of stiff foam (approx. 1/8" thick) between them and the side of the hull, and are constructed like this:

agunwale_box.jpg


The part I understand is that by using the foam sheet between the box and hull, and allowing it to "float" without being bonded to the hull, there is a small amount of flex built into the side of the hull. The part I haven't figured out or had explained to me yet is why is is it desireable to build flex into the sides like that. If anyone can explain this please speak up.

It would be easier (and cheaper) to rebuild these without that sheet of foam, but I'll probably include it to stay close to the original design's intent. If anyone else has to rebuild these in the future that foam is pretty close to what used to be called Clark foam, and is now available under the name "Last-A-Foam" from Wicks Aircraft or Aircraft Spruce (in the past I've had better service from Wicks Aircraft and prefer to use them whenever I have a choice).

I have your answer.

Are you ready?


These are called air tanks, they are constructed in various shapes and sizes. They are configured to help try to float the boat level, if it should ever be submerged. The foam is supposed to hold mostly air. But do tend to collect water over the years. But even wet, should float. Try a piece, see if it floats.

Now on to the sheet of foam between the foam and the hull.

Well, back then Checkmate pulled thier boats from the molds before it got to the foam station, in fact before the boxes were installed. Foam is very sticky, and tends to shrink a bit as it cools. It is very warm when the chemical reaction is taking place. So as it cools, it has a tendency to pull in the side of the hull. Look around on some boats, you'll eventually see it.
So a solution is to put something between the hull and the foam. Like a sheet of foam.
 
Currently Checkmate installs the airtanks, and foam while the boat is still in the mold. They use cardboard, as a barrior between the foam and the side of the hull. Works as well as sheet foam, and way cheaper. I've worked at a company that used a sheet of masking paper as a barrier. It doesn't matter as long as its something to keep the foam from bonding to the side.
 
Last edited:
Don't put any wood around the drain plug again. Cut out a 4 inch radius at the bottom of the transom, it should look like someone took a bite out of it. Then you will only be working with glass when you cut the new drain hole. Check out some pictures of the newer transoms to get an idea of what I mean.

Those drain tubes suck, and the guy that installed yours didn't cut it to the right length from the looks of it. You would need a tool to intsall new ones. Just replace the drain plug with one of those fittings that has the screw in drain plug.
 
......These are called air tanks, they are constructed in various shapes and sizes. They are configured to help try to float the boat level, if it should ever be submerged......


Thanks coop. Sounds like a good move on the part of Checkmate to install those while still in the mold and use cardboard instead of foam sheets. And yes, I have another boat (which will be sold as soon as the Eluder is finished) that has foam in the side of the hull and when light hits it just right you can see some of the results of the shrinkage (I never knew what I was looking at until just now).

So if I'm understanding you - those 6 ft. long box structeres (air tanks) under the gunwales serve NO PURPOSE structurally? I was assuming that the box structure itself was to add stiffness to the hull in addition to being a convenient place to have the foam reside.
 
Those side boxes started as just a vertical piece of wood. That was a bitch to carpet around. And to find some more room for some foam, someone thought of covering the top with wood to make it an air tank.

The probably do help with stiffness.

Did yours have cupholder holes cut in them? Thats the easiest way for water to get into those tanks.


Thanks, good information :thumb:.

There were no cupholders in the boxes/tanks, the cupholders were cut into the deck. And yes, I'd say that it looked like the cupholders had a lot to do with letting water into the foam under the deck.
 
groundloop,

Everything you just described in your posts is the description
of my transom. When you tap the outside of the transom it sounds
solid. The guy before me used a steel plate to wrap the transom
under the motor clamp (Shudder). He used steel screws to hold the bottom corners tight to the glass. Well as you would consider the screws did rot away and left holes exposed under the waterline. Along with trim
tabs that half the screws were stripped out and not a trace of any sealant anywhere. Today, after keeping the transom to the sun for 5
weeks (as much as possible) I took an air hold to blow the dirt out of those holes. Much to my surprise about 3 seconds after I shot air into the holes water poured out of almost every hole in the transom including the
holes for the motor. Now the boat has not been in the water for just over 5 weeks and the amount of water that came out was incredible.

I was going to hang the 200 I just got on the boat and go out next weekend, but my season is over. Next summer will get here soon enough.
Time to take it apart and make it new so next year is fun filled and worry free.
 
I won't swear to it but I think those steel plates might be standard equipment - mine had one also and unless I hear otherwise I'm planning on putting it (or a new slightly modified version) back.
 
You definitely want the backing plates... they protect the fiberglass by spreading the thrust from the motor over a larger surface area.
 
groundloop,

Everything you just described in your posts is the description
of my transom. When you tap the outside of the transom it sounds
solid. The guy before me used a steel plate to wrap the transom
under the motor clamp (Shudder). He used steel screws to hold the bottom corners tight to the glass. Well as you would consider the screws did rot away and left holes exposed under the waterline. Along with trim
tabs that half the screws were stripped out and not a trace of any sealant anywhere. Today, after keeping the transom to the sun for 5
weeks (as much as possible) I took an air hold to blow the dirt out of those holes. Much to my surprise about 3 seconds after I shot air into the holes water poured out of almost every hole in the transom including the
holes for the motor. Now the boat has not been in the water for just over 5 weeks and the amount of water that came out was incredible.

I was going to hang the 200 I just got on the boat and go out next weekend, but my season is over. Next summer will get here soon enough.
Time to take it apart and make it new so next year is fun filled and worry free.

My boat hadn't seen water in years and after grinding the inside of the hull, had water seeping out of areas from the core. When chiseling it out, I literally had water squirting. My transom was wet inside also. Moisture gets trapped and doesn't have the opportunity to evaporate without good exposure to air.

I won't swear to it but I think those steel plates might be standard equipment - mine had one also and unless I hear otherwise I'm planning on putting it (or a new slightly modified version) back.

Looks like you're making good progress. :cheers:
 
JT Patroni

I was going to hang the 200 I just got on the boat and go out next weekend, but my season is over. Next summer will get here soon enough.
Time to take it apart and make it new so next year is fun filled and worry free.


HAH..... :banana: My boating season never ends, it just gets adjusted depending on the weather. Summer and early fall are for water sports, rest of the year is for fishing and just ridin' around. My goal is to take the Eluder out for the afternoon on Christmas day, we'll see.

Speaking of fishing .... some here may find this idea sacreligous .... I'm thinking about a removeable fishing deck to go on the front and possibly one for the rear. The criteria are that the trolling motor mounts on the deck itself and not the boat, 2 people can install and remove the deck in under 10 minutes, and (this is the most important) there will be no holes or any other visible marks left on the boat. Time will tell how that works out - gotta get the boat put back together first though.


bigredinohio


Looks like you're making good progress. :cheers:

Thanks. Your boat's lookin' good too. Now if the fiberglass and epoxy I ordered would arrive so I can start having some real fun.
 
Last edited:
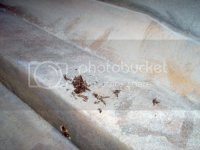
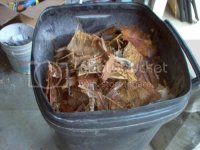
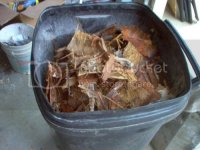
More progress. EVERYTHING is out of the hull now. The last thing to come out were the 'air boxes' which run lengthwise under the gunwales and are filled with flotation foam. Here's a photo of the foam from the front of one of those boxes, looks like they had a few guests over the years (I'd say I now know where the roaches were living that I saw scurrying out when I removed the boxes).

AIM000201.jpg


I rolled the hull outside (well, actually the trailer was rolled out - the hull doesn't roll) and gave everything a good scrubbing to get rid of TONS of dust. Wish my pressure washer was working right now.


AIM000203.jpg


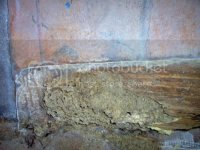
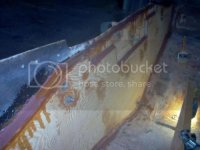
Here's the hull with everything cut out. I've left a small 'lip' where the deck was glassed in thinking that it will save me a bit of work and filler when the new deck goes on. There are many large dark areas over the core, when I first saw those my heart sank assuming that I'd also be replacing balsa. Come to find out all those dark areas are just stains on the fiberglass (probably from whatever leached out of all the rotting wood) - in a few areas I scrubbed with a little denatured alcohol and it took the stains right off.

AIM000214.jpg


I fabricated my new transom from 3/4 AB marine plywood. (I had used ACX in my previous boat restoration, but couldn't find any this time around that wasn't junk). I put one layer of mat on the aft face, and plan on two plies of 1708 on the forward face (which seems to be a lot more glass than was on the original transom). Here's a photo after I cut the mat.

AIM000269.jpg


And a photo after the layup was finished (I'm using US Composites epoxy). For every transom penetration I cut out oversized holes and filled them with an epoxy/milled fiber paste, those are visible in this photo. It will be impossible for water to ever get to the wood even if a mounting bolt or screw weren't sealed properly (but of course they will be). The fuel tank is doing double duty as a saw horse because the saw horse decided to break a little earlier in the day.


AIM000271.jpg


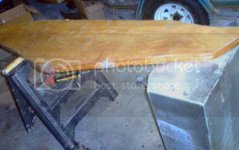
My Eluder has a new transom !!!!!!!! :bounce: A few epoxy dribbles on the forward face are harmless, it'll get sanded and coated with epoxy before being glassed anyway. You can see the area that had to be routed out for the splashwell to fit, in that area the wood is only 1" thick (I checked and double checked that dimension on the original transom before removing it). Before permanently installing the new transom I put the cap back on the hull to check the fit and even after removing that 1/2" of material it was TIGHT right at the bottom of the splashwell. I ground out just a bit more wood right in that area to be sure that 2 layers of 1708 will fit.

AIM000276.jpg


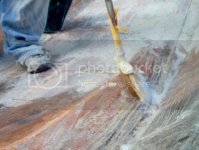
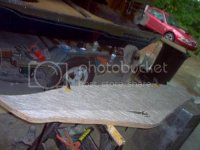
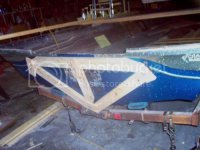
And a photo of my clamping system. I ran threaded rod through the transom in 4 places (where there'll be holes cut anyway) and held the 2x4's down with plates cut from scrap 3/4" plywood. Not as elegant as the nice BIG clamps that others (Old Hickory and bigredinohio if I remember) have fabricated, but they'll do. (And I even remembered to put grease on the threaded rod, I don't need those to become a permanent part of my transom).

AIM000277.jpg
 
Ive noticed lately every one seems to be doing some sort of transom repair or replacement . Seems to be spreading like wild fire
 
Ive noticed lately every one seems to be doing some sort of transom repair or replacement . Seems to be spreading like wild fire

I was thinking about that too. Maybe it's just that more and more people are figuring out that it's not rocket science to do, coupled with a lot of desireable older boats in need or repair.

Hey, since my boat (and others) are essentially being rebuilt from the ground up, can we get away with claiming they were manufactured (or at least RE-manufactured :D) in 2009 in the rare instance we ever decide to sell them?

Yeah remanufactured that would be nice wouldnt it lol . My transom was bad when I got mine and didnt know till the next day after I bought it . It was solid but when my dad put it in the detroit river so I could go weigh the trailor the motor acutally pushed thru the back of the boat . We didnt know that till after we go it home . I went to put the trailor plate on and noticed to holes in the transom .
 
Good Luck!

groundloop nice thread. Just a few suggestions/comments.
As far as your bilge pump emptying into your splash well this is okay, but if your boat sits high enough out of the water it is always nicer to have a through hull fitting. Also I always recommend adding a float switch to a bilge(hard wired direct to the battery)in addition to your manual switch.
For your foot throttle, I always fabricate a 3/4" block of wood with s.s. t-nuts in it to mount the throttle to. This block gets glassed to the hull, and then I taper the edges using filler(so the carpet will conform nicely). And add two additional layers of thin CSM to the top overlapping the hull at least 4". This may be a bit overkill, but I like doing things once right, and not having to worry about it again.
As for your wiring, best bet ALL NEW!! Like I said piece of mind.
For your boxes/floor I always taper the edge of the wood to the shape of the hull to spread the weight more evenly. Also, be sure to glass both sides of all your wood, and bed the edges in a waterproof marine structural putty(to again help disperse the pressure evenly over a larger area).
As for the rub rail. I use T-rivets which are made for aircraft. They split into three or four as you rivet them in, and spread the weight on a bigger area. Before using these rivets(about 4 times the price)I found there were a lot of places I couldn't get a backing washer on, and when I tried to rivet with regular rivets I had a lot of them not grip/pull the two pieces of glass together. I also like to glass from the inside all the spots I can get to. Then seal the outside of the seam with 3M 5200. Once the rub rail is on I tape off the rub rail and the fiberglass and silicone both top and bottom, as well as all the rivets. Be sure to use a GOOD silicone. If the hull is anything other than white I recommend a clear silicone(which IS clear when dry if you get GOOD silicone).
IT IS ALL WORTH IT IN THE END!!:bigthumb:
 
Back
Top