• Welcome to the Checkmate Community Forums forums.

    You are currently viewing our boards as a guest which gives you limited access to view most discussions, articles and access to our other FREE features.
    By joining our free community you will be able to:

    » Interact with over 10,000 Checkmate Fanatics from around the world!
    » Post topics and messages
    » Post and view photos
    » Communicate privately with other members
    » Access our extensive gallery of old Checkmate brochures located in our Media Gallery
    » Browse the various pictures in our Checkmate photo gallery

    Registration is fast, simple and absolutely free so please, join our community today!

    If you have any problems with the registration process or your account login, please contact support by clicking here or by using the"contact us" link at the bottom of the page.

'79 Eluder with water poisoning - finally started restoration

Any chance you're planning on putting knees in to support the transom?? It may very well be overkill, but it'd make that thing SOLID, and you'd never think twice about adding more power.
 
. Also I always recommend adding a float switch to a bilge(hard wired direct to the battery)in addition to your manual switch.

Absolutely. Especially on a boat like this where the bilge is darned near impossible to get to! There will also be a red LED to tell me that the float has activated.

For your foot throttle, I always fabricate a 3/4" block of wood with s.s. t-nuts in it to mount the throttle to.

That would beat the heck out of the previous owner's method of running screws all the way through the hull wouldn't it? :brickwall: Actually I haven't decided yet whether to keep the HotFoot or not. I've got many many hours flying airplanes and am perfectly comfortable with one hand on the stick and one hand on the throttle.


Any chance you're planning on putting knees in to support the transom??

Yes, for sure. I did a lot of reading through other people's restoration threads and came across one (can't remember who off the top of my head to give credit to) which I like the look of and will roughly copy that.
 
Progress continues. Not as fast as I'd like, but it's progress all the same. :cheers:

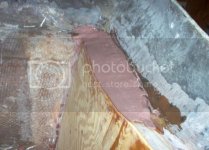
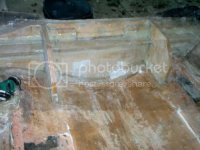
On top of the transom for about 10 or 12 inches on each side I added filler and smoothed it out such that it's angled forward. Just in case any water gets up there (which looks like it's possible especially on the starboard side where the steering cable passes through) I want to be sure not to have water sitting for long periods of time.

AIM000299.jpg


Then, after all the filler was cured and sanded smooth, 2 layers of 1708 on the forward face, lapping 3 to 4 inches onto the hull. That "tape" that's over the glass is polyester peel ply, I use that wherever I plan on adding glass at a later time (after the layup has cured) - in this case it'll be where I tab in the horizontal brace, stringers, and knees. When I'm ready for the next layup I just have to pull the peel ply off and the glass is ready, no cleaning or sanding needed.


AIM000300.jpg


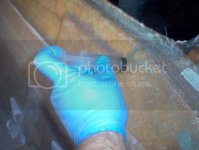
One small area of fiberglass about 10 inches long lifted up from around the top edge of the transom while the layup was curing. To fix that I drilled several small holes through the glass, about 3 or 4 inches apart. Then I mixed up a thin slurry of epoxy and milled fibers and shot it into each hole with a syringe. You can see in this photo that the delaminated area is almost completely filled now. This is a much faster method of repair (took all of about 3 minutes) than grinding off delaminated glass and laying up new, and is structurally just as sound.


AIM000303.jpg


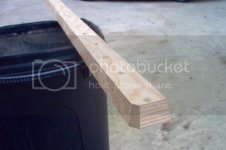
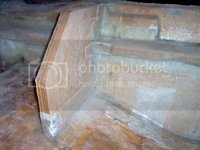
And I fabricated the horizontal brace from 2 layers of 3/4" marine plywood. It doesn't show real well in this photo, there's a bevel cut on the side that will go against the transom - I'm going to have the brace angled downward slightly, again so that water can't sit on top of it if somehow some gets splashed onto this area (no more water poisoning for this boat!)

AIM000301.jpg
 
More progress. Things seem to move a lot slower now that much of my weekends are spent at my daughter's soccer games.

The transom, brace, and knees are complete.

AIM000305.jpg


AIM000306.jpg


I put the cap back on after these photos were taken tonight, and much to my delight everything fits. :cheers:


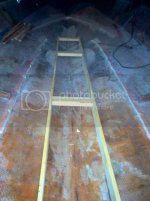
And I've fabricate the stringers for the main deck and after test fitting and trimming a few times they fit perfectly. Next will be cross-braces and stringers for the forward deck.

AIM000304.jpg
 
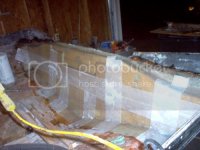
Finally some more progress. It's been going slow lately, partly because of spending weekends at my daughter's soccer (communist kickball :D) tournaments, and partly because I'm being anal about making sure this boat never sees one bit of rotted wood again. The stringers (deck supports if ya' wanna' get technical) and bulkheads were glassed with 7725 cloth before being installed, and the underside of the deck will be coated with epoxy before installation.

It's worth mentioning that for installing stringers and the deck I've temporarily re-installed the cap (but no rivets yet), this is to help ensure that the hull stays straight. If for some reason the hull twisted a bit on the trailer (perfectly possible with over 200 pounds crawling around in it) as the deck was being installed that twist would become permanent. The cap will stay on until the deck and gunwale foam-boxes are all glassed in.


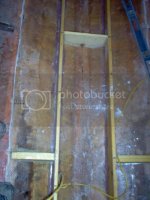
In this photo the stringers have already been tabbed in - I just used 7725 cloth for that, after being bedded with PL Premium they're not going anywhere. The rear bulkhead has been bedded with PL Premium in preparation for tabbing with 1708, and I'm adding blocking where the two pieces of deck will be joined (I decided it would be much easier to build the main deck in two pieces). This blocking will be under the middle of the seat boxes, not a bad place to have a bit of extra strength.

AIM000313.jpg


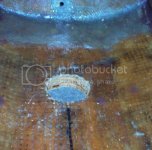
I'm installing an inside the hull transducer, and with the limited space available in the bilge it had to go in before the deck was installed. I cut away the inside fiberglass skin to expose the core, then I had to grind through the balsa core to get to the outside skin where the transducer will be epoxied in place. Having never seen the inside of the core before, and realizing what my neighbors would think of my actions if I happend to see garage floor through the hull, I CAREFULLY cut out the balsa with my dremel and a wood chisel, proceeding VERY SLOWLY (took me about 3 hours total - this balsa's A LOT tougher than what I used to build model rockets with). The transducer will mount about a foot in front of the transom in the middle of the pad.


AIM000309.jpg


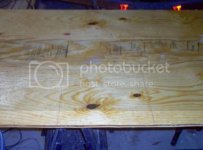
Before removing the original deck I measured it's width starting at the transom and working forward in 6 inch intervals. I marked a centerline on the new plywood, marked cut lines using these dimensions, and much to my surprise and delight they were perfect with the first test fitting. After that I coated the underside of each piece with epoxy (it actually looks a lot better than in the photo - there's just something about a nice smooth, shiny piece of wood).

AIM000316.jpg


I used my higher education to figure out that it was far cheaper buying the quantities of PL Premium I'll be using in the large tubes. I didn't have a caulk gun for that sized tube so bought the only one that the orange flavored home improvement store sold. Well, it was junk. And just to make sure that my day ended as badly as it began it didn't even make it through one tube before it tore up. I wound up cutting the tube open and digging out the adhesive with my (gloved) fingers.

AIM000314.jpg
 
  • Like
Reactions: JW
Great job groundloop!!! I'm on my second resto and it does take time when you got family commitments. The only suggestion I have is to put a layer of mat underneath the floor,encapsulate the plywood to ensure no water gets to it. You can use 1.5 oz mat for that. Keep up the good work!!!:thumb:
 
Hey CMP, we must be crazy huh. This is my 2nd restoration also (the first wasn't a Checkmate though) - WHAT WAS I THINKING WHEN I GOT INTO THIS PROJECT!?!?!?!?

I'd put some thought and research into whether or not to put glass on the underside of the deck. I found several differing opinions, but one of the few that seemed to be based on fact was that it's a good idea to use glass with polyester resin because by itself it's fairly brittle and will microcrack, eventually allowing some amount of water penetration. Epoxy is far more flexible (not to mention 10 times less permeable to water) and not nearly as prone to allowing water problems when painted on wood.

On the other hand, I'm being totally anal about everything else that has to do with keeping water away from wood, plus glass on the underside will increase the strength of the deck. Plus, I was digging through my leftover supplies from my airplane project and found that I've still got a roll of kevlar and a roll of lightweight glass cloth. I've got no desire to mess with kevlar right now, that stuff is a pain, but that roll of lightweght cloth - hmmmm.
 
Yeah we must be completely crazy or like doing restos.:eyecrazy: I didn't plan this one kinda snuck up on me. Ahh, didn't realize you're using epoxy instead of poly, my bad. Probably wouldn't hurt to add the lightweight glass you have since it's still apart.
 
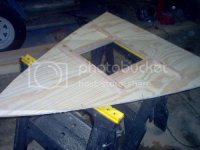
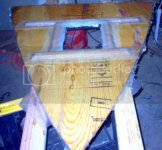
I'm making sawdust so something good must be happening. I marked and cut out the forward deck, it didn't fit as well on the first attempt as the main deck. Took a couple of rounds of making adjustments and trial fitting before it got right. I'll be putting a hinged hatch cover in the forward deck, so layed the deck in place along with the seats to make sure of the positioning for the hatch. I cut out some ribs from scraps of 3/4 marine plywood, they'll be doing double duty as stiffeners for the forward deck and a base for the hatch cover. These ribs will get two plies of 1708, and the entire underside will get a ply of 7725 cloth. That, along with a ply of cloth on the topside will make it plenty strong.

AIM000328.jpg


A couple of days ago I went ahead and put a ply of the lightweight glass cloth which I had laying around on the underside of both pieces of my main deck (it was free and will add some strength). The next day I bedded the rear half in place with PL Premium, and found everything heavy that was within sight to weight it down with.

AIM000317.jpg
 
GL what did you end up doing in the front w/ the stringers? You're on the down hill slide now, looking good!!!
 
GL what did you end up doing in the front w/ the stringers?

I haven't put it in yet, but I'm going to have a single stringer running as far forward in the bow as the original one. It'll only be a few inches tall, but beefier and with more glass than the original one, and will start at the bulkead where the double stringers (floor supports) end. The forward deck won't have any stringer supporting it, but I'm pretty sure that between the bulkhead at the rear of it (where you step up), and the ribs I'm building into it that it'll be plenty strong.
 
You are making great progress as well as cmpulse170. I can't believe you are already installing the deck!!! I guess that's what happens when you don't have core replacement.

The funny thing about restoration work is you hate having to do it initially but love doing most of it and promise never to do it again when complete. However, the never doing it again never seems to stick.


I'll admit "I promise never do it again" came out of my mouth and what ya know I'm on my second resto.:D
 
You are making great progress as well as cmpulse170. I can't believe you are already installing the deck!!! I guess that's what happens when you don't have core replacement.

The funny thing about restoration work is you hate having to do it initially but love doing most of it and promise never to do it again when complete. However, the never doing it again never seems to stick.
x2 on the progress:bigthumb:

The three of you will have the pride and satisfaction of jobs well done and working examples of your talent and determination.
I hope you will be able to enjoy the boats for many years and not be forced to get rid of them like some on this site. It's nice to be able to drive a good looking and running boat that you have restored.

I think the reason "never again" doen't stick is the mind plays tricks on us and we forget the worst parts of the job over time. So when the next resoration problem comes along we think "the last one wasn't so bad" and jump right in. :eyecrazy:
We need a friend to show us pictures of the brickwall part of the last project and rescue us. But that won't happen here because we're all nut jobs who like reading about someone elses misery.:rof:
 
I can't believe you are already installing the deck!!! I guess that's what happens when you don't have core replacement.

To be honest I feel like I'm moving kind of slow. I had to replace the transom, stringers, and half the deck on my 15 ft. fish-n-ski this summer - that took 6 weeks and I'm kind of timing myself off of that. Of course there's a lot more to a Checkmate, like transom braces and knees, which don't sound like much but are just plain time consuming to fabricate, install, and glass. And yes, I've watched your core replacement and say a quiet thank you every time I think about the extra work for me had the core in my boat been bad.


The funny thing about restoration work is you hate having to do it initially but love doing most of it and promise never to do it again when complete. However, the never doing it again never seems to stick.

Yup, for the most part I enjoy working on stuff, anything to keep me entertained. I will say that I didn't enjoy chipping apart the transom when it was 95 degrees though.

The motivation level is up a bit right now, as I just got the engine which will decorate the transom in the not too distant future - a 1990 Johnson 200. It's a great looking engine, I just hope it runs as good as it looks.
 
Last edited:
I glassed the underside of the forward deck last night, using one ply of 7725 cloth on the entire underside, and an additional ply of 1708 biax on the ribs. Except for a bulkhead at the rear of this it will be self supporting, so needs to be built strong. The 7725 cloth was installed at a 45 degree angle so that it would lay down better over the ribs (and even with that it was a pain), plus there's a small structural advantage.

AIM000330.jpg


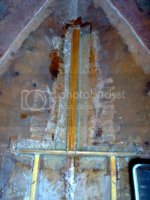
And I installed the forward stringer and bulkhead. I honestly don't know if a stringer is even needed in the bow (I suspect not, but I'm not the guy who designed this boat), so I decided I'd rather be safe than sorry. I had saved the old stringer to use as a template. Since I made the new one not as tall as the original I beefed it up by using 2 layers of 3/4" marine plywood.


AIM000331.jpg
 
Back
Top