• Welcome to the Checkmate Community Forums forums.

    You are currently viewing our boards as a guest which gives you limited access to view most discussions, articles and access to our other FREE features.
    By joining our free community you will be able to:

    » Interact with over 10,000 Checkmate Fanatics from around the world!
    » Post topics and messages
    » Post and view photos
    » Communicate privately with other members
    » Access our extensive gallery of old Checkmate brochures located in our Media Gallery
    » Browse the various pictures in our Checkmate photo gallery

    Registration is fast, simple and absolutely free so please, join our community today!

    If you have any problems with the registration process or your account login, please contact support by clicking here or by using the"contact us" link at the bottom of the page.

'79 Eluder with water poisoning - finally started restoration

I think I've got in my head what I'm going to do, and it might actually end up looking good. It won't be too difficult to do with fiberglass, just a bit of time sanding and prepping for paint. It's kinda' hard to explain, but the top left and top right will be recessed somewhat, and that curved section in the top middle will remain. I'll have to mock it up and make sure all gauges will clear the steering.

My biggest "problem" now is figuring out what color to paint it so that it goes well with the blue and silver metalflake on the rest of the boat. I'm more or less brain dead when it comes to artistic design - I'm extremely jealous of guys like yellowfiero88 who do such radical paint and have it look so fantastic.
 
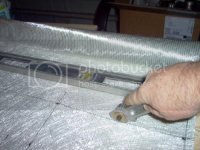
Over the course of the past week I finished glassing the gunwale flotation boxes. I measured the height and width of them every foot, and laid out cut lines on the glass. It's probably overkill, but I used 1708 for these (plus I'm running out of glass cloth and am trying not to have to buy any more). Here I'm using a rotary cutter (kinda' like a pizza cutter) to cut the cloth, it's a fantastic tool which is much faster and easier than scissors. ALSO, when doing a layup I'll use a hairdryer on medium heat to help speed up wetting-out of the cloth (and cut down on using excess epoxy). Now that the temperature is dropping that's especially helpful.


AIM000365.jpg


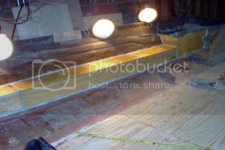
Since I don't have heat in my garage, in order to get a semi-reasonable cure time I shine shop lights (w/ incandescent bulbs because they're far more efficient at making heat than light) on the layup to warm things up. On these large layups I moved the lights once the next morning before leaving for work, then by evening the entire layup was cured enough that I could continue working.

AIM000368.jpg


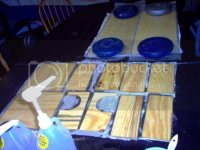
I hadn't gotten around to glassing the main deck yet, for no particular reason other than I always had plenty of other things to work on, now it's not going to be warm enough until next week, so to keep moving forward I cut out all the parts I'll need for making new seat boxes. The original ones were made using 3/4 inch plywood, but I'm sure that 1/2 inch plywood will be plenty strong. I've taken over a table in our basement family room and glassed all of these parts on both sides (one ply of 10 oz. cloth for the seat box sides, two plies for the tops).

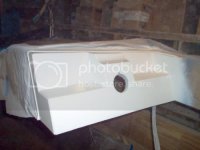
I also glassed the covers for the foam flotation boxes which I had fabricated from some 1/4 inch birch plywood I had on hand. There originally wasn't a cover on the flotation boxes, which I feel led to some of the wet foam and rotted wood I found back there. I'd guess that the factory never foresaw someone leaving a huge gaping hole for steering cables which I'm sure allowed a lot of water to be splashed into that area. In any case I'm covering the foam boxes and having the covers slope so that any water that finds it's way into that area will drain towards the bilge.

AIM000367.jpg
 
Over the past couple of weeks I've completed the new seat boxes, made a cutout in the deck for a ski locker (DARNED good planning for that I might add, it came out 1/8" from the stringer on each side :cheers:) glassed the deck, and installed the seat boxes.
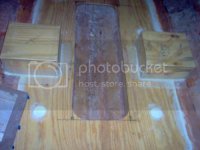


AIM000376.jpg


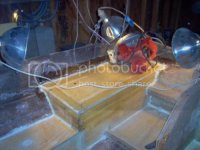
The flotation boxes are complete, I finished installing the tops on them yesterday. The shop lights are keeping the epoxy warm enough to cure, and my circular saw was the closest thing to me when I needed some weight to hold down a corner.


AIM000374.jpg


The previous owner of this boat had installed a hot foot by putting screws directly into the core, and two of them went all the way through the hull. :brickwall: Luckily there was no water intrusion into the core. To repair those I used my dremel with a router bit and cut about 1" diameter holes through the core down to the outer skin, being certain that the exposed outer skin is clean and sanded so that epoxy will have the best possible bond to it. I also ground out a shallow valley around the screw holes.
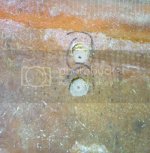
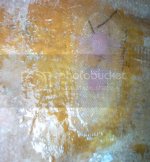

AIM000377.jpg


I put duct tape on the bottom of the hull over the holes, don't need epoxy dribbling down the side of the hull. The inside of the routed out area was coated liberally with epoxy and the screw holes filled with an epoxy/milled fiber slurry. Then I packed in about 1/4 inch of glass fibers (made by "chopping" a small piece of glass cloth with scissors) and thoroughly wet that out with epoxy. Then the hole was filled with micro-baloons and two plies of glass layed up over the entire area.


AIM000378.jpg


SO.... all my fiberglass work is now finished on the hull :surf: .

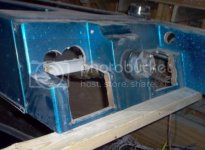
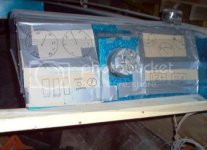
I did a mock-up of my dash modifications (necessitated by the fact that the existing plastic inserts are cracking and the original dash area was designed around using these inserts). Here's what was under the dash panel insert:

AIM000363.jpg


And here's a mock up of what I'm considering (it's either this or make a flat "standard" looking dash). I also need to decide on a paint color for the dash.


AIM000375.jpg
 
Looks good, I like the mock up on the dash. How's the rest of the gelcoat look? You could paint the dash white on both sides to blend with the blue.
 
Hotfoot. Two thumbs up.

That would beat the heck out of the previous owner's method of running screws all the way through the hull wouldn't it? :brickwall: Actually I haven't decided yet whether to keep the HotFoot or not. I've got many many hours flying airplanes and am perfectly comfortable with one hand on the stick and one hand on the throttle.

Groundloop- I don't mean to tell you your business, but go with the hotfoot. I have over 2000 hrs (if you're an old fart you probably have a lot more ;)) and I'll put my stick and rudder up against anyone and my pulsare scared the hell out of me this fall. A hotfoot throttle so BOTH hands are on the helm would have been very very useful for driving through the chine walk.

BTW-great job on the restore. I bought a pretty new boat, but I'm seriously considering finding an old C/M and restoring her so I can join in the club! You guys with tools and shop to make it happen are the object of my envy :drool: !!
 
Looks good, I like the mock up on the dash. How's the rest of the gelcoat look? You could paint the dash white on both sides to blend with the blue.

If I'm understanding, you're saying leave the center of the dash as-is (metal-flake)? I hadn't thought of that, it might be feasible. The gel coat seems to be in good condition there, just some tape residue that needs cleaned off.


Like I said before, I'm brain dead when it comes to cosmetic stuff.
 
I'll put my stick and rudder up against anyone

Even Sean Tucker ? :D

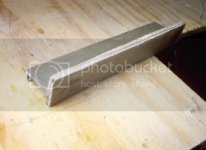
I'm leaning toward keeping the hotfoot. I need to think about mounting it, obviously not with screws through the hull. I'm thinking a 'wedge' shaped mount to bring it level since it would otherwise be sitting on a sloped section of the hull.


BTW-great job on the restore. I bought a pretty new boat, but I'm seriously considering finding an old C/M and restoring her so I can join in the club! You guys with tools and shop to make it happen are the object of my envy :drool: !!


Thanks. I just gotta' have a project going or my brain gets numb. I'm probably going to build a jon-boat from scratch with my son after I get done with this, I haven't worked with aluminum very much and that'll be an excuse to learn.
 
If I'm understanding, you're saying leave the center of the dash as-is (metal-flake)? I hadn't thought of that, it might be feasible. The gel coat seems to be in good condition there, just some tape residue that needs cleaned off.


Like I said before, I'm brain dead when it comes to cosmetic stuff.

Yes on either side of the steering wheel. You could fabricate a thin sheet of aluminum or stainless to make a face plate on either side to cover the holes. You can pick that up at Lowes http://www.lowes.com/lowes/lkn?acti...Ntk=i_products&category=Hardware&N=4294959437,. Then just add gauges,switches as needed.
 
Yes on either side of the steering wheel. You could fabricate a thin sheet of aluminum or stainless to make a face plate on either side to cover the holes. You can pick that up at Lowes http://www.lowes.com/lowes/lkn?acti...Ntk=i_products&category=Hardware&N=4294959437,. Then just add gauges,switches as needed.


Hey, I just saw your PM today, haven't been keeping real close tabs on this forum with Christmas and family stuff. Thanks for the offer to talk over ideas for the dash. In fact, you got me to thinking and I went out to the garage and did some more measuring and test-fitting. Lo-and-behold the gauges will JUST fit into the existing dash profile and BARELY clear the steering (which is all that's needed). And short of being able to purchase a replacement plastic panel cover from the factory, this is my top choice. SO.... I've figured out what I'll do with the dash and I think it's going to look great. :bigthumb:
 
It's been a slow, cold couple of weeks. Here in Georgia we've had temperatures ranging from the teens to mid 30's, not real conducive to epoxy curing. I've been able to do a bit fo fiberglass work on the boat by using shop lamps to warm small areas, but progress has been slow.

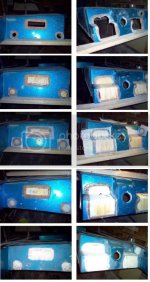
I plugged all existing holes in the dash with plywood, fiberglassed over that with 2 plies of 10 oz cloth, covered the fiberglass with peel-ply (to cut out a sanding step), then filled those areas with a thick paste of epoxy/micro. That's all been block sanded with 60 grit, and then I spent a couple hours the night before last with 150 grit. The next step is something I'm copying from a guy who built an award-winning fiberglass airplane - instead of fighting a never ending battle with pin-holes in the micro filler he used about 5 thin coats of pure epoxy, applied at about 2 hour intervals, to fill pin-holes and sanding scratches. I think that 2 coats of epoxy will be plenty for this, once the epoxy is fully cured I'll sand with 200 grit and then be ready to paint. At least that's the plan, this will be the first time I've tried it.


dash_composite.jpg


It wasn't until I removed the seats that I realized the driver's seat is adjustable, the knob was broken off but the mount was in otherwise good shape. I cleaned up the hardware in preparation for repairing the knob and noticed a long crack in an aluminum extrusion that's an important part of the mount (not sure but I may have caused the crack myself while removing the seat mount). Since I can't weld aluminum and don't know anyone who does (that I trust anyway) I decided to repair it with fiberglass. First the aluminum had to be scrupulously clean, then scratched up with 180 grit and all the residue wiped off with acetone. Then I painted on a thin coat of epoxy and lightly sanded it with 180 grit again, to remove surface oxidation. I laid up 5 plies of 7725 cloth on each side of the estrusion, covered it with wax paper and tightly clamped 1x2's over it to hold the glass cloth in place while it cured. It turned out great, should last forever.


AIM000383.jpg


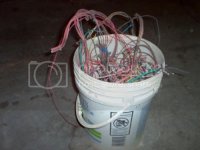
I also got started with the wiring. Instead of trying to straighten out the existing mess I decided it would just be easier to rip out every last bit of wire and start over.


AIM000382.jpg
 
The next step is something I'm copying from a guy who built an award-winning fiberglass airplane - instead of fighting a never ending battle with pin-holes in the micro filler he used about 5 thin coats of pure epoxy, applied at about 2 hour intervals, to fill pin-holes and sanding scratches. I think that 2 coats of epoxy will be plenty for this, once the epoxy is fully cured I'll sand with 200 grit and then be ready to paint. At least that's the plan, this will be the first time I've tried it.
Why not use evercoat glazing putty? Its very thin and with one coat, it will fill the pinholes and rough sanding scratches. I sand it with 180, then rough it with a little 220 and primer it. Works great and it sands real easy.
 
Why not use evercoat glazing putty? Its very thin and with one coat, it will fill the pinholes and rough sanding scratches. I sand it with 180, then rough it with a little 220 and primer it. Works great and it sands real easy.


Ummmm.... maybe because I don't have much experinece with body work / finishing and didn't know it existed. Thanks for the tip.

Once I layed up the glass for the dash using epoxy I realized I had limited my choices because polyester based materials adhere poorly to epoxy. In hindsight I realize there really wasn't any advantage to using epoxy instead of polyester for the dash. Looking at the evercoat website it looks like that would be a good choice (I'm looking at the Quantum and Quantum 1). I'll have to see if I can find some locally.
 
Thanks for the tip.

I'll have to see if I can find some locally.
No problem. You will love that stuff! I would say NAPA or any professional paint supply store will stock it. Put a thin coat over the entire area and make sure you smooth it with the spreader. Then block it out. It is harder to make straight if you just do small little areas. As for sanding, IMO I think it sands 2x easier than regular bondo:thumb:
 
Progress has been somewhat dependant on the temperature lately, so it's been slower than what I'd like. Anyway, I finally got the dash painted, which has been a major holdup (can't do much wiring 'till gauges and switches are in, can't put gauges and switches in 'till dash is painted...).

AIM000401.jpg


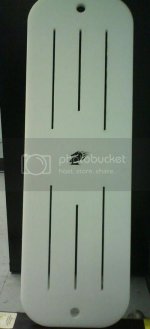
AND, I made a new ski-locker hatch cover.

DSC00092a.jpg


Also fabricated and installed a 'box' to mount my hot-foot. I'll be using T&H's adjustable slide mount, which hadn't arrived yet when I built the box, but JL was kind enough to get me the dimensions so I was able to proceed.
 
Back
Top