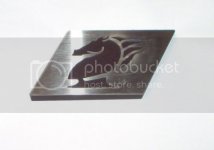
-
Welcome to the Checkmate Community Forums forums.
» Interact with over 10,000 Checkmate Fanatics from around the world!
You are currently viewing our boards as a guest which gives you limited access to view most discussions, articles and access to our other FREE features.
By joining our free community you will be able to:
» Post topics and messages
» Post and view photos
» Communicate privately with other members
» Access our extensive gallery of old Checkmate brochures located in our Media Gallery
» Browse the various pictures in our Checkmate photo gallery
Registration is fast, simple and absolutely free so please, join our community today!
If you have any problems with the registration process or your account login, please contact support by clicking here or by using the"contact us" link at the bottom of the page.
You are using an out of date browser. It may not display this or other websites correctly.
You should upgrade or use an alternative browser.
You should upgrade or use an alternative browser.
'79 Eluder with water poisoning - finally started restoration
- Thread starter groundloop
- Start date
groundloop
Active member
THATS SWEET!!!
you need to make more of these and sell them to forum members at a good price..
Think I could quit my day job?

Think I could quit my day job?
if you quit your day job, would you still have access to the waterjet???

groundloop
Active member
Hey Mr. Buss, I see you're in Birch Run - I lived not too far from there for a few years on my grandparents farm west of Montrose.
Well, I decided I'd keep my day job so I can keep paying the bills (and using their water jet), which is all good, but the need to work for a living gets in the way of really important stuff like making progress on my boat.
It's getting down to all the little, boring stuff that seems to take forever to complete.
I spent some time scratching my head trying to figure out the best place to mount a fuel filter. Best idea I came up with was right behind the rear seat, so made a bracket for that. It's mounted so that it will be a couple of inches further starboard than the fuel tank side, so there won't be any clearance problems.
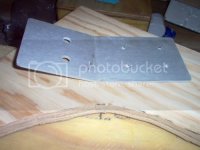
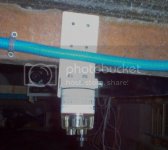
I glassed, filled, sanded, sanded some more, then finally sanded even more before I wet sanded the dash sides and front bulkhead. They got painted gloss white, direct from a Rustoleum spray can. They're not perfect, but are pretty darned good.
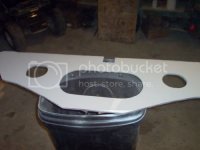

I've had the windshields out while working on the dash, the more I looked at them the more I hated how they looked with the corrosion and pitting that was present. I tried wet sanding the aluminum just to see what I could do with it, but it became apparent that these had been anodized. The bad part about that is that it would be virtually impossible to sand off all the anodizing to end up with a decent looking aluminum windshield frame. The good part is that paint adheres extremely well to anodizing - soooo.... one more painting project. I've seen a couple of other boats in the photo section with black windshield frames that look great, so that's what it will be.
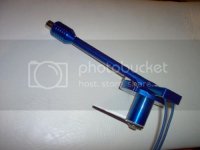
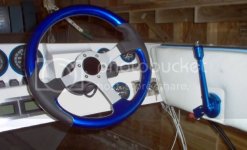
Got my shifter from Eddie Marine, it looks fantastic.
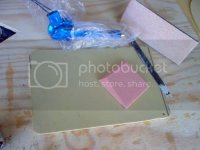
I'd agonized for awhile about how to mount this. I think I've finally decided on fabricating a mounting plate that will go below the gunwale, but that still might change if I don't like it. The benefit of this is that it also gives me a place to mount the safety kill switch and engine alarm horn. The one issue I had to overcome is that if mounted directly below the gunwale the shifter would rub on the padded upholstry, so I'm making an angled "bump" on the mounting plate to give just the right amount of clearance.
I had a piece of 1/4" high density Clarke foam and some urethane foam sitting around from a previous project. Urethane foam is fantastic stuff to work with, it's extremely easy to cut and shape. I measured the angle I needed the shifter to mount at, then shaped a wedge of urethane foam at that angle. That was glued in position on the Clarke foam with 5 minute epoxy, then the entire plate glassed with 3 plies of 10 oz cloth. Then... the back side of the plate was cut out directly behind the wedge, and all the urethane foam removed using a sanding attachment on my Dremel.

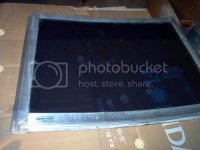
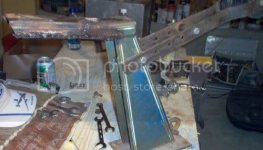
I've also started working on the trailer (my son doesn't know it yet but he's going to take a break from his video games to help me paint it). The winch stand looks pretty sad. I priced new ones at a few places, I can't believe what they sell for. That was pretty good motivation to fix the one I've got. It ought to be fairly straightforward to remove the mounting plate and properly weld a new one in place, all it takes is time.
Well, I decided I'd keep my day job so I can keep paying the bills (and using their water jet), which is all good, but the need to work for a living gets in the way of really important stuff like making progress on my boat.
It's getting down to all the little, boring stuff that seems to take forever to complete.
I spent some time scratching my head trying to figure out the best place to mount a fuel filter. Best idea I came up with was right behind the rear seat, so made a bracket for that. It's mounted so that it will be a couple of inches further starboard than the fuel tank side, so there won't be any clearance problems.


I glassed, filled, sanded, sanded some more, then finally sanded even more before I wet sanded the dash sides and front bulkhead. They got painted gloss white, direct from a Rustoleum spray can. They're not perfect, but are pretty darned good.


I've had the windshields out while working on the dash, the more I looked at them the more I hated how they looked with the corrosion and pitting that was present. I tried wet sanding the aluminum just to see what I could do with it, but it became apparent that these had been anodized. The bad part about that is that it would be virtually impossible to sand off all the anodizing to end up with a decent looking aluminum windshield frame. The good part is that paint adheres extremely well to anodizing - soooo.... one more painting project. I've seen a couple of other boats in the photo section with black windshield frames that look great, so that's what it will be.

Got my shifter from Eddie Marine, it looks fantastic.

I'd agonized for awhile about how to mount this. I think I've finally decided on fabricating a mounting plate that will go below the gunwale, but that still might change if I don't like it. The benefit of this is that it also gives me a place to mount the safety kill switch and engine alarm horn. The one issue I had to overcome is that if mounted directly below the gunwale the shifter would rub on the padded upholstry, so I'm making an angled "bump" on the mounting plate to give just the right amount of clearance.
I had a piece of 1/4" high density Clarke foam and some urethane foam sitting around from a previous project. Urethane foam is fantastic stuff to work with, it's extremely easy to cut and shape. I measured the angle I needed the shifter to mount at, then shaped a wedge of urethane foam at that angle. That was glued in position on the Clarke foam with 5 minute epoxy, then the entire plate glassed with 3 plies of 10 oz cloth. Then... the back side of the plate was cut out directly behind the wedge, and all the urethane foam removed using a sanding attachment on my Dremel.


I've also started working on the trailer (my son doesn't know it yet but he's going to take a break from his video games to help me paint it). The winch stand looks pretty sad. I priced new ones at a few places, I can't believe what they sell for. That was pretty good motivation to fix the one I've got. It ought to be fairly straightforward to remove the mounting plate and properly weld a new one in place, all it takes is time.

groundloop
Active member
Two steps forward, one step back
It's absolutely amazing how time consuming all the little bits and pieces are that you never even think about when talking about a boat restoration project. Plus there are the things you think are a good idea but end up not working out, so you gotta' spend additional time undoing stuff that you thought you were finished with. For instance, I decided to use a hot-foot, knowing it was going to be a challenge to mount on a sloping hull. I built and installed a "box" for it to mount on, about the same height as the forward deck. Once I lowered the cap onto the hull and temporarily installed the front seats for a trial fit it became obvious that the hot-foot installation was going to be very uncomfortable to use the way I had it - so out came my trusty grinder to undo all the work that went into building and installing that mounting box. I've now decided I'm going to use my left foot for the throttle, which will allow a very easy mounting location that is also comfortable.
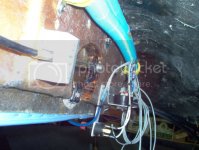
The mounting plate I had made for my shifter didn't work out either, so there was more time wasted. I took karzrus' suggestion and cut a section out of the side of the gunwale to make clearance for the shifter arm. Even though the shifter would now fit, I still had to make a new arm with an offset so that it would line up with the cable properly. I also had to fabricate a 'pivot block' to allow me to use a stock OMC cable, that was actually fairly easy to make using a mill. Also in these photos are the mounts I made for a safety kill switch and the engine alarm buzzer.
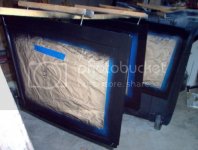
I painted my window frames black using RustOleum from a spray can. They're going to look fantastic on the boat, but I'm a little worried about the paint's durability - I may end up making a career out of touching up gouges in them.
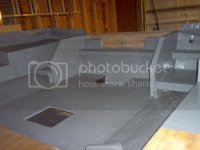
The entire battery-box area got painted with bilge-kote, and since there was some left after two coats I decided to paint the area in the bow also (the black paint up there was looking kind of rough).
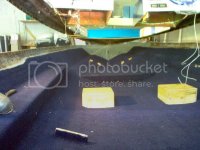
My new carpet arrived a couple of weeks ago, which I bought online from capricarpet.com. It appears to be the same carpet that Bass Pro Shops sells, but at a far better price. Gluing that in with the cap off wasn't too difficult, getting the cutouts just right around the seat boxes was a little time consuming.
It's absolutely amazing how time consuming all the little bits and pieces are that you never even think about when talking about a boat restoration project. Plus there are the things you think are a good idea but end up not working out, so you gotta' spend additional time undoing stuff that you thought you were finished with. For instance, I decided to use a hot-foot, knowing it was going to be a challenge to mount on a sloping hull. I built and installed a "box" for it to mount on, about the same height as the forward deck. Once I lowered the cap onto the hull and temporarily installed the front seats for a trial fit it became obvious that the hot-foot installation was going to be very uncomfortable to use the way I had it - so out came my trusty grinder to undo all the work that went into building and installing that mounting box. I've now decided I'm going to use my left foot for the throttle, which will allow a very easy mounting location that is also comfortable.
The mounting plate I had made for my shifter didn't work out either, so there was more time wasted. I took karzrus' suggestion and cut a section out of the side of the gunwale to make clearance for the shifter arm. Even though the shifter would now fit, I still had to make a new arm with an offset so that it would line up with the cable properly. I also had to fabricate a 'pivot block' to allow me to use a stock OMC cable, that was actually fairly easy to make using a mill. Also in these photos are the mounts I made for a safety kill switch and the engine alarm buzzer.


I painted my window frames black using RustOleum from a spray can. They're going to look fantastic on the boat, but I'm a little worried about the paint's durability - I may end up making a career out of touching up gouges in them.

The entire battery-box area got painted with bilge-kote, and since there was some left after two coats I decided to paint the area in the bow also (the black paint up there was looking kind of rough).


My new carpet arrived a couple of weeks ago, which I bought online from capricarpet.com. It appears to be the same carpet that Bass Pro Shops sells, but at a far better price. Gluing that in with the cap off wasn't too difficult, getting the cutouts just right around the seat boxes was a little time consuming.

Last edited:
groundloop
Active member
Any work done lately?
I guess I was posting my recent photos at about the same time you decided to get online.
I was wondering where exactly you place your bilge pump. I'm not sure mine was in the correct place, next to the gas tank. I would think it should be under the rear section of the floor near the drain.
In the photo I just posted showing the stern area you can see how I made the cutout for the bilge a little larger than it was before, to allow better access to the bilge. And yes, my bilge pump and float are mounted to the hull in front of the drain, I just glued them in place with some 3M 5200 (after sanding and cleaning the bilge and mating surfaces of the pump and float) and taped them down for a week to allow the 5200 plenty of time to cure. I'll get a photo of that tonight and post it.
Also, I cut an opening in the deck which will be beneath the rear bench seat. That will allow at least minimal access to the bilge so I can get at it with a towel to dry it out after use.
bigredinohio
Active member
I really liked how your boat is turning out! You've done a great job thus far and I've enjoyed following the progress you've made over the past months.
glake
Member
In the photo I just posted showing the stern area you can see how I made the cutout for the bilge a little larger than it was before, to allow better access to the bilge. And yes, my bilge pump and float are mounted to the hull in front of the drain, I just glued them in place with some 3M 5200 (after sanding and cleaning the bilge and mating surfaces of the pump and float) and taped them down for a week to allow the 5200 plenty of time to cure. I'll get a photo of that tonight and post it.
Also, I cut an opening in the deck which will be beneath the rear bench seat. That will allow at least minimal access to the bilge so I can get at it with a towel to dry it out after use.
Thanks. My cut-out is the same size as the original, but after seeing yours I will be enlarging it. The access under the seat is a good idea too. I was planning on changing mine from one rear seat to two side seats with a cooler in between. I could probably do an access door under the cooler.
groundloop
Active member
What you're planning with the rear seat sounds like a good idea. If I ever get new upholstry I may think about copying that, for the time being at least using the existing upholstry is what's in the budget.
Here's a photo of my bilge pump. I didn't realize how dirty it had gotten in there, or how much bilge-kote I had dripped, until I looked at the photo. (Just visible in front of the float switch is a thru-hull transducer for my fish-finder - yes, besides going fast and pulling skiers I'll be fishing from time to time.)
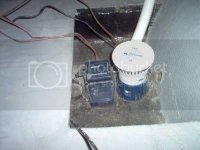
Here's a photo of my bilge pump. I didn't realize how dirty it had gotten in there, or how much bilge-kote I had dripped, until I looked at the photo. (Just visible in front of the float switch is a thru-hull transducer for my fish-finder - yes, besides going fast and pulling skiers I'll be fishing from time to time.)

john lamon
Well-known member
WOW, I haven't looked at this thread for a while, the dash and controls look great, as does the rest of the boat, do you have a date set for the maiden voyage?
Fishing ??? whats that?
Fishing ??? whats that?

ndaniels
Well-known member
Fishing ??? whats that?
Man! You of all people know what fishin is all about

The build is looking great!
john lamon
Well-known member
Man! You of all people know what fishin is all about
The build is looking great!
LOL, he has the right motor for fishing if that's what your getting at, Got to LOVE those fish motas
groundloop
Active member
WOW, I haven't looked at this thread for a while, the dash and controls look great, as does the rest of the boat
Thanks.
do you have a date set for the maiden voyage?
Yup ................. When everything is done and not a minute before.
groundloop
Active member
The fat lady is getting warmed up
It won't be long now (I hope). Probably just 2 or 3 more weeks of work (which will be interrupted by a vacation). Lots and lots of little things to do yet, the kind of stuff that you think will take 30 minutes to do but ends up taking an entire evening.
When I took off all the hardware for sanding and polishing, cracks in the gelcoat at the front ski-pole mount really stood out, even though the fiberglass is solid. It's obvoius this area had been flexing a little bit.
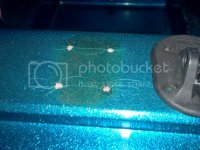
So I made a backing plate from 1/8" stainless to put on the underside which should eliminate any flex in this area.
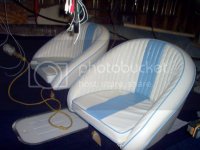
As soon as the carpet was in I got the front seats and ski locker installed. After playing contortionist and gouging the crap out of my arms reaching into the seat boxes to get the seats bolted down I really really really wish I'd have used pedestals instead of seat boxes.
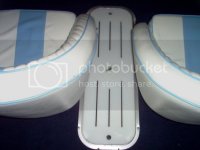
I really like the way my ski-locker cover with the Checkmate logo turned out, this photo doesn't really do it justice.
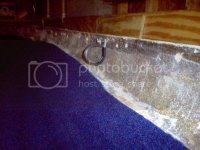
I installed two large Adel clamps for routing the steering and control cables. These will keep the cables from flopping around, and will be fairly easy to undo if a cable needs to be replaced sometime in the future.
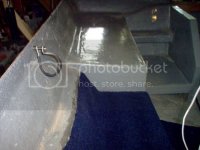
I was planning on getting 6 x 9 speakers for the rear and building enclosures myself, but decided to save time and just get some marine 2 way box speakers insead. Between these and the speakers which will be in the front the stereo will do OK. Not anything like what some guys do for sound systems, but plenty good enough for me and the family.
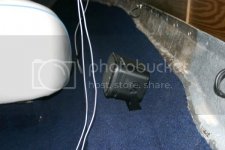
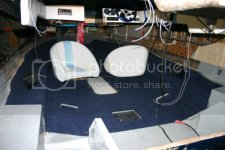
Here's the last photo taken before I permanently installed the cap. I left it off as long as possible because of how much easier rigging everything was with it off.
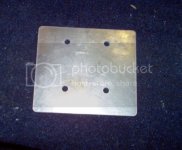
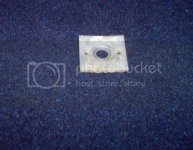
I fabricated a backing plate for the lower engine mounting holes from 1/4 aluminum, it looks much better than what was there before, and should do a better job of spreading load from the bolts.

And yesterday I mounted the jackplate and engine. Major milestones and I'm really beginning to see light at the end of the tunnel.
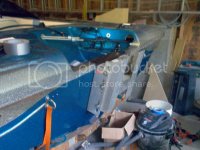
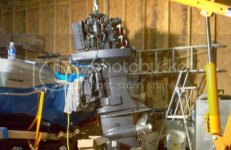
The engine is pretty well covered in dust, even though I had a tarp over it while it sat on a trailer in my garage. Once I got it on the boat I noticed gear lube seeping out around the prop, so it looks as though I've got a bad seal in the lower unit (unless someone can convince me it's normal for gear lube to leak out after 3 months of laying on it's side). I bought this engine off ebay from an outboard mechanic, and it was still on his boat when I picked it up so was able to see it run. There was absolutely no leakage then, so I'm not quite sure whats going on.
It won't be long now (I hope). Probably just 2 or 3 more weeks of work (which will be interrupted by a vacation). Lots and lots of little things to do yet, the kind of stuff that you think will take 30 minutes to do but ends up taking an entire evening.
When I took off all the hardware for sanding and polishing, cracks in the gelcoat at the front ski-pole mount really stood out, even though the fiberglass is solid. It's obvoius this area had been flexing a little bit.

So I made a backing plate from 1/8" stainless to put on the underside which should eliminate any flex in this area.

As soon as the carpet was in I got the front seats and ski locker installed. After playing contortionist and gouging the crap out of my arms reaching into the seat boxes to get the seats bolted down I really really really wish I'd have used pedestals instead of seat boxes.

I really like the way my ski-locker cover with the Checkmate logo turned out, this photo doesn't really do it justice.

I installed two large Adel clamps for routing the steering and control cables. These will keep the cables from flopping around, and will be fairly easy to undo if a cable needs to be replaced sometime in the future.


I was planning on getting 6 x 9 speakers for the rear and building enclosures myself, but decided to save time and just get some marine 2 way box speakers insead. Between these and the speakers which will be in the front the stereo will do OK. Not anything like what some guys do for sound systems, but plenty good enough for me and the family.

Here's the last photo taken before I permanently installed the cap. I left it off as long as possible because of how much easier rigging everything was with it off.

I fabricated a backing plate for the lower engine mounting holes from 1/4 aluminum, it looks much better than what was there before, and should do a better job of spreading load from the bolts.


And yesterday I mounted the jackplate and engine. Major milestones and I'm really beginning to see light at the end of the tunnel.


The engine is pretty well covered in dust, even though I had a tarp over it while it sat on a trailer in my garage. Once I got it on the boat I noticed gear lube seeping out around the prop, so it looks as though I've got a bad seal in the lower unit (unless someone can convince me it's normal for gear lube to leak out after 3 months of laying on it's side). I bought this engine off ebay from an outboard mechanic, and it was still on his boat when I picked it up so was able to see it run. There was absolutely no leakage then, so I'm not quite sure whats going on.
groundloop
Active member
Back in the saddle again
This past Saturday we got back home from a 2 week "vacation" which really wasn't much of a vacation. My father-in-law passed away a little over a year ago, so we spent the entire time cleaning, painting, re-wiring, and fixing up their place in preparation for my mother-in-law to sell. At least I got to see some family and old friends, and managed to go fishing a few times.
I got back to working on the boat tonight, bit the bullet and pulled the lower unit to see exactly what was going on with it - I knew there was a bad seal since gear lube was leaking and there was water in the lube. I started off by screwing two 2x4's parallel and a few inches apart to a workbench to hold the lower unit while I worked on it (this is far easier (and smarter) than the last time I changed an impeller and just sat the lower unit on the floor and balanced it while I worked).
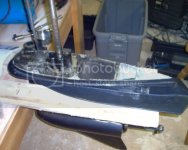
Once I got the water pump housing off it was pretty obvious that the impeller had not "just been changed" as the seller had claimed, because some small chunks of rubber were 'flaking' off the top of the impeller.
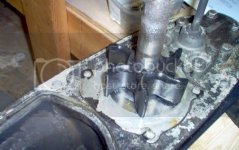
Even more troubling, two of the bolts for the bearing/seal housing were broken off , which probably explains why the seal was shot.
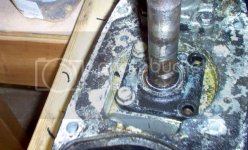
Now I'm wondering about the bearings. They LOOK ok, and turn smoothly, but ????? I may break down and take the lower unit to a mechanic - I hate paying someone else to work on one of my toys, but it'll save me a lot of time that can be better spent on finishing the boat.
I bought this motor on ebay, and had been able to see it run etc. before paying for it. I know you're supposed to check the lower unit lube when buying a used engine, but everything else about it seemed good and I just got in a hurry and skipped that step. In any case, don't EVER buy a motor from Frank Mathews in Savannah, GA.
This past Saturday we got back home from a 2 week "vacation" which really wasn't much of a vacation. My father-in-law passed away a little over a year ago, so we spent the entire time cleaning, painting, re-wiring, and fixing up their place in preparation for my mother-in-law to sell. At least I got to see some family and old friends, and managed to go fishing a few times.
I got back to working on the boat tonight, bit the bullet and pulled the lower unit to see exactly what was going on with it - I knew there was a bad seal since gear lube was leaking and there was water in the lube. I started off by screwing two 2x4's parallel and a few inches apart to a workbench to hold the lower unit while I worked on it (this is far easier (and smarter) than the last time I changed an impeller and just sat the lower unit on the floor and balanced it while I worked).

Once I got the water pump housing off it was pretty obvious that the impeller had not "just been changed" as the seller had claimed, because some small chunks of rubber were 'flaking' off the top of the impeller.

Even more troubling, two of the bolts for the bearing/seal housing were broken off
 , which probably explains why the seal was shot.
Now I'm wondering about the bearings. They LOOK ok, and turn smoothly, but ????? I may break down and take the lower unit to a mechanic - I hate paying someone else to work on one of my toys, but it'll save me a lot of time that can be better spent on finishing the boat.
I bought this motor on ebay, and had been able to see it run etc. before paying for it. I know you're supposed to check the lower unit lube when buying a used engine, but everything else about it seemed good and I just got in a hurry and skipped that step. In any case, don't EVER buy a motor from Frank Mathews in Savannah, GA.
Last edited:
groundloop
Active member
Awesome progress... sorry to hear about the lower, though.
Putting it in perspective, I know it's not nearly as bad as Robbie's Ficht.
Putting it in perspective, I know it's not nearly as bad as Robbie's Ficht.
No kidding!!!! LOL! I wanted to float the boat out on the lake and unbolt the motor.
 Thankfully with the help from Brannon the motor runs like a top now.
Last edited:

