• Welcome to the Checkmate Community Forums forums.

    You are currently viewing our boards as a guest which gives you limited access to view most discussions, articles and access to our other FREE features.
    By joining our free community you will be able to:

    » Interact with over 10,000 Checkmate Fanatics from around the world!
    » Post topics and messages
    » Post and view photos
    » Communicate privately with other members
    » Access our extensive gallery of old Checkmate brochures located in our Media Gallery
    » Browse the various pictures in our Checkmate photo gallery

    Registration is fast, simple and absolutely free so please, join our community today!

    If you have any problems with the registration process or your account login, please contact support by clicking here or by using the"contact us" link at the bottom of the page.

Enforcer Floor resto

Rob B

Moderator
Staff member
In another thread I was showing the shoddy workmanship from a company that put new carpet and interior in for the previous owner. Now I have the pleasure of repairing the mess. So I'll document from start to finish the floor resto in the enforcer like I did on the Pulse170 resto. The plan is to tear out the floor from the cockpit back to the transom. So here we go again

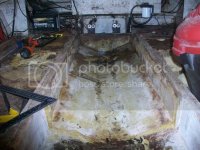
The floor as it looked when I pulled the carpet back, holes in front of the captain chairs
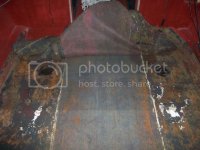
100_1504.jpg

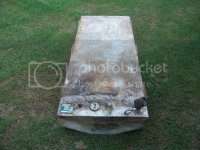
The middle section removed, showing the gas tank. The section was held down with screws no glass or resin just bare plywood.
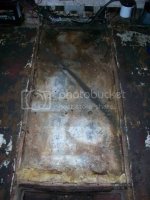
100_1516.jpg

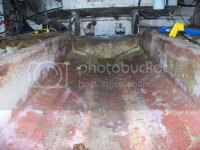
I starting cutting into the floor on the passenger side. The foam underneath totally saturated with water.
100_1665.jpg
100_1662.jpg
100_1660.jpg

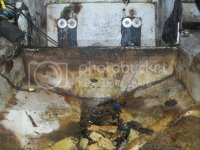
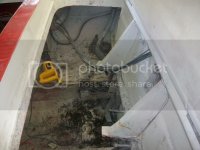
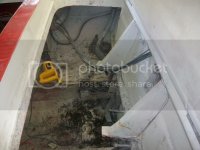
I pushed on the transom knees, both are shot will be replacing those as well. Notice the extra bolts not sure what they are for. I've accounted for all the bolts fro the gil bracket.
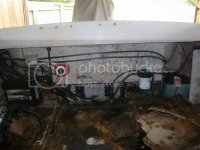
100_1655.jpg
100_1653.jpg
100_1654.jpg
 
Good luck. I know how heart-breaking that has to be!
Yeah , kinda like getting kicked in the gut.:( But on the other hand I've replaced a floor in the other mate I had so I know what to look for now.
I'm following your thread and you're doing a great job.:thumb: Thanks for the kind words.
 
WOW! it had to kill you when you saw all this.

Yes it did. One thing I can't stand is a dishonest person. I'm still trying to figure out if the PO new about this. I probably would've pass on the Enforcer had I known the extent of damage. Or bought the Mate less the cost of the repair. I paid $7000.00 for the whole rig.
 
Yes it did. One thing I can't stand is a dishonest person. I'm still trying to figure out if the PO new about this. I probably would've pass on the Enforcer had I known the extent of damage. Or bought the Mate less the cost of the repair. I paid $7000.00 for the whole rig.
For the price you did ok... i know you are upset now but when you get her fixed you will be happy you ahve her:thumb:
 
For the price you did ok... i know you are upset now but when you get her fixed you will be happy you ahve her:thumb:

I think I did ok on the price as well. I'm over the shock now so it's time to get to work and repair the damage. I know the extent of working on a resto, it takes alot of time. I'm working the night shift right now (shop support) so it's kind of hard working on the boat and still have family time.
 
The middle section removed, showing the gas tank. The section was held down with screws no glass or resin just bare plywood.

My plywood over the gas tank was not glassed, but there were two ~3' x ~8" x 1/2" boards underneath that were glassed over the foam on top of the gas tank.

The deck under the seats had 3/4" plywood under the 1/2" deck. The foam was poured in after the deck was laid because it was molded to these pieces underneath and there were pour holes that the foam rose through.

Were your cross members outside the stringers glassed? Mine were bare and encased in foam. They were only 1/2" ply. I replaced them with 3/4" and will glass them. The center cross members were tabbed about 1/4 of the way up, but bare from there.

I also had no limber holes in the stringers. There was no way for water to drain from outside the stringers. I'm planning to drill some and install plastic drain tubes with 3M 5200 after coating the interior of the hole with Git Rot.

Also, is your deck in three sections running front to back with each section coming together on top of the stringer? I agonized whether to duplicate this or run the deck across the stringers.

JS my floor was put in the same way from the factory. They put so much foam underneath the floor it was bowing up on each side. Yes my floor is in three sections running front to back.
Did you pull the gas tank? I'm catching hell trying to remove it, with the foam around all four sides. Any ideas?
 
Did you pull the gas tank? I'm catching hell trying to remove it, with the foam around all four sides. Any ideas?

I didn't pull the tank. The deck over the back half of the tank was cut out at some point and the foam had been replaced with home improvement store foam (like Great Stuff) that was just laying on top of the tank. The foam on the front half of the tank came up in one big chunk, except for a sliver between the tank and the bulkhead, which I haven't decided if I'm just going to leave there or not.

I think I'm going to finish prepping everything, but not lay the deck down until I have a jackplate installed. The transom looks, sounds and feels good, but I'll know for sure when the motor comes off.
 
JS I called Mike @Checkmate yesterday, he said I should be able to cut between the tank and stringers w/ a sawzaw then pry the tank up. I need the tank removed so I can replace the knees. The other way is removing the spashwell first.
 
I got the gas tank removed today, that was a bear to get out. The tank was surrounded by foam, take me and my neighbor to removed it. I also got the battery,oil resevoir removed and most of the wiring and cables disconnected. Next I'll remove the spashwell, knee braces and the rest of the floor back to the transom. Here's some pictures of today's progress:

Foam under tank after it was removed
100_1683.jpg
gas tank

100_1681.jpg

Foam removed from where the gas tank sat
100_1695.jpg

picture of the rotted knees under spashwell
100_1684.jpg

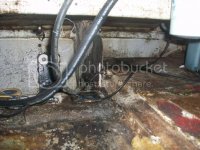
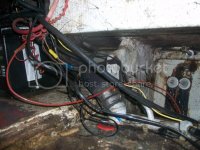
hoses/cables left to be disconnected from motor and trim tabs before splashwell can be removed.
100_1694.jpg
 
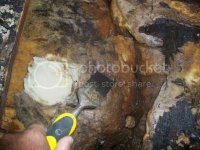
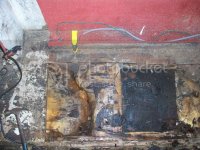
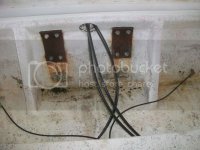
I got the spashwell out took a couple of days to completely remove it. Doing that really open up wasted space. I still need to remove the knees on the transom and finish cutting the floor out. The knees underneath the spashwell had termites or some type of bugs in the wood. All those steel plates will be replaced with either stainless or aluminum plate.

Things that you should'nt find in the bilge area; comb, hair clip, scrub brush, spark plugs, condom packages, leaves, wire, battery support.:shakehead:

Here's some pictures

100_1696.jpg

100_1701.jpg

100_1702.jpg

100_1704.jpg
 
looks like your doin a great job. just keep your spirit up by thinkin of the speed increase next season with fresh floor. i have only pulled one rotten floor out and i can say i feel your pain. it was horrible. i had a termite colony right next door to an ant bed in my mulch floor. see you are finding interesting items, i had found a rusted shotgun shell and a cigarette lighter under my floor. i can understand the lighter, but a shotgun shell? keep up the good work. before you know it you will be done.
 
looks like your doin a great job. just keep your spirit up by thinkin of the speed increase next season with fresh floor. i have only pulled one rotten floor out and i can say i feel your pain. it was horrible. i had a termite colony right next door to an ant bed in my mulch floor. see you are finding interesting items, i had found a rusted shotgun shell and a cigarette lighter under my floor. i can understand the lighter, but a shotgun shell? keep up the good work. before you know it you will be done.

Thanks. This is my second floor resto almost a year to date. I'm hoping to have this done by the end of October.
 
Man this is dajavu....

Sorry to see this, I know how excited you were about the "new" ride!

Just like your other boat, this one will be better than ever.

Keep up the good work, and please, keep this one for a while when you are done LOL. ;)

HD
 
Man this is dajavu....

Sorry to see this, I know how excited you were about the "new" ride!

Just like your other boat, this one will be better than ever.

Keep up the good work, and please, keep this one for a while when you are done LOL. ;)

HD

My wife said the same thing earlier, no more boats for a while. I'm keeping this one unless I get an offer I can't refuse.:D Btw before the carpet get's reinstalled, I plan on rerouting all the wiring it's a total mess.:rolleyes: As I was taking the boat apart I was finding wiring that went nowhere just cut and tied up.
 
Back
Top