• Welcome to the Checkmate Community Forums forums.

    You are currently viewing our boards as a guest which gives you limited access to view most discussions, articles and access to our other FREE features.
    By joining our free community you will be able to:

    » Interact with over 10,000 Checkmate Fanatics from around the world!
    » Post topics and messages
    » Post and view photos
    » Communicate privately with other members
    » Access our extensive gallery of old Checkmate brochures located in our Media Gallery
    » Browse the various pictures in our Checkmate photo gallery

    Registration is fast, simple and absolutely free so please, join our community today!

    If you have any problems with the registration process or your account login, please contact support by clicking here or by using the"contact us" link at the bottom of the page.

78 Trimate-III Resto....

Now your talking. PROGRESS

Dear ole dad strikes again. How are you ever going to teach him manners? :poke:

Dam, I forgot, I am one to and almost the same age. I better keep my mouth shut !!!!!!!!!!!!!!!!!!!!!!!!!!!!!!!!!!!!!!!!!!!!!!!!!!!!!!!!!!!!!!!!!!!!!!!!!!!!!

Keep up the good work. Your making us proud.


he was just excited our show on ship shape tv aired this morning, and one of our distributer had 8 phone calls with in the first half hour!!:banana:, he was working, grabbing some stuff to take to our manufaturing plant... so I really cant complain, or atleast really dont have room to, I always can complain...lol
 
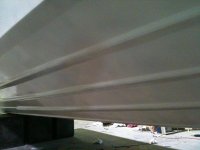
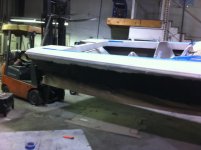
So here we are .... final coat on bottom of hull...
getting ready to sand sides and add color to this boat!!:bounce:
but before I do that im going to take some measurements and make some templates(not paint related but i want to work on some other stuff while paint is drying)
 

Attachments

  • photo12.jpg
    photo12.jpg
    43.9 KB · Views: 37
So here we are .... final coat on bottom of hull...
getting ready to sand sides and add color to this boat!!:bounce:
but before I do that im going to take some measurements and make some templates(not paint related but i want to work on some other stuff while paint is drying)

Sweet!!! Is that the primer or white paint on the bottom?
 
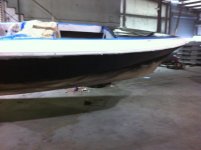
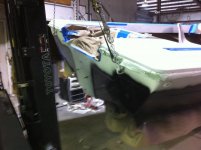
and let there be.....black!:bounce:
 

Attachments

  • photo13.jpg
    photo13.jpg
    45.2 KB · Views: 48
  • photo14.jpg
    photo14.jpg
    44 KB · Views: 47
  • photo15.jpg
    photo15.jpg
    48.5 KB · Views: 51
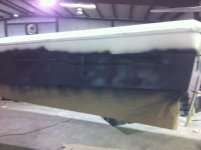
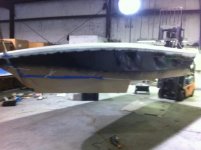
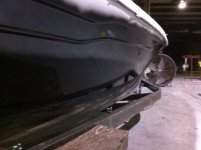
:Dand more black...:surf::popcorn:now to watch paint dry....
 

Attachments

  • photo16.jpg
    photo16.jpg
    49 KB · Views: 38
  • photo17.jpg
    photo17.jpg
    54.5 KB · Views: 37
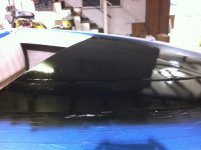
OK, since i posted on the other thread that I didnt like the finish, of the black, I guess I need to explain first whats up.... I have major spider cracks in the gel coat,they are smooth to the touch but visable:pissed:.... they were showing through:yell:...before to many people jump the gun let me say what ive done so far.... started out sanding with 80grit, then 120, then 220, then 320, then primed with epoxy prekote from interlux, sanded with 320, another coat of primer, sand again with 320, another coat and another sand with 320, now i did put the primer on heavy each time, and i didnt sand all the way through, just enough to get as smooth as i could with out going thru(though process was trying to fill the spider cracks)also the multiple coats did build up, I though i had them filled and smooth, couldnt see them in the primer anymore, so went the first coat of black! And there they were:brickwall: then I posted on the other thread... thought of possible buffing to a decent finish but end the end they would still be visable if you looked close.... so I mushed on... sanded first coat and sprayed again, planning to do three coats for some build up in hopes of being able to buff them...Of course have you know it the paint gods must have been listing because the second coat looks like this!!! No cracks!!!! :thumb: i hope it stays this way as it dries! It has been about an hour and the paint is dry to the touch, but it says its not dry until about 6 hours or so, so far so good!!! I also want to mention the cracks are only on the sides(the whole length of the boat) not on the bottom of the hull nor on the "deck"...
 

Attachments

  • photo21.jpg
    photo21.jpg
    49.2 KB · Views: 34
  • photo20.jpg
    photo20.jpg
    54.8 KB · Views: 36
  • photo18.jpg
    photo18.jpg
    54.1 KB · Views: 36
Last edited:
My hull had tons of spider lines in the gel coat wherever the support plywood was glassed to the deck and also some of the inside corners of the hull. I was told to use a small round nose carbide bit to cut into the gel and remove the fine crack line.
Then fill the groove with thickened gel coat. It was a daunting task but
there was no transfer of the fine crack lines into the new paint.
 
I would have been there forever if I lined the cracks... Think of a shattered piece of safety glass... The entire sides on both sides... It was insane... I originally thought it was just a haze in the gelcoat, but look closer it was all fine cracks, non stress related but this boat must have cooked in the sun without any care for a long time....the deck was so faded and worn the metal flakes in the gel were flaking off... It's all good now, enough filling and sanding, I think I'm on the good side of the curve now, it's just ashamed how people don't take care of things... I can tell she looked great in her day, but that's how I got her so cheap....after painting I'm still only in this boat for about 1g, once I redo interior and other mods I'm guessing I'll be in it for 1700-2000, so I can't complain to much....
 
You can see in my photobucket where I had to groove out all the
hairline cracks in the gel. They are not there now.

I guess I got carried away, as usual.
 
Back
Top