• Welcome to the Checkmate Community Forums forums.

    You are currently viewing our boards as a guest which gives you limited access to view most discussions, articles and access to our other FREE features.
    By joining our free community you will be able to:

    » Interact with over 10,000 Checkmate Fanatics from around the world!
    » Post topics and messages
    » Post and view photos
    » Communicate privately with other members
    » Access our extensive gallery of old Checkmate brochures located in our Media Gallery
    » Browse the various pictures in our Checkmate photo gallery

    Registration is fast, simple and absolutely free so please, join our community today!

    If you have any problems with the registration process or your account login, please contact support by clicking here or by using the"contact us" link at the bottom of the page.

1975 V-Mate II Restore

bigredinohio

Active member
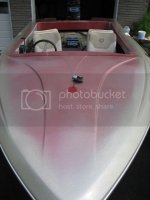
Okay, I am starting my first attempt at restoring an old boat. I decided to go with this little old boat as I thought it had character and I always liked Checkmates. I probably overpaid for it but it was under $1000.
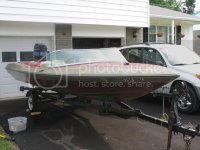
IMG_2428.jpg
what I brought home

I decided to clean the outside and buff the top to see if I could restore any of the gel coat. It did smooth out somewhat but unfortunately it did not restore any color and probably too far gone for simply "sanding and buffing" back to it's original state. I've had some great input in another thread in the gel coat section which is still on-going. I have not made up my mind as to what I want to do :confused: but my wife just wants the boat to function and worry about looks down the road.
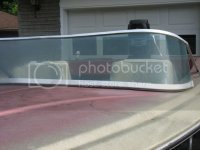
IMG_2432.jpg
before buffing

IMG_2497.jpg
after buffing...you can notice the difference in colors and "blotch" effects

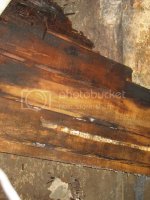
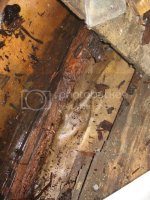
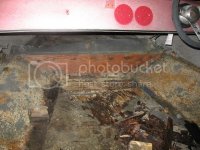
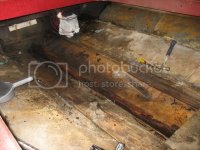
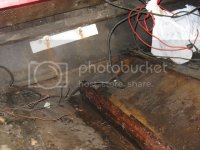
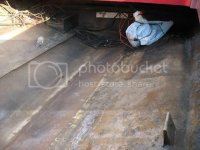
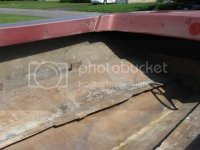
Now I'm in the process of gutting the "soft" floor out of the boat. To my surprise, T-111 wood siding was flipped over and used as the flooring. Also I saw a lot of water standing in the bottom and my stringer is just nasty!
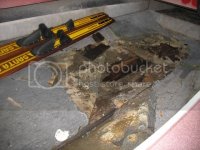
IMG_2508.jpg
sample removal of carpet with flooring coming up with the carpet
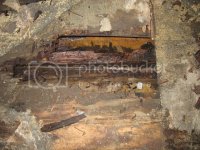
IMG_2509.jpg
stringer sitting in water

IMG_2510.jpg
T-111 flooring!

IMG_2511.jpg
stringer sitting in water

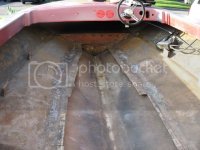
IMG_2512.jpg
a look up towards the bow

One quick question though...is it alright to be doing floor/stringer work while the outboard motor is still attached to the boat? I don't have a stand or any place for the motor to sit in my little garage as the boat itself barely fits and the city won't allow it outside more then 48 hrs.

Well, got to get back at it. All suggestions, pointers and/or comments are most welcome.
 
T-111 flooring!
:rof:Dont you just love used boats! Must of had a sale on it back in the day of the last floor. Or maybe a rare checkmate racing option???? Consider the weight savings with those groves notched out, maybe good for 3mph on the gps!

Looks like you got a neat project on your hands. Good luck and keep us posted.

I did 2 of my mates with the motor still hanging off the back with no problems.
 
Being my first project, I'll let you know the answer to the "used boats" question after I'm done. Thanks for the answer about the motor. It will make it a lot easier to begin with.

I was thinking I could go luan plywood and really lighten her up a bit...just kidding of course! Anyways, the boat was definitely redone (or attempted at one time) because a part of the original floor fiberglass still exists and was never ground out. I just need to find out exactly how the stringers and cross supports where originally with this model boat as there was nothing except a really rotted 2x6 running down the middle of the boat. Also, not an ounce of foam anywhere in the floor. This baby would of sank to the bottom in no time!
 
NO NO NO 1/8" hard board is the way to go, just make sure you get the tempered stuff:poke:!!!

Generaly there is a 3/4" piece of plywood stood up on end for the stringer (enchanters atleast). I believe they use bondo to "bed" it to the floor then glass over it. I have always used 2x6 for replacement stringers. And dont use PT wood IMO, just use exterior grade, cut it to size, and then coat it with resin on both sides.
 
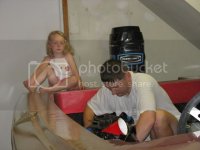
IMG_2516.jpg
My superviser

IMG_2519.jpg
More rotted stringer

IMG_2520.jpg
Close up of the transom

IMG_2537.jpg
Hey look, they do have foam in this boat.

IMG_2538.jpg
Finally somewhat cleaned up. Don't know if you can see the wet mark but I had some water seeping up through the fiberglass that wasn't completely sealed in the little area...would this be the balsa core I hear about?

IMG_2541.jpg
Some sanding done to clean up the carpet glue and old epoxy.
 
glad to see anoter v mate II headed back to the water. When I got my lil vmate the floor was rotten just like yours and rust stains running down from the bottom engine mount boats. I used 3/4 marine grade plywood for the center stringer, I coated it with a 50/50 mix of laminating resin and acetone untill it would not soak up anymore, then wrapped it in fiberglass with waxed resin and used 5200 to set it in the bottom of the boat. Mine was original when I pulled it apart so the 3/4 stringer went center from your foot rest untill about 1' from the transom where a small cutout was made for a bildge pump, then continued all the way to the transom. 2 cross pieces were installed on either side of the bildge pump. When i went back together with her, I enlarged the bildge pump area and installed one battery box on each side. My transom was partially rotted, i removed the original 3/4 plywood that had a 2x4 centerd horizontally and replaced it with 2 pieces of 3/4 marine plywood glassed together and glassed back in the boat. I used 1/2 marine grade plywood for the floor glassed on both sides. 5200 the edges on the way back in then glassed in the top. I also reinforced (underneath) where the seats sit i don't know why, I just did. I cut 4 3" holes front and rear on either side of the stringer to dump the 2 part foam in, then glassed the cut outs back in place. I never weighed her. but three of us guys can pick her up and flip her over on the trailer (what we did when we started the paint process)

While she was flipped on the trailer i backed up the cleats, running lights, speaker mounts and foot pads with 3/4 plywood and foamed in both gunwalls (foamed in a rigging tube on the stbd side). This really made a difference.

The vmateII has a really nice ride, you wont be dissapointed.
 
I have a couple questions...how come I am having difficulty removing the steering cable from the motor?

removal.png


I have "A" loosened and arm that attaches to "D" removed. Surely I don't loosen "B" & "C"? Do I disconnect from the steering wheel? Any help would be great.

Also, I suspect core damage/rot as water seeps up through the fiberglass mat. Where is the best place to get new core and what size did you guys use?

Many thanks
 
You can get core from www.mertons.com ,Joe will take care of you. They have different sizes and will depend on how much you remove. Cooperider has step by step instructions on how to remove and install balsa/core. You're doing a great job so far.:thumb: Here's the link:http://www.associatedcontent.com/article/141391/how_to_repair_a_damaged_balsa_core.html
I'll give Joe a call and pick his brain a little. Looks like they have pretty good prices considering some other places I've looked at. I'm still getting over the sticker shock at the local marina for their supplies!

I just need to get this outboard off the back so I get a rockin' on this thing.
 
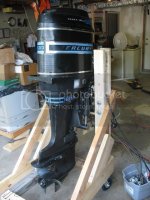
I finally got the motor off with the help of my wife, a circular saw and a cable winch attached to a big beam in my garage.
biggrin.gif
It still took approx. 5 hours to do (first time I've ever done it) and had minor complications. I had (2) 2x8's on my stand and it was too thick for the motor to sit on therefore the circular saw was used (on the wood stand). In addition, I mounted wheels onto the stand (which I wasn't going to do) and it raised the stand too tall so some modification was in order also. All in all, this was probably the hardest thing to prep and do since I'm not a real gearhead. Now I just got to remember where those bolts all go now.

IMG_2563.jpg

IMG_2564.jpg

IMG_2565.jpg

IMG_2566.jpg

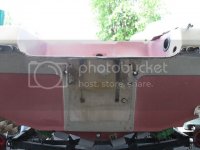
The transom looks fairly rough. Pretty banged up and will probably require a lot of attention. The bolts holding the motor were about half corroded from rust. I was planning on redoing this anyways along with everthing thing else in this boat after reading some threads in here.
 
you are doing a good job. I just started on the 1974 v-mateI i got and its by far the easiest to tear apart, We took the top deck off and then tore the transom out. Its easy compared to the powercats we build. I'm gonna go back with a thicker transom, some stringers with knees, due to hanging a 260 on it.:eyecrazy:, the floor and stringer was rotted like yours also, but the stringer was only a peice of 3/4 ply. I will have pics up soon
 
Good thing you pulled your engine off, that plate is on there for one reason, someone new there was rot in the transom. Are you going to use two pieces of 3/4 marine plywood? or are you going back the way it came apart? Do you have a plan to remove and install the transom?
 
Good thing you pulled your engine off, that plate is on there for one reason, someone new there was rot in the transom. Are you going to use two pieces of 3/4 marine plywood? or are you going back the way it came apart? Do you have a plan to remove and install the transom?
I plan on removing the transom and replacing it. Not for sure what I'm going to use at this moment...I have bigger fish to fry with the balsa core in my opinion. I can tell you that I'm not going to use treated plywood. I'll probably go with marine plywood or CDX but I really haven't priced anything yet nor researched it. :eyecrazy: I know the marine ply will definitely be more expensive but is it really that much better if CDX is prepared properly? Anyways, I'm still reading on how to actually fiberglass and what product to use while trying to getting the nerve to actually use a saw and cut into the boat.
 
you are doing a good job. I just started on the 1974 v-mateI i got and its by far the easiest to tear apart, We took the top deck off and then tore the transom out. Its easy compared to the powercats we build. I'm gonna go back with a thicker transom, some stringers with knees, due to hanging a 260 on it.:eyecrazy:, the floor and stringer was rotted like yours also, but the stringer was only a peice of 3/4 ply. I will have pics up soon
I hope I'm doing this boat justice. If not, I hope people will chime in and let me know.

A 260 on the back of that boat is just insane. :devil: I couldn't even imagine putting on the back of mine...well, I could but the wife enters the picture and my daydream comes crashing down. Do post some pics. Can't wait to see what you do with it.
 
I run a old rude 225 looper on mine. Its got 175 on the cowling, Hehehe fooled the wife for the moment. I'll be home in a week and dig up some of the pics from my restoration. will send them to you.. Fiberglassing isnt difficult, it is about being neat!!! and using tools of the trade. If your sloppy with it, you'll be sanding, and sanding, and sanding, and make one heck of a dust storm, which itches bad. I promise the wife wont like it. Which reminds me. Her nylon stockings will provide much needed protection from the sanding residue from fiberglass. I cut them up and put them on my arms really helped!!
 
I hope I'm doing this boat justice. If not, I hope people will chime in and let me know.

A 260 on the back of that boat is just insane. :devil: I couldn't even imagine putting on the back of mine...well, I could but the wife enters the picture and my daydream comes crashing down. Do post some pics. Can't wait to see what you do with it.


I will I'm about to go take pics of teh tear down, and I will start me a thread
 
Which reminds me. Her nylon stockings will provide much needed protection from the sanding residue from fiberglass. I cut them up and put them on my arms really helped!!

No way, your not supposed to cut them up, leave them intact. You save them for when she pisses you off real bad then when she aint lookin, put them back in her drawer:devil:. Kinda like right after she says "no more money on that damn boat"
 
Being a rookie, I have a ??? on core. I am wondering if I should use 3/8" or 1"2" replacement core? I'm leaning towards 3/8" unless told otherwise

Also, could you guys take a look at this diagram and let me know if this is basiclly what I should be doing. The core repair is based on what I read from Cooperider's column on core repair and the rest is what I've picked up here and there. I'm a visual person and after reading a ton of posts for the past couple of weeks, my head is completely spinning. I've ordered the Runabout Renovation book but it hasn't arrived yet. I'm hoping it gives some more insight. If anything seems out of place or needs changed, please let me know.

diagram.png

I had though of doing the transom in epoxy but after reading some of the posts, I'm a little scared working with the stuff (not to mention the price) so I've decided to work with polyester. It seems like everyone is having pretty good success with it so why not? Should I also look into the vinylester or a combination of poly/vinyl and do I need the waxed stuff for final coating?

Thanks again as always and I apologize for the amature questions. :confused:
 
No way, your not supposed to cut them up, leave them intact. You save them for when she pisses you off real bad then when she aint lookin, put them back in her drawer:devil:. Kinda like right after she says "no more money on that damn boat"
:devil: That's just so wrong...so I'll try it next week :sssh:
 
Back
Top