-
Welcome to the Checkmate Community Forums forums.
» Interact with over 10,000 Checkmate Fanatics from around the world!
You are currently viewing our boards as a guest which gives you limited access to view most discussions, articles and access to our other FREE features.
By joining our free community you will be able to:
» Post topics and messages
» Post and view photos
» Communicate privately with other members
» Access our extensive gallery of old Checkmate brochures located in our Media Gallery
» Browse the various pictures in our Checkmate photo gallery
Registration is fast, simple and absolutely free so please, join our community today!
If you have any problems with the registration process or your account login, please contact support by clicking here or by using the"contact us" link at the bottom of the page.
You are using an out of date browser. It may not display this or other websites correctly.
You should upgrade or use an alternative browser.
You should upgrade or use an alternative browser.
1975 V-Mate II Restore
- Thread starter bigredinohio
- Start date
bigredinohio
Active member
That is the goal. I will probably work on the stringer fillet some more tomorrow but I'll have to wait until next week before I can get back to working on it, depending on my schedule.
T
TheNerd
Guest
Looking good, you will love that boat when its done, I wish I still had my V-Mate II.
bigredinohio
Active member
I hope so...I've spent a lot of time and money into this thing and I'm yet to see this thing float.
bigredinohio
Active member
I haven't worked much on the boat other then glassing the stringer in these past couple of days due to work. However, I'm off a couple of days so I decided to take a trip down to my folks where I have my other boat stored just to work on the other motor. After a little tinkering with taping some bad wires that will need replaced and checking the plugs, it started right up.
http://www.youtube.com/watch?v=IbMQCikKX7Y
I didn't hook up any of the other wires to the battery so I didn't have it trimmed down all the way. Because of this, I noticed some gas dripping from the middle carb while it was running which is kind of hard to see in the video. Is this normal or the motor trimmed up too much causing this?
http://www.youtube.com/watch?v=XiOHjvLUlbE
bigredinohio
Active member
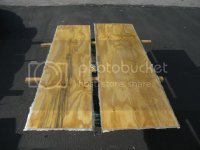
I made some progress this weekend by installing my deck. I glued it in using PL Premium then weighed it down with everything I could find. After setting it in place, I then filled in the seams with the leftover glue.
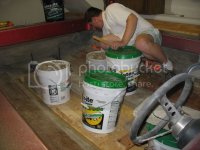
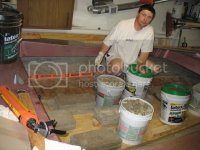
Today, I took off all the weight and scraped off any excess glue from the wood and hull. Then I mixed up a couple of batches of epoxy pb and fillet the edges. If it wasn't for the fact that it's been raining for the past couple of day, I'd have it glassed in but that will probably wait until Tuesday, if I'm lucky.
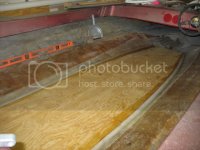
It's so nice to be able to walk on something flat in this boat for a change!


Today, I took off all the weight and scraped off any excess glue from the wood and hull. Then I mixed up a couple of batches of epoxy pb and fillet the edges. If it wasn't for the fact that it's been raining for the past couple of day, I'd have it glassed in but that will probably wait until Tuesday, if I'm lucky.

It's so nice to be able to walk on something flat in this boat for a change!
bigredinohio
Active member
I've been pondering my gas tank and I need opinions. Should I add foam board between my gas tank and wood support or just tack the tank in place with a couple of shots of glue?
bigredinohio
Active member
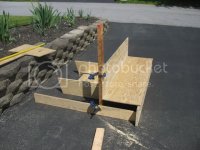
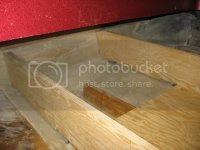
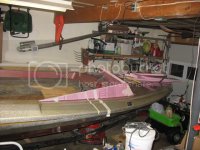
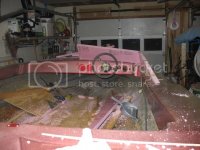
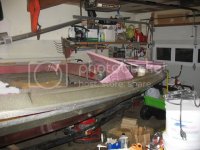
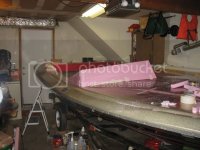
I've started working on the seat bases. Here is the framed construction of my rear seat that will tie into the transom. Once done, I should be able to mount any size motor on this boat but for now, I'll start out with my 1500. When I'm done adding all this wood, I'll probably need a 250 hp to reach good speed.
Anyways, my 19 gallon fuel tank will be elevated in the back to give room for my bilge pump. There will be a 1" allowance on each side of the tank for adding foam or whatever buffer I come up with. The total height of the base for the rear bench seat will only 8" tall. The total height from deck to top of the cap is only 22" so I want company to be confortable without feeling like they are going to fall out. The depth of the seat will be 18". Here are a couple of pictures of what I have thus far but my pieces still need to be contoured to the hall...

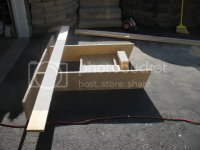
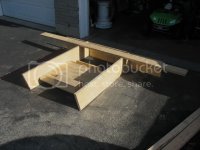
Also, here is the basic construction of my front seat base mounts. I still need to contour the edges with the hall and make the tops that the seat will bolt to.

Anyways, my 19 gallon fuel tank will be elevated in the back to give room for my bilge pump. There will be a 1" allowance on each side of the tank for adding foam or whatever buffer I come up with. The total height of the base for the rear bench seat will only 8" tall. The total height from deck to top of the cap is only 22" so I want company to be confortable without feeling like they are going to fall out. The depth of the seat will be 18". Here are a couple of pictures of what I have thus far but my pieces still need to be contoured to the hall...


Also, here is the basic construction of my front seat base mounts. I still need to contour the edges with the hall and make the tops that the seat will bolt to.

bigredinohio
Active member
I've been pondering my gas tank and I need opinions. Should I add foam board between my gas tank and wood support or just tack the tank in place with a couple of shots of glue?
Are you talking adding foam board underneath the tank or behind it? Fiberglass or Aluminum tank? The resto is coming along great, keep up the good work.

bigredinohio
Active member
Are you talking adding foam board underneath the tank or behind it? Fiberglass or Aluminum tank? The resto is coming along great, keep up the good work.
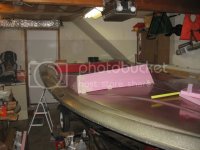
What I am doing is building a wood platform for the gas tank to sit in between the two new braces. I've allowed 1" spacing around the tank and didn't know what I should use to hold the tank in place such as foam board, etc. I didn't want to use two part foam since it's so expensive. As for the bottom, I was just going to lay a piece of carpet down for a sound barrier unless someone has a better idea.
What I am doing is building a wood platform for the gas tank to sit in between the two new braces. I've allowed 1" spacing around the tank and didn't know what I should use to hold the tank in place such as foam board, etc. I didn't want to use two part foam since it's so expensive. As for the bottom, I was just going to lay a piece of carpet down for a sound barrier unless someone has a better idea.
I got it now. You can cut the foam board into 1 or 2" strips to put underneath the tank so water can drain around it. The foam board around the tank will hold it in place.
bigredinohio
Active member
bigredinohio
Active member
yellowfiero88
Well-known member
I like the longer sides better. I would cut a little out of the center, front windshield.
justincase
Well-known member
longer sides and not as tall across the front. my 0.02

