• Welcome to the Checkmate Community Forums forums.

    You are currently viewing our boards as a guest which gives you limited access to view most discussions, articles and access to our other FREE features.
    By joining our free community you will be able to:

    » Interact with over 10,000 Checkmate Fanatics from around the world!
    » Post topics and messages
    » Post and view photos
    » Communicate privately with other members
    » Access our extensive gallery of old Checkmate brochures located in our Media Gallery
    » Browse the various pictures in our Checkmate photo gallery

    Registration is fast, simple and absolutely free so please, join our community today!

    If you have any problems with the registration process or your account login, please contact support by clicking here or by using the"contact us" link at the bottom of the page.

1978 Convincer restoration

My local boat shop gets material from Lorenz and Jones, they are a marine supplier in Iowa. Both the extrusion and vinyl insert are made by taco metals and are really close dimensionally to the original stuff that Checkmate used.
 
Sorry about that! I used (4) #A11-0317 extrusion, it comes in 12' sticks
and #V12-0317 vinyl insert it comes in a 50' roll. The total was around $500.00 for it with freight.
 
Sorry about that! I used (4) #A11-0317 extrusion, it comes in 12' sticks
and #V12-0317 vinyl insert it comes in a 50' roll. The total was around $500.00 for it with freight.

Good work! Could like to find one continuous extrusion though... :eyecrazy:
 
Good luck on that one, I think the freight would kill you! This stuff is pretty easy to conform around the hull and the seams butt up against each other very smoothly. I can take some close up pictures of it if you want to see how they look....
 
Good luck on that one, I think the freight would kill you! This stuff is pretty easy to conform around the hull and the seams butt up against each other very smoothly. I can take some close up pictures of it if you want to see how they look....

If that means I get to see some more of that metal flake, absolutely... :thumb::drool:
 
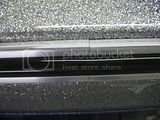
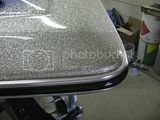
Here are some close up pictures of the rub rail.

th_38b03175.jpg

th_fb367daa.jpg

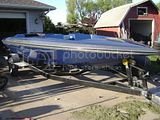
Here is the boat after all the metalflake work out in the sunlight for the first time. This thing looks fantastic in the sunlight, all the sanding and buffing was worth it.
th_9037bc45.jpg

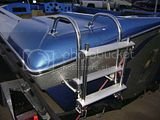
Here is the new ladder installed. The people over at Aquarius made this one out of stainless steel.
th_c67bd4e5.jpg

Now its off to get the engine, drive unit, wiring and gauges installed. A friend of mine owns a boat shop here, he is also an authorized Mercruiser mechanic so I am just going to let him do all the install and wiring work.
 
Looks absolutely terrible, especially out in the sun. I will do you a favor and take it off your hands if you'd like...
 
Thanks, but I think I will keep it anyway!!
By the way, how is your project coming along? Are you getting ready to spray some gel coat?
 
Thanks, but I think I will keep it anyway!!
By the way, how is your project coming along? Are you getting ready to spray some gel coat?

Not yet... ran out of epoxy, had to order more again. Will finish the transom/stringers/floor glass this week, p77 it flat and put a coat of epoxy over it, then I gotta fix the swiss cheese top/bottom hull holes w/poly & cab and then finally flip it... Can't imagine the bottom prep will take but a few days, I'll just need to get a couple days of higher temps to be able to spray the gel.
 
Sounds like fun, I was lucky, even though the floor and stringer in my boat were junk the transom was rock solid, this saved a huge amount of time.
I will post some pictures of the engine/ drive install in a few days.
 
Outlaw, the boat looks beautiful. You have way more patience than I do. I would have said the H#!! with it and wrote the check a long time ago.
 
Thanks rjstarr, in the beginning of this project I was very close to doing just that and letting someone else do the work. The problem is I am very picky about how this boat would look when done, so as the saying goes "if you want it done right, do it yourself"....It has actually turned out to be a fun project so far.
 
This is exactly as a resto should be!!! Very nice. I plan on doing near the same on my 77 Trimate IV in a couple of winters. My Gelcoat is spider cracked in spots and I'd like to change the colour but still stay old school flake like you did... Make it kind of as i would have ordered it in 77 but only with new gauges, stereo, appolstery, and paint.


One of the best Restos I've seen!
 
Back
Top