• Welcome to the Checkmate Community Forums forums.

    You are currently viewing our boards as a guest which gives you limited access to view most discussions, articles and access to our other FREE features.
    By joining our free community you will be able to:

    » Interact with over 10,000 Checkmate Fanatics from around the world!
    » Post topics and messages
    » Post and view photos
    » Communicate privately with other members
    » Access our extensive gallery of old Checkmate brochures located in our Media Gallery
    » Browse the various pictures in our Checkmate photo gallery

    Registration is fast, simple and absolutely free so please, join our community today!

    If you have any problems with the registration process or your account login, please contact support by clicking here or by using the"contact us" link at the bottom of the page.

1978 Convincer restoration

Hey Man,
I don't know what you do for a "living",--- but if it's not working on boats then you missed your calling, --- you obviously have the talent / passion / and patience, as shown in this beatiful resto your doing....
Can't wait to see pics of this gorgeous Mate in the water...
I think I see a B.O.T.M nomination for the near future in the making...
Keep up the awesome work.
 
Thanks Kurtster, I really appreciate the compliments.
I dont work on boats for a living, I am a territory rep for a diesel engine/parts company. I used to work at a performance boat shop in Corona CA several years ago and learned a few tricks from them.
 
Gorgeous work!

enjoyed reading your thread.

regarding your drive and engine set-up. I would try running a small enough wheel that your max rpm at wot is closer to 6000 than 5000. the top of the drive is the weak link and it is the torque that will kill it (assuming NO water in lube, etc...). running more reduction - be it through a higher (numerically) gear ratio or smaller prop and higher engine rpm - transfers more of the torque to the lower.

horsepower (at wot) equates to top speed, since torque x rpm = horsepower, higher rpm at a similar or slightly higher speed means less torque and less stress on the drive components. with increased rpms however comes more heat, but as long as you're running high quality synthetic lube, that shouldn't be the main issue. Hope this is helpful...
 
Thanks for the input on the drive unit wca tim, I was thinking of starting with a 25" pitch 3 blade prop and going from there. I believe the gear ratio in the drive is 1.65, so I may have to experiment a little. I think running that outdrive at 6000 RPM is a little too much for it, have you had any experience trying this, and did the drive live doing this?
 
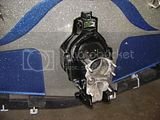
Well the out drive and gimble housing have been stripped down, rebuilt with new bearings and seals, then painted with an epoxy based paint.

th_cc4a61fa.jpg

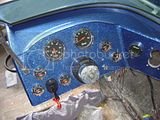
I have also started to install the gauges. we installed a fue block under the dash, the original wiring did not include one but I think its a good idea to add this feature.

th_c1ecad7e.jpg

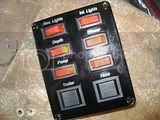
New switch panel from Dana Marine to go in where the original trim/tilt buttons were on the dash.

th_c0f3892c.jpg

HOPEFULLY, we will get the engine installed next week. I will post pictures then.
 
Man that boat has come a long way, you done a good job on the flake and gel work. Nice torque numbers on that small block :thumb:
 
We have the gauges and the switch panel all wired up and installed, we are also installing a fuse block under the dash just to be safe. The exhaust system is here and I have installed it on the engine as well as the water pump, P/S pump and the pullies. The engine should be ready to drop in by mid next week, I am still waiting on some water distribution hoses for the manifolds. I have to remember to take my camera next time I am at the shop!!
 
Not yet, I have been swamped at work the last 2 weeks. We will be installing the engine and the outdrive this Thursday or Friday. Iam getting pretty anxious to get it in the water!!
 
Well I have finally got back to working on the boat. Today we finished up the dash and all its wiring. Next, we got the engine wired up and installed. I had to order different exhaust risers/elbows as the risers Eddie Marine sent to me would have put the exhaust tips too high on the transom and interfered with the steering cable. I re ordered an "S" pipe configuration that will work much better.

th_e67b85d2.jpg

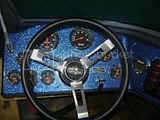
Here is the finished dash layout. One I get the side bolster back from the upholstery shop I will get the shifter installed.


th_d75e8a66.jpg

Here is the engine installed and ready for final wiring and exhaust elbows.
Hopefully we will be ready to install the drive and start this thing next week.
 
I am hoping to have it running next weekend. Then I can start on the interior. This is becoming an expensive project but, I really like the way the boat is turning out!!
 
Very cool, boat is turning out really nice!! Should run right along pretty good with that small block in it! You gonna cut some holes in the transom and run thru-hull exhuast? I bet it will sound nasty!! :thumb:
 
I bought a set of EMI Thunder exhaust manifolds with the stainless risers. These will exit through the transom with some 4" stainless exhaust tips (no mufflers) I hope it sounds as good as it did on the dyno!
 
This is going to look killer out on the water with the sun beating down on it. That engine cover will get some attention I bet. :thumb:
 
I am going to use the stock engine cover, I measured and it will clear the flame arrestor and the exhaust elbows. That way it will look like a stock boat/engine !!
 
I am going to use the stock engine cover, I measured and it will clear the flame arrestor and the exhaust elbows. That way it will look like a stock boat/engine !!

:drool::drool::drool::drool::drool::drool::drool:

This has been a great thread.....
Your upcoming water pics {and hopefully video w/sound} are gonna be very kool --- your doin a great service to old Mates :thumb:
 
I have been working on getting all the little details ironed out on the engine installation and wiring. Here is a photo of the engine with the exhaust elbows in place.

th_57747ad2.jpg

I am still waiting for the alt. bracket to arrive so I can get the alternator installed. I have made a new engine wiring loom, battery cables and installed a battery cut out switch.
In the process of installing the engine and checking the drive alignment I checked the final fit of the engine hatch.... I dont know how I measured it before, because I thought everything would fit but it is now 1 1/4" too short!!

th_4b99ef22.jpg

I think we are going to extend the sides of the engine hatch to increase its height (maybe....)

Here is the decals I had made for the side of the boat, I installed those today also.
th_36ee22fa.jpg

I will install the drive unit and get some photos of that Monday. SLOWLY getting closer to running it. I will figure out how to post a video with sound on here.
 
Back
Top