Gimme Fuel
Well-known member
Making good progress Robbie! I like the blue and silver. Should pop in the sun and look killer!
Welcome to the Checkmate Community Forums forums.
You are currently viewing our boards as a guest which gives you limited
access to view most discussions, articles and access to our other FREE features.
By joining our free community you will be able to:
Registration is fast, simple and absolutely free so please, join our community today!
If you have any problems with the registration process or your account login, please contact support by clicking here or by using the"contact us" link at the bottom of the page.
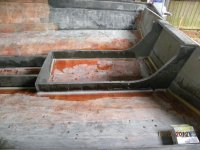
Is there a place for water to get out of the ski locker/fuel tank areas? Hard to tell from the photos.
HD
Robbie,
I went through my photobucket album and couldn't find the measurement pics. I was sure I had them in there, but...nope. I can't find them on my Mac either. So...I'm no help.
Sam

 The measurements I need now are where the captains seats go and to locate blocks for the bench seats to attach to. I'm not going to attach the bench seats to the alumium angles like the factory used. No floor penetrations.
 I too like the paint colors. It will be one sharp boat when you're done!
Looking good Robbie
How is it working with the Coosa (sp?) What are you going to use for the actual floor?
A little side note: If the coosa is anything like PVC material (azek) the saw dust sticks to everything. Use a can of Anti Static spray. When working with PVC, I spray it on me, tools, tool belts etc...
 looks like youll be splashing it by spring time....looks great!
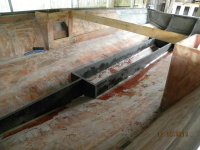
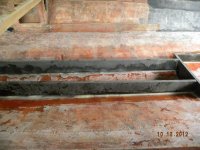
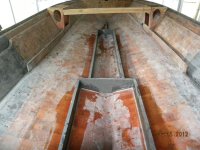
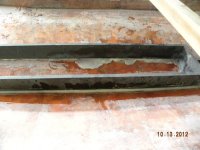
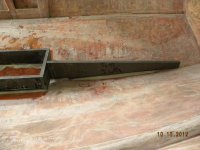
 For whatever reason I either get the consistency of to runny or it looks like grits. Anyway for better or worse the stringers are embedded. I'll need to remove the waste with a chisel tomorrow or sometime next week and add more cabosil and epoxy. I was under the assumption that cabosil/epoxy doesn't sag, maybe I read it somewhere. My first instinct was to embed the stringers in 5200, should've done it. Anyway here's the pictures.
mashed potato consistancy...Right now I'm soooooooooo f%%king frustrated with cabosil and epoxy resin!