• Welcome to the Checkmate Community Forums forums.

    You are currently viewing our boards as a guest which gives you limited access to view most discussions, articles and access to our other FREE features.
    By joining our free community you will be able to:

    » Interact with over 10,000 Checkmate Fanatics from around the world!
    » Post topics and messages
    » Post and view photos
    » Communicate privately with other members
    » Access our extensive gallery of old Checkmate brochures located in our Media Gallery
    » Browse the various pictures in our Checkmate photo gallery

    Registration is fast, simple and absolutely free so please, join our community today!

    If you have any problems with the registration process or your account login, please contact support by clicking here or by using the"contact us" link at the bottom of the page.

78 Predictor Full Restoration

Looks like we may have to take a vote on the paint job. I counted about five in favor of the three tone. Keith and i have been back and forth between all black and all blue. I might be able to live with keeping the white if the black was gone and it had some white stripes on the bow.
.

Nothing wrong with goin with all blue and white!!! :D
 
Thank ya its gonna be a sweet ride I have run the bar tires on a lot of tractors I dont see a lot of problems with the turning and if I remember right the 318 has power stearing so it should be fine does yours still have the onan in it?
Yep, it has power steering (so nice!). Mine came with the B43 Onan but was upgraded to a P218 Onan from a tractor that fell off the forks while being unloaded. I bought it from original owner who was also the service manager at the deere dealer. After selling some of the 3 point implements, I have noting into it.....can't beat that! I still have the 3 point, cab, 49 snow blower, 4' rear blade, and 50" mower deck :cheers:
 
83 Predictor

AdamBomb
Thanks for the posting of your pictures and the notes in your captions. I'm very new at this and recently purchased an 83 Predictor. I was thinking it may be a good idea to take it down to the transom to actually get an idea of its condition before I start re-doing the interior. Your photo's alone showed me alot and hope to see more in the developmental stages and the Final out come as well. I'm just in the thinkng stages but seeing how your going about it has me feeling a little more confident and able to understand how to take it apart without doing any irreverseable damadge.


Keep It Slow and Easy
Hank
 
Awesome pics! And that's a good lookin' boat!

I picked up a '78 Predictor myself a few months ago and am about to start tearing into it. This is my first boat though so I'll be learning on the fly.

Can you go into a little more detail on the separation of the hull halves and the removal of the floor? Or is there a thread somewhere that details this a little more?

I'm probably going to take mine out this weekend then I'll be taking everything apart.

Thanx!

.
 
Thanks for the encouragement HANK PREDICTOR and imelmo. I'd encourage you both to work on your boats if you have a warm dry place to lay up the fiberglass, and expect to pay around $500 for fiberglass and transom materials. We're doing transom, stringer, floor, carpet, interior, paint, jackplate, and motor install. so my bill is climbing fast. and I honestly didn't expect that I would have to replace anything but the transom, motor and seats when I first started.
To answer your questions, imelmo there are a ton of restorations like mine or better on the forum. you can search for them in the restoration section.
To seperate the top deck, you first remove the hardware that holds the bumper in, and remove the bumper, then drill out the rivets that hold the rail on, remove the rail, then drill out the remaining rivets, they also threw in a few screws to remove. Some of the rivets you may have to drive out the center before you can drill them out, it was real pain in the ass.
Depending on the condition of the floor, you can remove the carpet, and seats, then either tear up the floor with your hands and a crow bar or cut sections out of it peice by peice, being careful not to cut, or puncture the hull. when you get to where the floor connects to the fiberglass, you can tear up the layers of fiberglass that holds it down and remove the hull and deck puddy and remaining fiberglass with a hammer and chisel and a grinder. we punched through the boat in a couple places so expect to do some patch work if you arn't super careful.
 
So after a short break to fit Keith's Pacifica into the garage we've started making progress on the Predictor again.
DSC02726.jpg
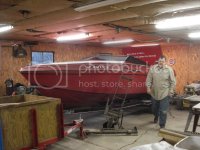
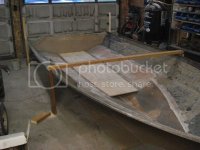
To free up some room, make it easier to work on and stabilize the boat, Keith and I Picked it up off of the trailer and set it on the floor, then built a frame around it. You can also see the new floor we cut and dry fitted in this picture. We made the floor a few inches narrower than the original, this will allow us to cover up the slot the last guy cut in the hull and it will also make for a little more room in the boat.
DSC02722.jpg
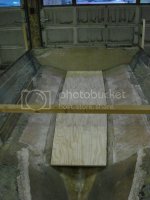
Here's a couple closer shots of the floor. We still need to cut a peice for the bow.
DSC02723.jpg
DSC02725.jpg
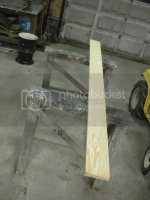
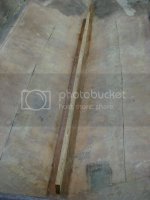
We had enough plywood left from the floor sheet to cut a couple peices to glue together for the stringer.
DSC02730.jpg
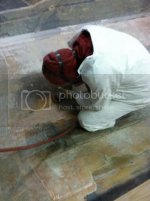
Heres a shot of me prepping the old fiberglass for the new layers. I will be doing this for many more hours before the boat is ready for the rest of the new glass work.
grind.jpg
 
You can make quick work grinding/sanding with a 7" grinder on the hull. You're doing a great job!!!:thumb:

028875084000xl.jpg
 
Looking at these pictures makes me want to get mine back home and work on it . But will have to wait till spring :(
 
Adambomb

Thanx for the update. I have decided to take it completely down and rebuild it from the transom up. I do see a peice of wood from what was left of the original flooring after one attempt to restore it by someone. it looks like there was only one stringer in this 83 from the transome up to the bow beneith the flooring right in the center. I'm far from getting to that point still cleaning and tearing it down. Learning as you go is a slow process lol.
Keep those updates coming. The're very motivational.

L8R
HANK

x2 :thumb:
 
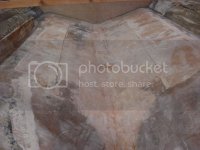
After a couple days of grinding the hull in preparation for glass, and another shipment of resin, fiberglass mat and hull/deck putty arrived in the mail, the boat is ready for the stinger and floor! heres a picture of everything prepped. and a shot that gives a good look at the balsa through the fiberglass. I punched through to the balsa in a couple thin spots with the grinder but it's all sealed back up now.
DSC02739.jpg

DSC02742.jpg
Heres a look at the stringer install. With everything already dry fitted, keith and I screwed the stringer to the floor and buttered it with hull and deck putty. After that, we carefully carried it over the to hull, centered it, set it in, and applied even weights.
DSC02746.jpg
DSC02748.jpg

DSC02751.jpg
After the putty had dried, we unscrewed the floor, removed it, and applied another two strips of putty on either side of the stringer where the wood meets the hull, doing this will help us get good contact when we apply the fiberglass. when that had dried, we sanded it to prepare it for the mat.
DSC02761.jpg

DSC02757.jpg
Heres some pictures of stringer after we fiberglassed it. the mat starts at the top of the stringer and extends a few inches past where the floor will end.
DSC02765.jpg
DSC02767.jpg
Next, back to grinding. and prepping the floor you can see the lighter tracks on either side of the hull where I prepped for the floor to meet it. We also went over the top of the stringer to level everything off and make the floor sit snug and painted two coats of resin on the bottom of the floor to seal it up and keep if from rotting. and the last shot shows keith patching the end of the stingers to cap it off from moisture.
DSC02776.jpg


DSC02777.jpg
DSC02768.jpg
 
Ya the floor is all glassed in now I just went out and walked on it its strong as hell next is transom knees seat boxes carpet and then the top goes back on going to glass the splash well to the transom after all that its time for paint put the jack plate and the motor and run it hopfully by May.
 
Nice job :thumb: Seeing all these resto threads starting to pop back up is really making me want to go and pick mine back up and get at it again ....
 
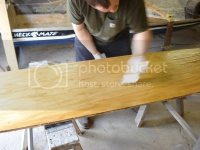
Thanks for all the positive feedback everyone! It definitely motivates me to post this stuff when I know people are actually reading and appreciating it...so here is another update. Floor install. After the stringer was prepped and ready to recieve the floor, I buttered it up with an even layer of hull and deck putty and we set the floor down in the boat and screwed it back down to the stringer.
DSC02769.jpg
DSC02781.jpg
DSC02780.jpg
next we filled the gaps between the floor and the hull with putty, ideally we are looking for no bubbles when we lay up the glass.
DSC02786.jpg
DSC02785.jpg
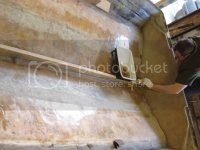
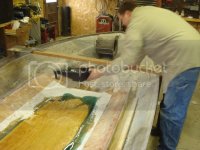
Next step was to cut a sheet of fiberglass that covered the entire floor, and start covering it with resin. we used a different type of mat for the floor, the 1708 that we used on the transom had stitching in it that made it thicker and easier to work into corners and angles, the mat we used on the floor was a rougher sheet with no stitching.
DSC02790.jpg
DSC02788.jpg
heres a look at the first layer. We will lay two more after this while it is still tacky, two strips on either side of the floor to cover up the seam and seal the remainder of the hull. You can see the fan in the first shot set in the bow. we turned this on after the mat started to harden a bit, this really speeds up te curing process.
DSC02792.jpg
DSC02794.jpg
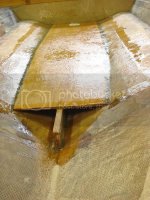
This shot is taken after the next two layers were put down.
DSC02796.jpg
 
Back
Top