-
Welcome to the Checkmate Community Forums forums.
» Interact with over 10,000 Checkmate Fanatics from around the world!
You are currently viewing our boards as a guest which gives you limited access to view most discussions, articles and access to our other FREE features.
By joining our free community you will be able to:
» Post topics and messages
» Post and view photos
» Communicate privately with other members
» Access our extensive gallery of old Checkmate brochures located in our Media Gallery
» Browse the various pictures in our Checkmate photo gallery
Registration is fast, simple and absolutely free so please, join our community today!
If you have any problems with the registration process or your account login, please contact support by clicking here or by using the"contact us" link at the bottom of the page.
You are using an out of date browser. It may not display this or other websites correctly.
You should upgrade or use an alternative browser.
You should upgrade or use an alternative browser.
95 Pulsare 2100BR resto
- Thread starter Madtown
- Start date
Madtown
Active member
T
TheNerd
Guest
I would grab the threaded rod with some vise grips and see if you can back it out. Is "unthread" a word??
Are those threaded rods or long bolts? You should've put some grease or vaseline on the threads to keep them from sticking or bonding to the transom. Worse case you'll have to cut them out. If they're bolts I would put a pull bar and socket on it and heat it up like JW said and try to turn or back them out.
Madtown
Active member
They are threaded rod & did spray silicone on them before hand but guess that was not enough. I gotta say this project is starting to wear on me. After trying get them out & no luck I am getting to the point of wanting to just dump it or let it sit. Patience is worn out at this point.
Eric
Eric
After thinking about it try this: cut the rod flush with the transom then drill a pilot hole in the middle then use a drill bit just little bigger than the diameter of rod and try drilling it out. You'll need a carbide or diamond tip bit to drill thru the metal. Hope this makes sense. You'll probably only need to drill 2" max depending on how thick the transom is.
BADBK
Well-known member
BFH... Big Forking Hammer, just do it. Smack it outta there, enough whacks and it'll give. Worse case scenario, it will take a little bit of the transom gel with it, nothing that can't be easily fixed. I would have someone grab the head with a vise grips trying to work the head loose while someone was beating the sh!t out of the bolts from the inside.
I hear ya on the project wearing on ya... take a break and go back at it in few days/week. I've come to the realization I most likely won't be on the water at all this year or at best end of the summer...
I hear ya on the project wearing on ya... take a break and go back at it in few days/week. I've come to the realization I most likely won't be on the water at all this year or at best end of the summer...
BFH... Big Forking Hammer, just do it. Smack it outta there, enough whacks and it'll give. Worse case scenario, it will take a little bit of the transom gel with it, nothing that can't be easily fixed. I would have someone grab the head with a vise grips trying to work the head loose while someone was beating the sh!t out of the bolts from the inside.
I hear ya on the project wearing on ya... take a break and go back at it in few days/week. I've come to the realization I most likely won't be on the water at all this year or at best end of the summer...
BK I like how you think!!! 10 lb sledgehammer should do the trick.
 I didn't want him to mess up what he's done so far.
Ramifications
Well-known member
as BK said, big ol hammer. Before you go and smash it, cut them down to about 2" sticking out. This way you won't bend what is sticking out when you smash it and it is less bolt that needs to pass through the transom. Used a slightly smaller bolt to drive it once it is below the surface, like a punch...
Good luck and be persistent! you will win
Good luck and be persistent! you will win

Madtown
Active member
Lots work done tonight. First off the rods turned right out when applied some heat to then with Map gas. Only took about 20 minutes & no damage done. Next filled in some spots & smoothed out the transom were meets hull. Used West System Six10. Stuff works fantastic but goes fast. Not a lot in tube. Will be buying more for sure. Cut & glassed the knee support for under the splash well. That will get bonded in tomorrow.
Madtown
Active member
Knee support is in & finished up with the fillet work on the transom. Will add some fiberglass tomorrow to tie it all in. Started to fit the stringers but got really hot out & decided to call it a day. By the end of the weekend I hope to have the stringers set. Will feel great to have the transom area finished as that seemed to take forever.
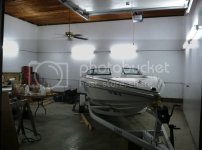
Moved boat into the second shop also. Its heated, better lighting, air compressor & still plenty of space.
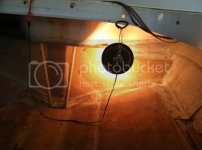
Knee support under splash well bonded in & fillet work on ends of transom finished.
Eric
Moved boat into the second shop also. Its heated, better lighting, air compressor & still plenty of space.

Knee support under splash well bonded in & fillet work on ends of transom finished.

Eric
Lots work done tonight. First off the rods turned right out when applied some heat to then with Map gas. Only took about 20 minutes & no damage done.
What did I say

Glad that worked for you! Too much heat would have been as bad as not enough. Whew!
Madtown
Active member
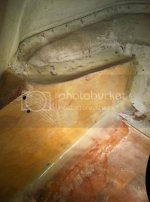
More work done this early AM. Decided I didn't like the way the wood looked in the drivers side stringer under the bow floor so out it came.
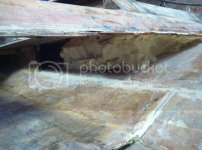
Next was to make replacement piece & glass.
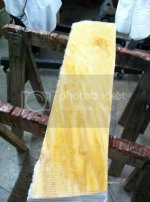
Finishing up transom work.
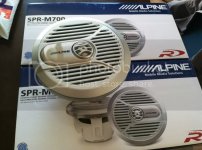
New speakers
So one question I have is instead of using my 2X8's for stringers I like the idea of bonding 2 pieces of 3/4 marine ply for them. They would be 1 1/4 thick with thickened epoxy in the middle. Seems like better idea & less weight. Thoughts?
Eric

Next was to make replacement piece & glass.

Finishing up transom work.

New speakers


So one question I have is instead of using my 2X8's for stringers I like the idea of bonding 2 pieces of 3/4 marine ply for them. They would be 1 1/4 thick with thickened epoxy in the middle. Seems like better idea & less weight. Thoughts?
Eric
Ramifications
Well-known member
two pieces of ply with glass between is probably stronger than 2x anyway. You should check out what Ballardnboyz did with his stringer. He took two pieces on edge and attached one piece on top to keep it straight.
Here is a pic from his thread and a link to that page
http://checkmate-boats.com/forums/showthread.php?t=22880&page=11

Here is a pic from his thread and a link to that page
http://checkmate-boats.com/forums/showthread.php?t=22880&page=11
Madtown
Active member
Thats a really good idea.My stringers vary in hight almost 2 inches front to back so made a really good cardboard cut out tonight for cutting the wood.
Dont know why did not think of this sooner but I get in & out of the boat a lot in the same spot. Been lucky for most part that have not dropped anything on it but decided better safe than sorry during the restore.
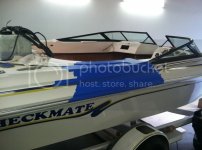
Eric
Dont know why did not think of this sooner but I get in & out of the boat a lot in the same spot. Been lucky for most part that have not dropped anything on it but decided better safe than sorry during the restore.

Eric
Last edited:
Ramifications
Well-known member
Looks like a standard NPT style plug, which is a tapered, self sealing style plug. The only thing I wouldn't like about that is the fact it will require a wrench, pliers etc to make it tight. Why not just install a standard plug from the outside of the boat? I have no choice but to install it that way on my boat, since I can't easily reach the drain from the inside.

