• Welcome to the Checkmate Community Forums forums.

    You are currently viewing our boards as a guest which gives you limited access to view most discussions, articles and access to our other FREE features.
    By joining our free community you will be able to:

    » Interact with over 10,000 Checkmate Fanatics from around the world!
    » Post topics and messages
    » Post and view photos
    » Communicate privately with other members
    » Access our extensive gallery of old Checkmate brochures located in our Media Gallery
    » Browse the various pictures in our Checkmate photo gallery

    Registration is fast, simple and absolutely free so please, join our community today!

    If you have any problems with the registration process or your account login, please contact support by clicking here or by using the"contact us" link at the bottom of the page.

96 185 Pulse restoration.

Well I found out real fast if you have water intrusion into the Core in a roundabout way.
Wheeled the hull outside in 10 degree weather to do the remainder of my grinding and removal of the rest of the stringers. 2 hours later wheeled her back into the shop and low and behold I had a perfect outline in the form of condensation of what balsa needed to be removed. Just another setback as I had hoped to get the stringers set last weekend and started on fitting the floor. Go figure, nothing goes quite as planned. I'm now sure I have the most neglected/abused 1996 boat in the country.
The water likely came from a chip in the gelcoat on the bottom of the pad midway up from the stern that I missed when I first looked at the boat. guess the previous owner wasn't smart enough to know how easily a balsa cored hull can become serious issues once water has a way in. :shakehead:
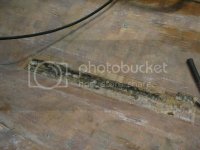
P1010847-Copy.jpg

Oh boy do I know the feeling.:brickwall: I found bad core during my Pulse170 resto, the PO decided to use longer screws to attach the seat to the floor.:( Stringers are looking good.
 
ST

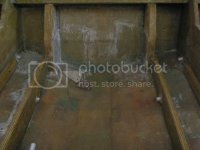
I noticed that the front bulkhead doesn't have a limber relief at the bottom. This area, on my starflite, held water and was severly rotten
because the water was trapped.
 
ST

I noticed that the front bulkhead doesn't have a limber relief at the bottom. This area, on my starflite, held water and was severly rotten
because the water was trapped.

Plan is to build a designated anchor locker in front of the bulkhead with a dedicated drain hose to the bilge. What I have in mind should work out well for that.
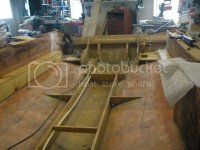
Work up till then is moving along at a snails pace so it seems. Did get new core in and glassed. As CP's 170 Pulse had, I also had scews from the seat base that protuded into the core that had to be replaced. I'm hoping to set one mid stringer this week. I only plan on setting one first so I can pull a straight line down it so both end up purrty straight I hope. ;)

P1010849.jpg

P1010852.jpg
 
P1010867.jpg

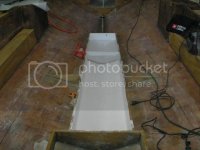
Drains everywhere! No chance for water to sit outside the stringers or stringer bulkheads ever again.P1010865.jpg

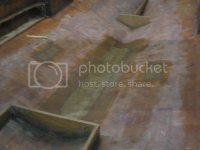
This drain tube will lead to forward of the bulkhead to drain the anchor locker were adding in. It'll support a Dandorf style anchor.

P1010859.jpg

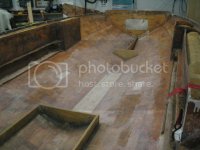
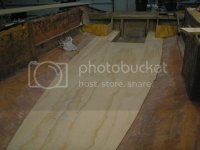
Floor being fitted.

P1010854.jpg

Decided to go with gelcoat to line ski locker and transom, bilge area. side boxes also enlarged to now enable us to install large style cup holders (6 total)

P1010869.jpg
 
Looky what I found! :banana:2010 slightly used 150Hp Etec 20in. The deal was WAY to sweet to pass on. Looking forward to setting this on a 8-10" setback/hyd jackplate!
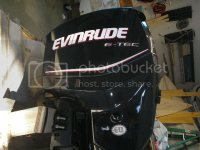

P1010868.jpg
 
ST I like the pvc inserts for the drains, that was a great idea. Did you roll, brush or spray the gelcoat in the sk locker and bilge area? I bet it's easier to work on the stringers, floor and transom with the top off. Great job!!!!:thumb:
 
I rolled it CP. I'm gettin tired of sanding so as little of the area you'll see it just was not worth the extra time to make it nice and shiney. A removable rubber mat is planned in the locker to keep ski's or what have you from banging around anyway. Taking the deck off was probably my best idea, oherwise I'd problably be totally crippled up by now. :eyecrazy:
The PVC looking stuff came from Home Depot and is called Sharkskin It's much cheaper then PVC, much more flexible but will do the same job just as well if not better. It's 1/2" and you can use PVC elbows and such as they fit perfect. I'm thinking I can finally lay the front half of the floor in this week at least then glass in the anchor locker floor.

Interior was ordered from Checkmate 3 weeks ago and they were very helpful. Plus the price was right! I'm sure I won't be ready for it when it get's here but figured I'd get my order in before any of the boat show orders started in heavy. (hope they get many!)

Memorial Day weekend this thing is gonna be on the water one way or another!:banana: Hear of any good deals on Hyd J/P or steering let me know. :)
 
I agree with the sanding, that has to be the most time consuming part of the resto and it gets old quick. I probably went thru at least couple hundred dollars worth of sandpaper, thankfully it's fairly cheap. I'm amazed at the different ideas people come up with when doing restos.You're doing a great job on the resto, keep up the good work.:thumb:
 
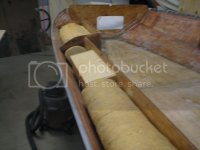
Just enjoying this thread. Those foam filled areas are called "air tanks". Under 20ft, the boat is supposed to float level submerged. Spreading the foam out like that is supposed to help it do that.
 
Just enjoying this thread. Those foam filled areas are called "air tanks". Under 20ft, the boat is supposed to float level submerged. Spreading the foam out like that is supposed to help it do that.

Thanks Coop, I'll likely leave the gunnles foam filled and was trying to figure a way to add some back in under the battery boxes and between where the soon to be anchor locker is, yet keeping it from coming in contact with the hull itself. (air viods so to speak) Would the stuff they use at the factory stick to say wax paper?
 
I agree with the sanding, that has to be the most time consuming part of the resto and it gets old quick. I probably went thru at least couple hundred dollars worth of sandpaper, thankfully it's fairly cheap. I'm amazed at the different ideas people come up with when doing restos.You're doing a great job on the resto, keep up the good work.:thumb:

Most of the ideas come from this forum, I just try and put a new spin to them!..;)
 
Looking good. Should be another nice boat that has been redone the right way. Its just sad that someone can take money, stick it into a boat, abuse it, then leave it out to rot away like our boats did at one time. I must say that my boat has been caught in the rain 2x in the past 2 years now. Both times, I had a cover on it and it was while driving back to the garage.
 
Stil getting after it slowly but surely. :eyecrazy: Of course I did not order near enough gelcoat to paint alll the area I wanted so Joe at Mertons will be getting yet another phone call from me!

P1010878.jpg

BTW, his white Gelcoat is a pretty much dead on match in the white CM used on this hull. Thus I'll be using it to fix chips, etc in the hull itself.

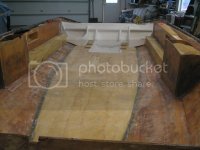
Here is the future Dandorth anchor locker area coming along and the side storage I was asked to add by the ladies in the house.. :eyecrazy:


P1010881.jpg

P1010877.jpg

I'll foam back in the area around the side storage boxes even though I hate the thought of adding foam back in anywhere. :poke:

P1010882.jpg
 
Last edited by a moderator:
Wow! Don't know how I managed to get 2 pic's side by side but sorry for the long scroll as I can't figure out how to edit that without starting all over..
 
Need a opinion from you guys that have done the floor before. If you look you'll see 4 tabs of bi-axel knit down each side under and over the Mat.

Question is do you think that is enough to keep the floor good and solid just tabbing it in with the mat?

I really don't recall how huch knitting the factory used for this purpose when I took it all out..
 
looks fantastic. are you going back with carpet or the pirelli floor.

I love the idea of the pirelli floor but man that means yet more work vs carpet. The pro's to the pirelli floor are lot's so I kow in the end it'd be worth it, but man I gotta stop somewhere and draw a line in the sand, so to speak.. :thumb:
 
Need a opinion from you guys that have done the floor before. If you look you'll see 4 tabs of bi-axel knit down each side under and over the Mat.

Question is do you think that is enough to keep the floor good and solid just tabbing it in with the mat?

I really don't recall how huch knitting the factory used for this purpose when I took it all out..

From the pictures, looks like you've got plenty. After glassing my floor in I went around the perimeter with 8" mat just for piece of mind.
 
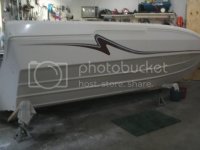
I've switched gears a bit and have started to work on the hull exterior in preperation to move it onto my heavy duty boat dollies that are now under my Sunsation. Mainly because the make shift dolly it was under was not supporting it well enough to continue finishing inside the hull.

Lots of wet sanding and I had to get pretty aggresive in spots starting with a 400 grit wet sand moving to 1000 grit (in most areas) then onto the finsish sand of 2000 grit. 3M heavy duty and 3-M medium duty compound was used to bring back it's luster. Love the fact that CM did not paper thin the gel on their hulls! I also recieved myinterior pieces and skins from CM! Look very nice and I'll try and get some pic's of them soon. Wine colored carpet 36oz was also purchased form Cablelas so once I get done fixing the gelcoat chips still needing attention then I can get serious again about bringing it all together... All in all I pretty happy with how well the gel has come back to life!

P1010895.jpg


P1015317.jpg


Now onto fixing the abuse on the keel by many sand beachings of this boat... :yell:
 
Back
Top