• Welcome to the Checkmate Community Forums forums.

    You are currently viewing our boards as a guest which gives you limited access to view most discussions, articles and access to our other FREE features.
    By joining our free community you will be able to:

    » Interact with over 10,000 Checkmate Fanatics from around the world!
    » Post topics and messages
    » Post and view photos
    » Communicate privately with other members
    » Access our extensive gallery of old Checkmate brochures located in our Media Gallery
    » Browse the various pictures in our Checkmate photo gallery

    Registration is fast, simple and absolutely free so please, join our community today!

    If you have any problems with the registration process or your account login, please contact support by clicking here or by using the"contact us" link at the bottom of the page.

Diary of a Preditor Restoration

when do you plan on having it finished? are you shooting for this season?

not a hope for this year - i don't have a motor or upholstry. i hope to get as far as paint this year but am running into a couple of issues. this boat will stay in the water possibly for weeks at a time, my parents cottage is 10 minutes from my house, petit paints and my local boat body guys say that the paint won't stick to the bottom if left in the water - it will blister and fall off - i'm open to suggestions - what did you use matt? how is it holding up?

what distance apart did you place your stringers. i like the idea of having 2 stringers instead of one.
 
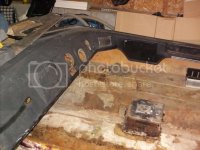
so, got the boat sitting on the pad, blocked the sides and threw some bracing in to keep this thing from shifting on me. i have removed the spray foam that was there - it was already wet, the guy for some reason drove nails through the stringer for some reason. here are a few more pics:

stripped down - all the dash holes will be filled. i don't like the current gauge set up and if the budget allows hydrualic steering will go in.

HPIM0127.jpg

here is the last nail left in the stringer after i dug all the foam out, love the hose idea, even runs UNDER the stringer - that is supposed to drain the water to the bilge - it would work if this repair had been done properly - i will try and save it but it'll be installed alot differently

HPIM0130.jpg

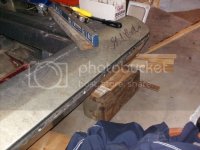
blocking left and right sides:

HPIM0132.jpg
HPIM0133.jpg

i love the stringer work here - notice how nothing touches the bottom of the boat - quality!

HPIM0134.jpg

hope to split the hull and deck this week - it's ready to go i just need the time!

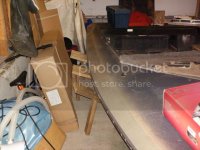
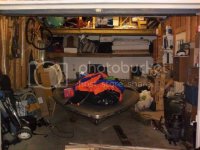
getting better at this photobucked thing, at least the pics are better size now - here is my workspace - so much room :brickwall:

HPIM0135.jpg
 
Ooooohhh, your going to be cleaning dust out of all that stuff for years.


I suggest grinder in one hand, shopvac hose in the other.
 
If your gonna leave it in the water your best bet is to regel atleast the hull. And look into maybe building a PVC and plastic tent over your hull while grinding or like coop said you'll be cleaning fibreglass dust out of your stuff for years to come.
 
ahh haaa - my head not cabbage, once the transom is back together and the stringers are in, it's going back on the trailer - and pulled outside for sanding and grinding - i want to do as little as possible in the garage :thumb:
 
so with the help of a neighbour i got the deck off tonight. saw some wierd stuff when i lifted the deck.

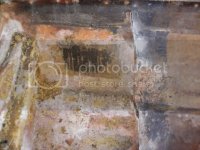
what is this stuff? it looks like a liquid filler of some sort?

HPIM0140.jpg
HPIM0145.jpg

here's the foam box, it appears to have buckled, maybe water, maybe from the foam installation originally.

HPIM0139.jpg
HPIM0144.jpg

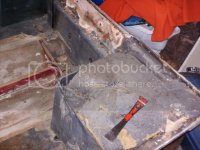
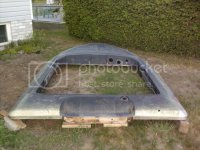
here is the naked hull

HPIM0138.jpg

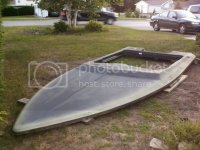
and the naked deck:

HPIM0136.jpg

HPIM0137.jpg


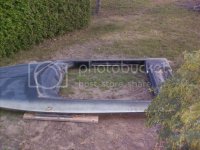
and if all of this doesn't work, well, it'll make a helluva a planter:

HPIM0146.jpg


the transom appears to be fairly rotten and very wet. i'll no a little more tomorrow. i measured the transom and it's 1 1/2" thick, i was thinking of stepping up to a 2" transom, just because i want to put a 150 on the back and think the extra thickness would be good. any thoughts?
 
Chris E My Pulse is 2 3/8" finished

3/4" x 3 = 2 1/4"

I would think that would be plenty with some additional support bracing inside

2 1/4" of plywood glassed with 12oz.biaxial is more like 4" of plywood.
 
Chris E have you considered a copy of the pulsare on the stringer system.

Bulk heads with split in stern for belly tank
a little more fuel would be nice with that 150

I never priced a tank I stayed stock with mine but INCA made mine
They have a web site INCA molded products or something like that.
The site lists all sorts of sizes maybe one would work.

i have been admiring the pulsare set up - that's a good idea about the tank - i'll have a look and see what they have

thanks:bigthumb:
 
Congrats Chris, that may be the new record for worst looking rescue mission. That liquid filler you were talking about is Bondo. Mate used it anytime something didn't line up quite right to fill the voids.
Here's the link to my Starliner resto to give you some ideas...there is a great sense of accomplishment in projects like these. Have fun and enjoy the journey. http://checkmate-boats.com/forums/showthread.php?t=4539&highlight=born
 
thanks mark, just went through that thread front to back - now i know how i'm doing my stringers. - that's the design i want - just wasn' sure how to do the bow - picked up some 3/4 ply yesterday at homely depot - couldn't beleive it they were the cheapest place around.

i stepped on the stringer by accident yesterday and the damn thing fell over - knew it was a crap install but thought he might have used a nail or something to hold it in - oh well.

so i have a question - should i do the stringers before demoing the transom or does it matter - the boat is flat on the pad on the floor of the garage right now with supports holding the bottom.
 
Chris E I would tie those tank stringers to the transom so do the transom first. Also tie your vertical transom supports to the tank stringers.

I would wrap the stringers in glass before install one long piece
both sides & top. The bottom will be buried in resin & more glass when you install them in the boat.
I've found you need to ease the edges so the glass will roll over if not it's to sharp a turn for the glass & you'll get air pockets

You might consider using douglar fir for the stringers with plywood bulk heads as plywood is hard to ease the edge without splintering.
When I say ease the edges I mean like with a router just a little & just the top 2 edges not the bottom .

I also would use a long piece of glass to tie the stringers to the boat it's easier, faster & stronger.

You can buy the glass in several different widths.The width I used allowed me to cut long strips for the wraps & still had enough width to cover the deck.I believe I used about 14 yards or so on mine.
I bought it from a supply house down here .Bought the the resin in 5 gallon buckets.I used every drop of 10 gallons.

How about this post for a bunch of unsolicited information!

There is always more than one way to skin a cat
So chime in fellas

There are more tips Chris E I'll give you a break for now
 
This thread will have more pics than every other combined by the time i'm done with it :eyecrazy:

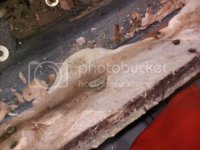
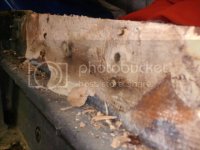
so, the boxes are out - both sides foam were soaked for the bottom 3". the odd/frustrating thing is this - soft spots on both sides in about the same location:

port side - see the black - that's the issue

HPIM0154.jpg

HPIM0153.jpg

starboard side:

HPIM0149.jpg
HPIM0147.jpg
HPIM0157.jpg

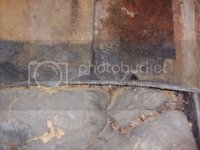
love this - not sure what the scoop is with it:

HPIM0150.jpg

will marks epoxy idea work on these soft spots? or am i cutting and grinding?
 
My transom was about the same size as yours. Its now right at 3" think. If it would float I could hang twins.
Just remember that you will have to trim the splash well back to match the thicker transom.
When I glassed my transom in I started with one board. Coated with resin and glass then installed in the hull. I used screw's to clamp it to the outter skin. I then glassed the new wood to the sides. I ran from the transom up the side of the hull about 8" I then repeated the process with the other 2 sheets.
 
If you are going to add transom knees then do the transom first. Personally I would do that instead of the foam boxes, which incidently function as knees. If I was doing it again I would run the stringers up the transom as knees.
 
boxes are not going back - that's for sure - i think knees are a good idea, so that's what i'm going to do - my kids will be in this boat so going half way isn't an option.

some good news today, i found a company in toronto that sells endura 2 part paint which is supposed to stay put if the boat sits in water. best part - they sell metallic paint - which is what i would like - same price as standard which is awesome, and i also found cheap resin in barrie for 30 a gallon better than i can get if for wholesale and my wife in down in barrie 2 times a week.

tonite - if it isn't to bloody hot, i'm going to start tracing out and measuing the transom plywood - before i hack the transom apart i only want to do this once - i am getting smarter in my old age.
 
Back
Top