• Welcome to the Checkmate Community Forums forums.

    You are currently viewing our boards as a guest which gives you limited access to view most discussions, articles and access to our other FREE features.
    By joining our free community you will be able to:

    » Interact with over 10,000 Checkmate Fanatics from around the world!
    » Post topics and messages
    » Post and view photos
    » Communicate privately with other members
    » Access our extensive gallery of old Checkmate brochures located in our Media Gallery
    » Browse the various pictures in our Checkmate photo gallery

    Registration is fast, simple and absolutely free so please, join our community today!

    If you have any problems with the registration process or your account login, please contact support by clicking here or by using the"contact us" link at the bottom of the page.

Its time...

I have always used a circular saw set to about 1/4". I only use it to cut through the fiberglass going parallel to the boat. Then I cut just past the wood (leaving a sliver of wood there) and use a screw driver to remove the rest of the rotten wood. When you have to cut side to side, you will have to set it to about 1/2"+ and make sure you dont go throught the glass in the hull. ****If you do make sure you patch it with fiberglass before putting new floor back in**** The stringer is prob rotten also. It should just about fall apart and then you will have to cut it at the front with a sawzall. Scrub it with concrete degreser, grind it all, and scrub it all again. This will make the best adheasion for the new glass.

Good luck!


Yeah I already found the mushy stringer...
 
wow I am really sure I took over 200lbs of wet foam and wood out now all I have to do is clean it up and start getting ready for the new stuff.
 
wow I am really sure I took over 200lbs of wet foam and wood out now all I have to do is clean it up and start getting ready for the new stuff.

LOL if you want some extra practice before you do yours, you can come down and finish mine first! All I got left to do is the engine compartment. I will buy the beer and burgers!!!:banana:

Check for blackness on the hull fiberglass, that is a sign of rotten balsa wood in the core. VERY, VERY, BAD!
 
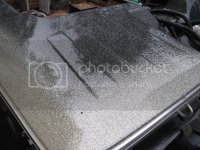
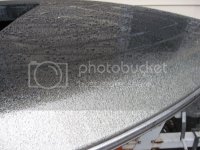
over the weekend I finished polishing out everything above the rub rail and waxed it.:drool::drool::drool: Guys I can not believe how nice it looks now. I will take some pics later today to post up. I also have all the floor out now and I may be shopping for wood and glass tomorrow night.
 
damn rain:irked:
IMG_1724.jpg
IMG_1725.jpg
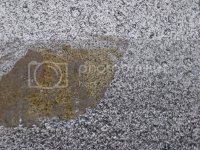
here you can see how close the origional color is with the color now, there is still some sun fade but not bad.:D You need to look really close to see the difference(that is where the plastic plate used to be).
IMG_1726.jpg
 
Wizard,
I'm going thru a floor replacement myself, looking good so far. Good luck with the floor.:thumb:
 
well I notice the flotation box's on the sides were swelled up so i dug into them and I am going to gut the foam from there as well. Now I noticed the wall on those box's is really thick if I remove them should I replace them?
 
well I notice the flotation box's on the sides were swelled up so i dug into them and I am going to gut the foam from there as well. Now I noticed the wall on those box's is really thick if I remove them should I replace them?


I repaired part of my floor in my Trimate a few years ago the rest has stayed pretty solid. Im gunna head up to the lake house this up coming friday and bring my boat home for a bit . I have to pull the power head and reseal it leaks water on the exhaust side of the motor . Its a easy fix just have to pull the power head in order to do it .
 
Looks really good so far. Can't wait to see it done:thumb: Like many here, I also did the floor in my Hydrostream. Nothin that hard work and benjamins can't solve.
 
ok I bought some floor supplies this weekend I am ready to start installing new stuff. I have some questions though how do you guys attach the new floor to the stringer. I heard of some liquid nails stuff? Come on 175 and coop. My plans are to coat all the pieces I install with resin let it cure then glass it to the hull like the stringer and the sump hole peices or should I glue them down before they get glassed in place?
 
ok I bought some floor supplies this weekend I am ready to start installing new stuff. I have some questions though how do you guys attach the new floor to the stringer. I heard of some liquid nails stuff? Come on 175 and coop. My plans are to coat all the pieces I install with resin let it cure then glass it to the hull like the stringer and the sump hole peices or should I glue them down before they get glassed in place?

Wizard, I used Hull and deck putty where the floor meets the hull for a smooth transition. I used PL Premuim for Lowes to attach the floor to the stringers along w/ screws then sealed the floor with two layers fiberglass cloth and resin. Hope this helps.
 
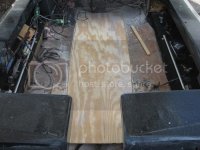
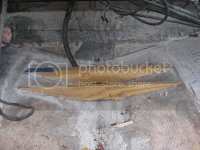
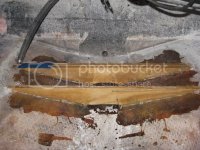
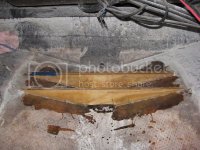
Most of the main floor is done being cut I put the first coat of glass for the underside on the floor today and test fit it. The bilge braces are done and glued in place I just need to glass them in. I also have the floor done for the bilge waiting to finish the braces to put them in. I took some pictures of the floor test fit.
IMG_2326.jpg
IMG_2327.jpg
 
As I work on my boat I am noticing all kinds of weird things. First the drivers seat box is forward 1 inch more than the passengers. Also looks like someone at the factory started to drill the holes for the driver and passenger cup holders but was putting them in the wrong spot so they cover them with the carpet and called it good. I will get some pictures of these findings.
 
Custom Built or Stevie Wonder?

I removed my rear seat back last week to do some work on my ski pylon brace and I noticed that the holes for the bolts were drilled as much as 4 times in order to line it up. It looked like a large roto-zip was used and just cruised around making holes until one was in the right place. I assume that each boat is slightly different in fit and so the flexible hole process was necessary. Made me laugh a little as I thought that I wouldn't have even done that!

In working on my boat in the past I have learned the rule that you can't assume that any item is symmetrical from side to side. Specifically the bow rail supports are not even close to the same spot side to side. I try to measure everything quite a few times before commiting. Your floor looks great, good job!
 
glassed in the supports for the bilge and rear floor today!!! Next dry day I dont have class I will take the measurments for the stringer and get to work on it.
IMG_2338.jpg
IMG_2339.jpg
 
Lookin good, hope to see it on the water in person sometime this summer.
 
ok I test fitted the floor with the stringer today and I liked how it fit so much I put a layer of resin on it so I can get in glued and glassed in soon.
 
Back
Top