• Welcome to the Checkmate Community Forums forums.

    You are currently viewing our boards as a guest which gives you limited access to view most discussions, articles and access to our other FREE features.
    By joining our free community you will be able to:

    » Interact with over 10,000 Checkmate Fanatics from around the world!
    » Post topics and messages
    » Post and view photos
    » Communicate privately with other members
    » Access our extensive gallery of old Checkmate brochures located in our Media Gallery
    » Browse the various pictures in our Checkmate photo gallery

    Registration is fast, simple and absolutely free so please, join our community today!

    If you have any problems with the registration process or your account login, please contact support by clicking here or by using the"contact us" link at the bottom of the page.

Tri-mate 2 over haul.

Well this weekend the weather was crappy. So I went inside. All the interior pannels and seats are removed from the boat. All the wood was not sealed and has rotted. spent the day cutting out backings for the seats and interrior parts. When it warm's up again It will be ready for resin.

rooster_3.jpg


1975 Checkmate Tri-mate 2, 2.4 200+
 
Having fun yet?????
icon_biggrin.gif


Checkmates may not be the fastest boats on the water, but they are the nicest looking!
 
Alright idea guru's, I need some guidance.

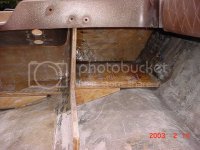
Set the deck back on so I could measure for the new knee's.
The knees are tight against the transom, splashwell and hull.
Looking at hull and where the floor goes I have to come up with a way to tie the knees into the hull. They have to be set wider than the factory floor.

Idea's??? Lets hear them.

Gus17.jpg


rooster_3.jpg


1975 Checkmate Tri-mate 2, 2.4 200+
 
Just have to love cardboard.

This picture gives a better idea of the knee/floor/ hull realation.

Gus18.jpg


rooster_3.jpg


1975 Checkmate Tri-mate 2, 2.4 200+
 
Since I have no room for a stringer for the knees. I may have to try something diffenent.

How about this. Since the knee will be glassed to the following.
Knees to splashwell, transom, side, (boxed section, attached to hull and sides). The knees run right next to where the floor lays down. How about using the floor as a stress member?

Looking at what was under the floor from the factory, it looks like they did this before. (only one stringer and 2 cross braces)

rooster_3.jpg


1975 Checkmate Tri-mate 2, 2.4 200+
 
I have no advice Gus, but you're doing a great job. It's looking good....
icon_smile.gif


~~~~~~~~~~~~~~~~~~~~~~~~~~~~
Webmaster
Checkmate-Boats.com-The Fanatics Home!
 
I like to run a boat at top speed, not working on it so I am sorry but I can't tell you much either... I can't wait to see how it runs first time out...

Checkmates may not be the fastest boats on the water, but they are the nicest looking!
 
See how it run. Oh yea. Spent another day glassing and sanding. I have the support knees cut, glassed and bonded to the transom. I will let it cure over night and then glass the mess in the afternoon when the temp gets up a bit.
21403knees1.jpg

rooster_3.jpg


1975 Checkmate Tri-mate 2, 2.4 200+
 
Your doing great... Keep up to good work... What was your proposed date, April????

Checkmates may not be the fastest boats on the water, but they are the nicest looking!
 
Gus,
when I used to build hydro's, pop rivets, clamps, and pre-fabbed "l" angles were my best friend. I put aluminum l angles on all flat pieces of honeycomb so I could rivet the angle to the pirpindicular piece of honeycomb. For bonding, I used hysol, then once I bonded the pieces together with the rivets, I layed Kevlar in with some epoxy, rolled it oud and bingo. Was I clear or did I confuse you? This is easier to show in person than to explain, sorry. Epoxy was my preferance, some will tell you to use other materials, Actually, West System is what I used for Laminating and Hysol for bonding.
 
Bill, I was close. I used "L" brackets to get the knees tight against the transom. When the epoxy is dry I will remove the brackets and lay down a bunch of bi-axle. Its kind of over kill with the added beef in the transom, pluse boxing the rear. The box's are for the batt. and trim pump. Plus maybe a little flat,dry storage.

rooster_3.jpg


1975 Checkmate Tri-mate 2, 2.4 200+
 
Another day of fun filled glassing and grinding. Knees are in and glassed, boxes are it and super glassed at the rear. Still have to the front of the boxes and finish up. But its getting there.

Gus19.jpg


rooster_3.jpg


1975 Checkmate Tri-mate 2, 2.4 200+

[This message was edited by 175checkmate on February 15, 2003 at 08:47 AM.]
 
I can't say that it is literally looking good, but it's getting there. I can't wait to see the finished product...

Checkmates may not be the fastest boats on the water, but they are the nicest looking!
 
A shot of the inside of the spash well. Deck is back on, just set on to see if I screwed up on the knee height. It fit real well.

Still have to rivit the deck back down and glass the well in.

Getting closer.

Gus20.jpg


rooster_3.jpg


1975 Checkmate Tri-mate 2, 2.4 200+
 
I have the greatest respect for the people that do this for a living. They have to be out of there mind for doing it for a living.

Z, you would be amazed at what boats look like under all the carpet, and gloss.

rooster_3.jpg


1975 Checkmate Tri-mate 2, 2.4 200+
 
Even by what you've done, it looks of good shape, even though that last picture doesn't show anything except ground...

Checkmates may not be the fastest boats on the water, but they are the nicest looking!
 
Gus, that is amazing. I'm completely impressed! You did a great job.

I'll have to get some tips on glassin' one of these days when I get around to building that seaflea!
icon_smile.gif


~~~~~~~~~~~~~~~~~~~~~~~~~~~~
Webmaster
Checkmate-Boats.com-The Fanatics Home!
 
Back
Top