• Welcome to the Checkmate Community Forums forums.

    You are currently viewing our boards as a guest which gives you limited access to view most discussions, articles and access to our other FREE features.
    By joining our free community you will be able to:

    » Interact with over 10,000 Checkmate Fanatics from around the world!
    » Post topics and messages
    » Post and view photos
    » Communicate privately with other members
    » Access our extensive gallery of old Checkmate brochures located in our Media Gallery
    » Browse the various pictures in our Checkmate photo gallery

    Registration is fast, simple and absolutely free so please, join our community today!

    If you have any problems with the registration process or your account login, please contact support by clicking here or by using the"contact us" link at the bottom of the page.

jeff,s enchanter resto

Status
Not open for further replies.
Jeff just curious did you get the white primer (714-002 ) and personally i think that trying to sand everything in #320 to get ready for paint is going to be a long road blowing thru a lot of paper in a heartbeat . Just my 2 cents ........................

actually, i was going to use 220...my mistake..what would you use??

...and they were out of white...would had to wait over a week...so we got gray....
 
Jeff , is your painter using the low 5% voc Imron that comes in a black can or the Imron that has the most poison that comes is a green and white can ,and what is the paint code 555-U or............. just asking it is not a biggie .
 
Jeff , is your painter using the low 5% voc Imron that comes in a black can or the Imron that has the most poison that comes is a green and white can ,and what is the paint code 555-U or............. just asking it is not a biggie .

He was buying it today...Ill ask him...
 
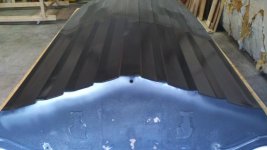
heres the hi build primer just at the repair or blueprint area. block sanding it next, then fill any pin holes, then the entire bottom with a coat of primer, then sand, then white Imron..,
 

Attachments

  • primer 036.jpg
    primer 036.jpg
    36.7 KB · Views: 59
  • primer 040.jpg
    primer 040.jpg
    26.5 KB · Views: 55
  • primer 038.jpg
    primer 038.jpg
    32.3 KB · Views: 54
heres the hi build primer just at the repair or blueprint area. block sanding it next, then fill any pin holes, then the entire bottom with a coat of primer, then sand, then white Imron..,
Jeff , just walked in the door and will give you a call shortly & can i recomend filling all pin holes prior to any sanding and........ this is food for thought and, that is................... why spray primer to sand and re-spray over the primer again blowing more money on sand paper ( unless needed ) because you are covering the same area (or surface ) twice using a different primer that costs more money along with more sand paper ............... and not to mention having to use a costly reducer & activator , and just by chance if your painter decides to use an aftermarket reducer like Montana the dollars still add up because everything that is needed to spray Imron is very pricey . Jeff , ole friend ...i am not trying to be rude and i hope that you understand what i am trying to say or the logic behind what i just wrote .
 
Last edited:
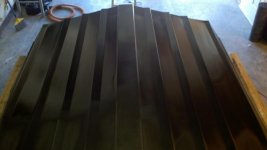
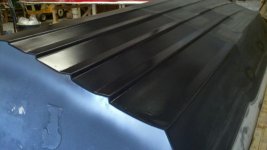
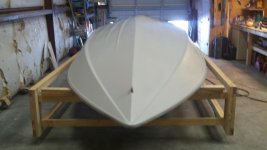
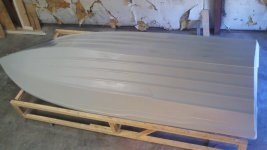
ok so heres the primer and then the wet sand with 400 grit...not sure that was necessary, but its what my painter wanted....was a nice sunny day anyway..:)
 

Attachments

  • primer 032.jpg
    primer 032.jpg
    39.4 KB · Views: 59
  • primer 024.jpg
    primer 024.jpg
    34.3 KB · Views: 57
  • primer 011.jpg
    primer 011.jpg
    36.7 KB · Views: 60
WoW!!!!!!! And i can almost bet......... that you know what i am thinking as i shake my head . :( :(:eek: Good luck my friend and take care . OUT !!!!!!

your thinking it looks great and its really smooth...as is my finger tips...:brickwall:

I had to trust my guy as I have you, im no painter, not a boat builder either, however i do have skills...and tools......and really...only took a good hour...

just want this thing upright, hoping he gets the white on before monday...:shakehead:
 
Jeff i will be poking my head on here from time to time , and to tell you the truth your painter really needs to get his ***** together considering he has made so many changes down the road on your behalf for example #220 to wet sanding in #400 grit prior to paint hmmmmmmmmmmmmm .....Take care my friend ...................Artie
 
Last edited:
400 wet?

Too smooth.... or perhaps he just isn't a very good painter ;)

Good luck, what are you using for interior gel/paint/coating/??? I don't want to prime, then gel my insides if I don't have too....
 
Jeff i will be poking my head on here from time to time , and to tell you the truth your painter really needs to get his ***** together considering he has made so many changes down the road on your behalf for example #220 to wet sanding in #400 grit prior to paint hmmmmmmmmmmmmm .....Take care my friend ...................Artie


Guys like i said im no painter...however i really cant see how 400 will hurt anything...Imron will stick to it, and like anything the better the prep the better the finish. Yes, My painter has made changes to our plan as things progressed...since I did the shaping and glass, not him, and the hull was black, defects and scratches show up after primer, things that wouldnt matter to most, I, on the other hand, want this flat and smooth on the bottom with no defects, my painter is just listening to me and seeing what pops up as we go...I havent seen any info that shows 220 is better than 400??:poke:

I would rather work a little harder now as to insure a good product later, I will only do this once...:eyecrazy:
 
400 wet?

Too smooth.... or perhaps he just isn't a very good painter ;)

Good luck, what are you using for interior gel/paint/coating/??? I don't want to prime, then gel my insides if I don't have too....


not sure on the inside...this is why i would like to finally get off the hull...lots of rigging and interior to do...she will have all new wiring, gauges, throttle/shifting, hydro steering, 10 inch static plate with a stacked jack plate and a custom windscreen...
 
Jeff , like i mentioned before your painter has made way to many changes in his game plan on doing your boat from ......spraying the primer to re-spraying it in a different primer to the grit # of sand paper he wanted it preped in.... prior to painting but O-Well .....its your boat , and you are the one calling the shots ,and not to mention all of the sweat equity you have put into this project but O-WELL ! Jeff , i cant help remember a little story you told me about your painter when he sprayed your truck ,and how nice it looked when it was done, and now the paint is starting to flake off the bed because he was trying to save you a little money .:)
 
Jeff , like i mentioned before your painter has made way to many changes in his game plan on doing your boat from ......spraying the primer to re-spraying it in a different primer to the grit # of sand paper he wanted it preped in.... prior to painting but O-Well .....its your boat , and you are the one calling the shots ,and not to mention all of the sweat equity you have put into this project but O-WELL ! Jeff , i cant help remember a little story you told me about your painter when he sprayed your truck ,and how nice it looked when it was done, and now the paint is starting to flake off the bed because he was trying to save you a little money .:)

And in those lines...how would this be the same?...it appears your telling me im spending more money the way i have gone to date?:poke:

...also is it a problem that I sanded in 400??...that is the question really...

I really could care about 100.00 extra in primer at this point..and to tell you the truth...im glad he sprayed over the hi-build as it really didnt fill like i thought...He had never used it before and should have sprayed it heavier, but that is the point im making...his changes in our process are based on products i told him to use that didnt work out as we hoped...every ones a little different. :D
I feel the opposite is true here...were actually not saving money, but are doing this right at all cost...

so I ask anyone again ...is there a problem with wet sanding with 400?????:poke:
 
they are sending the catalyst with the primer...easy sanding?...im all for that!

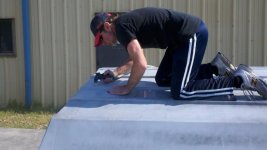
Finished the port side with cloth today....and the damaged nose....the picture of the starboard side is finished and awaiting primer....looks like ill be starting on the finish sand on the rest of the hull and deck ...220 is what my painter asked for....
first .
 
Jeff, very coooooooooooooool , and your painter & i think alike considering i always put everything in #220 before paint . Hey bro .....the easy sanding comes after breaking the surface ,and at this point in time the rest should be a walk in the park for you ,and just curious are you doing the actual spraying of the Primer ........and if so the bigger the tip the better which means you will be able to push more material at a faster rate but non the less i will give you a call tomorrow ,and to tell you the truth i actually am very curious (excited) to see what type of gains (mph) you have achieved thru all this hard work .
and last ...........................
 
and last ...........................

not getting ur point???:poke: are you saying if he doesnt do it the way you do hes not doing it right?...or are you not understanding that things arent always as they seem....:sleep:

however, still havent got a clear answer on your feelings about 400??..seems most info i get, and i always double check any advice(called research) Imron will stick to anything:drool: and the smoother the primer the smoother the finish coat....so again not getting your point other than to bust my balls...and if thats what your doing, then speak up, cause its only funny when YOU laugh old friend........:eyecrazy:
 
Status
Not open for further replies.
Back
Top