-
Welcome to the Checkmate Community Forums forums.
» Interact with over 10,000 Checkmate Fanatics from around the world!
You are currently viewing our boards as a guest which gives you limited access to view most discussions, articles and access to our other FREE features.
By joining our free community you will be able to:
» Post topics and messages
» Post and view photos
» Communicate privately with other members
» Access our extensive gallery of old Checkmate brochures located in our Media Gallery
» Browse the various pictures in our Checkmate photo gallery
Registration is fast, simple and absolutely free so please, join our community today!
If you have any problems with the registration process or your account login, please contact support by clicking here or by using the"contact us" link at the bottom of the page.
You are using an out of date browser. It may not display this or other websites correctly.
You should upgrade or use an alternative browser.
You should upgrade or use an alternative browser.
1975 V-Mate II Restore
- Thread starter bigredinohio
- Start date
Will30
Well-known member
x3...he does very nice work and well documented
Yes he is doing a fantastic job isnt he ? Brio like ive said many times before keep up the great work bud

bigredinohio
Active member
Thanks Will! I finally have my stringer glued together and about to cut to size so I can pre-glass. It's been raining here on and off the past couple of days so its been difficult working in the garage with a 12' piece of wood. I'm hoping to get pictures up tonight or tomorrow of the progress.
justincase
Well-known member
Snow next tuesday and wed, Here anyway. dont know exactly where you are at Red.Thanks Will! I finally have my stringer glued together and about to cut to size so I can pre-glass. It's been raining here on and off the past couple of days so its been difficult working in the garage with a 12' piece of wood. I'm hoping to get pictures up tonight or tomorrow of the progress.
Will30
Well-known member
Thanks Will! I finally have my stringer glued together and about to cut to size so I can pre-glass. It's been raining here on and off the past couple of days so its been difficult working in the garage with a 12' piece of wood. I'm hoping to get pictures up tonight or tomorrow of the progress.
Yeah I can see where that would be tricky lol .
bigredinohio
Active member
Snow next tuesday and wed, Here anyway. dont know exactly where you are at Red.
I live in Dayton, Ohio. It was in my profile but I must of took it off while dealing with my best friend.
I'm so glad fall lasted a whole week?
bigredinohio
Active member
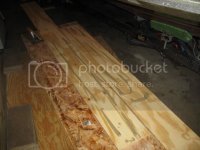
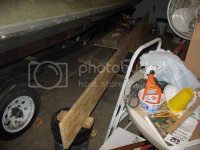
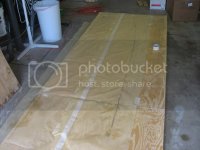
Have some pictures to share. The wood I picked up earlier this week was pretty dry so I went ahead and cut my stringers which comprised of (3) 8' foot sections of 1/2 plywood. I overlapped two of them by 4' and glued them and took the other 8' section and cut it in half and glued onto the remaining section. This gave me a total length of 12' which is well more then I needed for my stringer.


bigredinohio
Active member
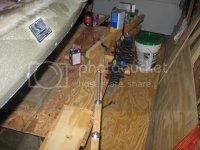
Then I cut it to rough length then placed where it's going to sit. Then I took a piece of wood and drilled a hole approximately 1/2" up big enough to fit a pencil so I can scribe the bottom so I can replicate the contour of the hull to the stringer. Then I cut to size and refitted which is pretty good. After I finish the core repair and lay a layer of 1708, I'll be able to sand the bottom of the stringer so it fits better then cut the top of the stringer to size.
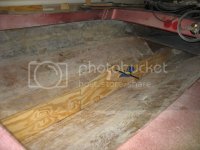 Wood place in hull
 Scribing the contour of the hull
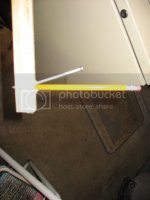
Homemade scribing tool...had to break the pencil in half so I could scribe the bow area since the pencil was too long and used a screw to hold pencil in place.
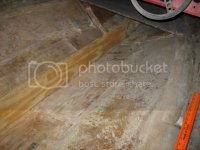
Fitted stringer look toward the bow
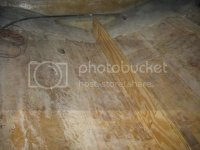
Fitted look toward the stern
 Wood place in hull
 Scribing the contour of the hull
Homemade scribing tool...had to break the pencil in half so I could scribe the bow area since the pencil was too long and used a screw to hold pencil in place.

Fitted stringer look toward the bow

Fitted look toward the stern
bigredinohio
Active member
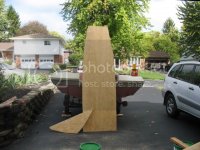
Update time! I hit the boat first thing this morning and was able to accomplish a lot. I cut some major pieces that include my deck, front bulkhead and gunnel boards. Before I took the grinder to the lip from the previous deck, I made a template with tracing paper. It wasn't the easiest thing to do but it worked. Today, I taped the template to the 1/2" plywood and took my knife and cut a slit into the paper so I could pencil a mark. After making an outline of sorts, I simply connected the dots that were left on the wood.
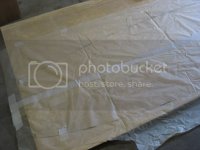
Tracing paper template of the deck

Using the jig saw to cut out the deck

Tracing paper template of the deck


Using the jig saw to cut out the deck
bigredinohio
Active member
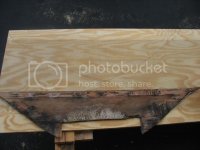
Next, I cut out my forward bulkhead by simply using the existing as a template and using the jig saw to cut out.
Then I moved on to the side gunnel rails. These are the boards that run on the top of the inside of the boat that are usually cushioned. I only had one to work from as the other had rotted years ago and the one I did have was in pretty bad shape. I did manage to trace a template from the original and then I cut the first one by cutting 1/4" away from the line. After that one was made, I flipped it over (using BC grade ply and I want good ply on the outside for both pieces) and clamped it down and cut it by using the first piece. Afterwards, I left them clamped and sanded down to the finish line for both so the matched exactly.
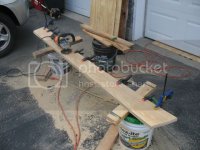
Clamped together during cutting and sanding.
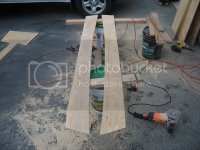
Matching gunnel rails


Then I moved on to the side gunnel rails. These are the boards that run on the top of the inside of the boat that are usually cushioned. I only had one to work from as the other had rotted years ago and the one I did have was in pretty bad shape. I did manage to trace a template from the original and then I cut the first one by cutting 1/4" away from the line. After that one was made, I flipped it over (using BC grade ply and I want good ply on the outside for both pieces) and clamped it down and cut it by using the first piece. Afterwards, I left them clamped and sanded down to the finish line for both so the matched exactly.

Clamped together during cutting and sanding.

Matching gunnel rails
bigredinohio
Active member
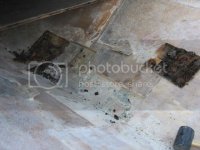
Although I have made great strides today, I did have a major set back.  I was in the process of replacing my last little section of core when I hit a landmine of rotted core where the foam in the bow sat. I should be used to feeling of replacing core but it still hits you in the nads, if you know what I mean.

justincase
Well-known member
Just think how good you will feel when its done! have you decided what to do about the exterior finish?
bigredinohio
Active member
Just think how good you will feel when its done! have you decided what to do about the exterior finish?
With the clear coat shot (as I'm down to the flake) and my colors are really faded, my options are limited. It has quite a few battle wounds with chips, scratches and gouges so trying to repair would be a real PITA.
Ideally, I would want to re-gelcoat the boat but I've heard I'd have a better time sticking needles in my eyes while laying in a ditch. It's just too expensive to have someone else do it. Additionally, if you spray gel too thick or too thin you will will get spider cracking.
With that said, I'm most likely going to prep, sand and paint the boat all white but that's as far as I've made it. I'd like to come up with something simple yet cool so I've been checking out Hotboat Magazine for inspiration but nothing is jumping out at me yet. I'll come up with something when the time comes though.

dogschool
Active member
BR I've been following your resto from the beginning. You're doing a great job,keep up the good work.
X2


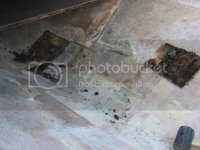
Although I have made great strides today, I did have a major set back.I was in the process of replacing my last little section of core when I hit a landmine of rotted core where the foam in the bow sat. I should be used to feeling of replacing core but it still hits you in the nads, if you know what I mean.
I know that feeling all to well.

bigredinohio
Active member
I know that feeling all to well.Look on the bright side, you've gotten thru the hard part and just about done w/ the resto.

Yeah, once the core repair is done it should start coming together quickly.
It's weird, I thought I was near completion since I removed dry foam and I didn't see any black in the fiberglass to indicate rot. That's why I was a little surprised.
Thank you everyone for the nice comments.

bigredinohio
Active member
Hey the week of Nov 2-6 If you'd like i'd like to see your boat and if you want to see mine. I'm free that whole week let me know. It's looking great.
It's possible but it's still a long way off for me. Just let me know more details as we near that week.
Did you get your motor winterized?
SrA Eason
Member
It's possible but it's still a long way off for me. Just let me know more details as we near that week.
Did you get your motor winterized?
No not yet. Maybe you could help me with that if its not hard. I'm keeping it in my garage but i'm not sure if it gets too cold in there.

