-
Welcome to the Checkmate Community Forums forums.
» Interact with over 10,000 Checkmate Fanatics from around the world!
You are currently viewing our boards as a guest which gives you limited access to view most discussions, articles and access to our other FREE features.
By joining our free community you will be able to:
» Post topics and messages
» Post and view photos
» Communicate privately with other members
» Access our extensive gallery of old Checkmate brochures located in our Media Gallery
» Browse the various pictures in our Checkmate photo gallery
Registration is fast, simple and absolutely free so please, join our community today!
If you have any problems with the registration process or your account login, please contact support by clicking here or by using the"contact us" link at the bottom of the page.
You are using an out of date browser. It may not display this or other websites correctly.
You should upgrade or use an alternative browser.
You should upgrade or use an alternative browser.
1975 V-Mate II Restore
- Thread starter bigredinohio
- Start date
yellowfiero88
Well-known member
That is one funny looking boat you got that motor mounted on
 Glad to see it fired up. Now get to work on the boat before summer is over with!!
bigredinohio
Active member
Now that had to shiver your timbers.. Ya motivated now??
Oh yeah, can't wait until my fiberglass order arrives so I can get this boat done!
bigredinohio
Active member
That is one funny looking boat you got that motor mounted onGlad to see it fired up. Now get to work on the boat before summer is over with!!
It's a homemade Beckmate...what can I say?

Work on the boat starts this weekend, if everything goes as plannned. I'm shooting to do some water testing by July or sooner before doing the interior or painting the hull.
bigredinohio
Active member
She sounds good Mike .
Thanks Will! I can't wait to fire the newer motor up here in a couple of weeks! If it does with no problems, I'm going to change out the water pump on it so it's ready to go for the summer.
justincase
Well-known member
Thats a helluva jackplate!

happy
Active member
Thats a helluva jackplate!
We need drawings for your jack plate.!!!

bigredinohio
Active member
Today, I got to pull the boat out and get some work done on it. The first thing I did was to pop the cap back off so I could do some trimming and sanding. I stribed a line where the spashwell was hanging up on the transom to allow for a better fit.
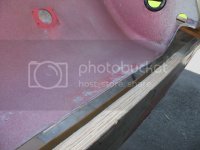
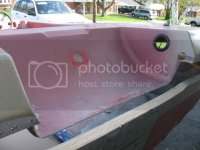
Finished cutting using my dremel tool w/ reinforced cutting wheel
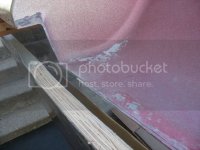
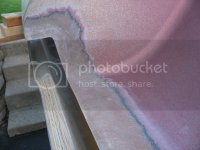
Afterwards, I sanded the gelcoat and metal flake off down to actual fiberglass. When I start to rebuild the splashwell, I'll need this so I can adhere the new layup to.

Bottom of spashwell sanded
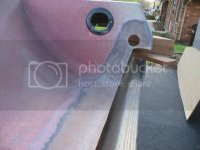
When I bought this boat, they had the steering coming from the hole in the right. I didn't pay any attention if I could use the factory hole but I'm thinking of going ahead and patching that hole and if I need it, I'll simply drill a new one.
Lastly, I removed the last of my bad core...FINALLY! It was a real pain even with the cap slid forward for easier access. I hope either tonight or tomorrow that I can go ahead and epoxy the new core in and hopefully lay some glass over the repair area. If I ever have to do core repair in my lifetime, it will be too soon.
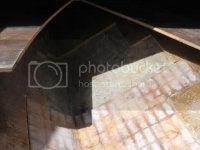
No more black rotted core
All in all, it's been a pretty good week!


Finished cutting using my dremel tool w/ reinforced cutting wheel
Afterwards, I sanded the gelcoat and metal flake off down to actual fiberglass. When I start to rebuild the splashwell, I'll need this so I can adhere the new layup to.

Bottom of spashwell sanded


When I bought this boat, they had the steering coming from the hole in the right. I didn't pay any attention if I could use the factory hole but I'm thinking of going ahead and patching that hole and if I need it, I'll simply drill a new one.
Lastly, I removed the last of my bad core...FINALLY! It was a real pain even with the cap slid forward for easier access. I hope either tonight or tomorrow that I can go ahead and epoxy the new core in and hopefully lay some glass over the repair area. If I ever have to do core repair in my lifetime, it will be too soon.

No more black rotted core
All in all, it's been a pretty good week!

bigredinohio
Active member
Did some more work today. I cranked on all the heaters this morning until my garage was about 90 degrees. With all the bad core now removed, I set the new in and now my core repair is finally complete.
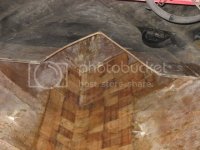
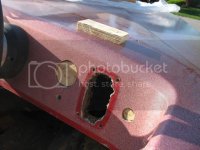
Since I had time to kill today, I finally got around to scraping the adhesive/sealer off of the hall that seals the cap to the hall. I ended up using some carb cleaner with a kitchen scratch pad to get the remaining bits off. After that, I decided that I'm most likely going to redo my dash completely so I made some plugs to fill in some holes using some 3/4" plywood. I still need to do some work with the big hole but I didn't want to mess with cutting into the dash and making a mess on my core repair. They aren't the prettiest but after they are glued in and glassed over, you'll never know there were any holes.
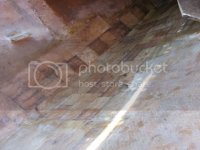
This evening I mixed up some pb and filled in all the gaps around the core.
Tomorrow with weather permitting, I will sand and lay a layer of cloth glass over the two upper sections.

Since I had time to kill today, I finally got around to scraping the adhesive/sealer off of the hall that seals the cap to the hall. I ended up using some carb cleaner with a kitchen scratch pad to get the remaining bits off. After that, I decided that I'm most likely going to redo my dash completely so I made some plugs to fill in some holes using some 3/4" plywood. I still need to do some work with the big hole but I didn't want to mess with cutting into the dash and making a mess on my core repair. They aren't the prettiest but after they are glued in and glassed over, you'll never know there were any holes.

This evening I mixed up some pb and filled in all the gaps around the core.

Tomorrow with weather permitting, I will sand and lay a layer of cloth glass over the two upper sections.
yellowfiero88
Well-known member
Don't worry Mike, weather is going to be nice for the next 10 days, just for you!
bigredinohio
Active member
Today, I glassed over the repair forward repair area.
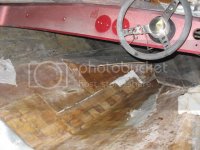
Not to worry, there was excess glass that didn't need wetted out. It will get sanded off.
Then I took 1708 and covered the entire back section stopping short of the new glassing in the front. I will let everything set up and cure then I will sand the front and just enough of the 1708 that I laid today to overlap when I blanket the front section with 1708. Then I'll be ready to install the stringer.
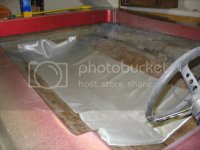
Rollling out 1708. I really wanted to flip it and have the csm up and the biax cloth down but I was afraid that the stitching might cause a bonding issue.
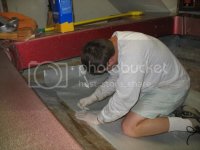
Trimming around the tabs with an exacto knife
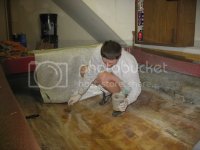
1708 drinking up the resin
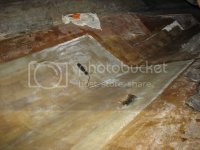
Working with this stuff is a job to wet out
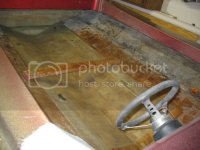
I used a 2x4 to help reach them hard to reach places

Not to worry, there was excess glass that didn't need wetted out. It will get sanded off.
Then I took 1708 and covered the entire back section stopping short of the new glassing in the front. I will let everything set up and cure then I will sand the front and just enough of the 1708 that I laid today to overlap when I blanket the front section with 1708. Then I'll be ready to install the stringer.


Rollling out 1708. I really wanted to flip it and have the csm up and the biax cloth down but I was afraid that the stitching might cause a bonding issue.

Trimming around the tabs with an exacto knife

1708 drinking up the resin

Working with this stuff is a job to wet out

I used a 2x4 to help reach them hard to reach places
Last edited:
yellowfiero88
Well-known member
I was in that position for so damn long on my boat, I could hardly straighten back up. I am glad mine is done and I won't have to be doing that ever again
 hopefully
 bigredinohio
Active member
Yeah, and I told the wife if I ever to do something stupid again like rebuilding an old boat to stop me. Hopefully this will be worth it. At least she's cool with it...while we were glassing, I was griping about how much this was costing me in resin and she said she didn't want to know how much it cost.
justincase
Well-known member
Well at least its money on the boat...it would probably be another toy or project if you didnt have your mate, it always is at my place

bigredinohio
Active member
I finished glassing the forward core repair with 1708 yesterday. My core repair is officially over, unless there is an issue down the road.

Today, I trimmed my stringer (or floor support if you like) and it's finally in the boat. The process I used was simple to get the original height. First, I scribed the bottom where it seemed a little high then I cut a line down where the tabs of the original floor are. This allowed me to pull a string from one tab acoss through the line I cut to the other tab to get my height. I did this for the front, middle and rear section of the stringer then ran a chalk line across all three marks then used a circular saw to cut a nice straight line.
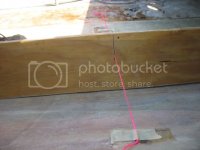
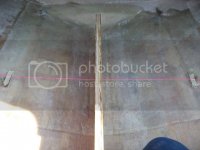
Afterwards, I bedded it in place using PL Premium.
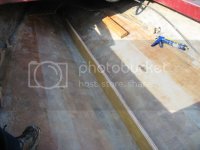
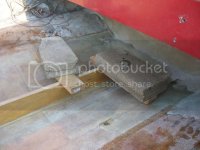
Once in place, I used 2x4's weighted down with some concrete block to hold in place so I could make sure it was centered as best as it could be then ran a bead of PL down the edge to do fillets.


Today, I trimmed my stringer (or floor support if you like) and it's finally in the boat. The process I used was simple to get the original height. First, I scribed the bottom where it seemed a little high then I cut a line down where the tabs of the original floor are. This allowed me to pull a string from one tab acoss through the line I cut to the other tab to get my height. I did this for the front, middle and rear section of the stringer then ran a chalk line across all three marks then used a circular saw to cut a nice straight line.


Afterwards, I bedded it in place using PL Premium.

Once in place, I used 2x4's weighted down with some concrete block to hold in place so I could make sure it was centered as best as it could be then ran a bead of PL down the edge to do fillets.


