-
Welcome to the Checkmate Community Forums forums.
» Interact with over 10,000 Checkmate Fanatics from around the world!
You are currently viewing our boards as a guest which gives you limited access to view most discussions, articles and access to our other FREE features.
By joining our free community you will be able to:
» Post topics and messages
» Post and view photos
» Communicate privately with other members
» Access our extensive gallery of old Checkmate brochures located in our Media Gallery
» Browse the various pictures in our Checkmate photo gallery
Registration is fast, simple and absolutely free so please, join our community today!
If you have any problems with the registration process or your account login, please contact support by clicking here or by using the"contact us" link at the bottom of the page.
You are using an out of date browser. It may not display this or other websites correctly.
You should upgrade or use an alternative browser.
You should upgrade or use an alternative browser.
1988 Vision redo
- Thread starter Kurtster
- Start date
Kurtster
Well-known member
Got the plywood backing cut and shaped for the engine cover sunpad.
Time to start putting that together now....
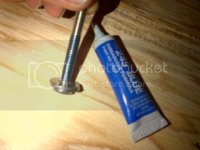
The machine screws that feed through the anchor fasteners absolutly need blue lok-tite, otherwise they WILL eventually loosen.
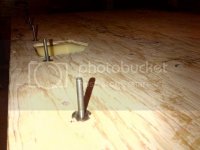
OK, all 28 machine screws and fasteners in place.
Time to pull/stretch the new pad upholstery over the plywood backing.
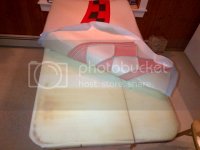
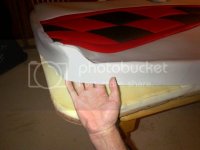
The skin fit perfectly ---- I'll let it sit for a day in the warm 70 deg indoor temp before I do a final form and fit then staple.

Time to start putting that together now....
The machine screws that feed through the anchor fasteners absolutly need blue lok-tite, otherwise they WILL eventually loosen.

OK, all 28 machine screws and fasteners in place.

Time to pull/stretch the new pad upholstery over the plywood backing.


The skin fit perfectly ---- I'll let it sit for a day in the warm 70 deg indoor temp before I do a final form and fit then staple.

atc250r
Well-known member
I would suggest coating that plywood with something to prevent water from soaking in. I used several coats of urethane on the panels I built but I would think fiberglass resin would be better and a layer of glass matting better still. You'd be surprised how quick it'll soak up water and get really heavy and rot quickly.
Kurtster
Well-known member
I would suggest coating that plywood with something to prevent water from soaking in. I used several coats of urethane on the panels I built but I would think fiberglass resin would be better and a layer of glass matting better still. You'd be surprised how quick it'll soak up water and get really heavy and rot quickly.
Actually there is a thin coat of sprayed waterproofing on the plywood that I applied a couple of months ago --- I should've applied more but I ran out after one coat --- I figured a couple of things, first, the boat very rarely gets wet as it's stored under a roof on the racks, and this engine cover is most likely a temporary cover anyway, given what I have planned for the summer of 2015, we won't get into that just yet {although a hint would be that I'll need higher clearance}

Kurtster
Well-known member
I was thinking more of people getting out of the water and into the boat. I make them drip off in my splashwell but I'm psycho like that.
Ah, that is a good point that I really didn't consider ----
Looks like I'll need to go a little "psyco" with my passengers too.... but that will not surprise anyone who knows me
Or better yet, I'll offer to hand towel dry each and every female passenger as they board from the water

RNGRDVE
Well-known member
I was thinking more of people getting out of the water and into the boat. I make them drip off in my splashwell but I'm psycho like that.
My dad used to make my sister in I stand in the splashwell whenever we got out of the water.
Kurtster
Well-known member
We used to have to stand on the ladder until Dad determined we had sufficiently dripped off but the ladder side of the sundeck and the floor in front of it still were among the first parts of the old boat to get soft. Score one for the outboards.
I was wondering when an "outboard" reference was gonna come my way
redstrat
Well-known member
I've been hitting all my wood with a coat of epoxy. I've replaced to much plywood while doing upholstery repairs. I might suggest a thin layer of 1/4 to 1/2 " dacron over the foam on your sun deck. I find it really helps keep things smooth and plump especially where the foam was previously compressed. You might check with Mike on this, not sure if they use it in the factory. Stitch work look great. 

Kurtster
Well-known member
I would suggest coating that plywood with something to prevent water from soaking in. I used several coats of urethane on the panels I built but I would think fiberglass resin would be better and a layer of glass matting better still. You'd be surprised how quick it'll soak up water and get really heavy and rot quickly.
redstrat said:I've been hitting all my wood with a coat of epoxy. I've replaced to much plywood while doing upholstery repairs. I might suggest a thin layer of 1/4 to 1/2 " dacron over the foam on your sun deck. I find it really helps keep things smooth and plump especially where the foam was previously compressed. You might check with Mike on this, not sure if they use it in the factory. Stitch work look great.
First, let me thank you guys for bringing me back to rational quality thinking.....
In an effort to get this thing done on time for such a short season of boating --- and dealing with the anxiety of last minute delays and issues, --- I do admitt I lost sight of how important {at least for me} it is to stick to the higest quality workmanship and processes it takes to do a quality makeover on a quality machine.
No matter how I rationalize it, the engine cover is as important as any other part of this boats makeover, and if I were to go ahead and put this cover assembly together without doing it to the best of my ability, then I would be doing an injustice to a beautiful piece of machinery.
One thing my dad instilled in me over and over again, "no matter what your hands on project is, albiet it a model airplane or a $40,000 hot rod, you do it to the absolute best of your ability no matter what or don't do it at all, period".
So, to keep him from comming back from "the other side" and haunting me
So, again guys, --- thankyou for bringing me to have this moment of clarity {it's what I love about this forum}

I'm gonna be better for it
My Checkmate will be better for it
Any future owner will be better for it
Everybodys happy happy happy
Kurtster
Well-known member
Swim pad / Engine cover work.....
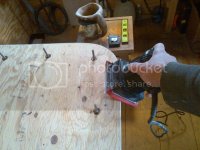
Before encasing the swim pad plywood backing, I wanted to "soften" the sharp edges of the panel a little bit.
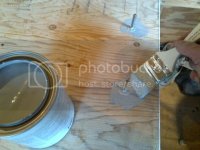
Next, I wanted to first put down a good thick coat of epoxy around all the hardwares of the plywood backing so as to reduce and or eliminate the possibility of water ingress through those areas...
The product here is a 3M marine epoxy based urathane.... didn't want to go the resin route because of stapling issues and a weight factor --- this is a manual hatch and did'nt want to make ANY heavier than it already is.
Next, a simple roll-on, making sure to fill every nook and cranny,....first coat will let dry completetly before next coat.
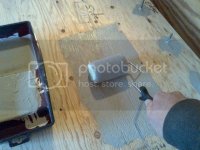
After just the first coat, there is a real nice encasement of the panel --- however I have a whole quart of this stuff and I'm using the entire quart---I'll eventually end up three thick coats
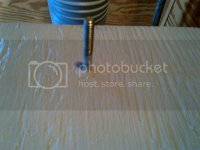
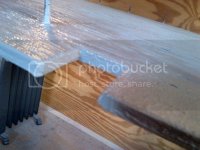
Yup, ended up with three nice thick coats of the epoxy creating a total encasement of the wood --- every nook and cranny AND the edges also were given good thick coverage.
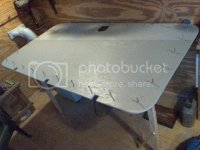
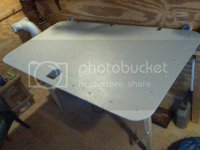
Right now I'm wating delivery of the new foam --- I ordered a 3 X 6 X 1 1/2 marine grade that'll be here possibly by Saturday.
Before encasing the swim pad plywood backing, I wanted to "soften" the sharp edges of the panel a little bit.

Next, I wanted to first put down a good thick coat of epoxy around all the hardwares of the plywood backing so as to reduce and or eliminate the possibility of water ingress through those areas...
The product here is a 3M marine epoxy based urathane.... didn't want to go the resin route because of stapling issues and a weight factor --- this is a manual hatch and did'nt want to make ANY heavier than it already is.

Next, a simple roll-on, making sure to fill every nook and cranny,....first coat will let dry completetly before next coat.

After just the first coat, there is a real nice encasement of the panel --- however I have a whole quart of this stuff and I'm using the entire quart---I'll eventually end up three thick coats


Yup, ended up with three nice thick coats of the epoxy creating a total encasement of the wood --- every nook and cranny AND the edges also were given good thick coverage.


Right now I'm wating delivery of the new foam --- I ordered a 3 X 6 X 1 1/2 marine grade that'll be here possibly by Saturday.
ram750
Member
Dude serious quality stuff going on with this Redo ! Boat looks incredible ... The colors you chose are amazing and the custom powder coated hardware is just extra sweet ! Do you plan on tinting the glass in the windshield ?
About the windshield one of the two main piece in the front is bent on the top rail , it looks like actual glass so I want to be careful but do you think I could bend it back in shape in place ? Its basically the top part of the passenger side windscreen. Someone bent it while going to the front deck...
Any ideas what strength those hatch gas shocks are ? Sierra as 120 , 60 , 40 and lighter ... I would think 120#
Kurtster
Well-known member
Dude serious quality stuff going on with this Redo ! Boat looks incredible ... The colors you chose are amazing and the custom powder coated hardware is just extra sweet ! Do you plan on tinting the glass in the windshield ?
About the windshield one of the two main piece in the front is bent on the top rail , it looks like actual glass so I want to be careful but do you think I could bend it back in shape in place ? Its basically the top part of the passenger side windscreen. Someone bent it while going to the front deck...
Any ideas what strength those hatch gas shocks are ? Sierra as 120 , 60 , 40 and lighter ... I would think 120#
Hi ram750
Funny you ask about the tinting of the windshield ---- I pondered that over and over and over again, I really wanted to use dark tinted glass {the glass on there now is factory tinted but not very dark} --- I thought that the dark tint would've looked really kool, however, this is a "sit down" boat, and in most cases I {and the passenger} are looking through the windshield not over the top of it, so tinting any darker just wouldn't be a practical idea --- especially since I do a lot of night cruisin.
As far as your top frame piece --- it's very common for these pieces to get bent and curved from people leaning on them either getting in and out of the boat or going from bow to cockpit.
In order to bend the piece back to shape you must disassemble the windshield first --- do not try and straighten it while the glass is in place {you know what will happen
 }
}If I remember correctly yours is a 1988 and actually these windshield frames are not very complicated to disassemble.
Once you disassemble the windshield the frame pieces bend/straighten very easily.
All that said -- if you decide to disassemble the windshield you'll need to replace the gasketing along the bottom {if you need some I will be glad to send you what you need for that --- I have plenty left over -- let me know}.
Also, if you decide to disassemble the windshield, --- let me know, I may be able to give you some pointers if you need them -- will be happy to help.
As far as the gas shocks--- I also am looking into this myself, the shocks I have do work fine but they do show a little age and I'm thinking of replacing them for cosmetic reasons --- let me see if I can figure out by looking at my old ones what pressure spec they are and I'll let you know.
By the way, thanks for the compliment on my boats make over...
Kurt
Last edited:
Kurtster
Well-known member
Any ideas what strength those hatch gas shocks are ? Sierra as 120 , 60 , 40 and lighter ... I would think 120#
I cannot figure out the specs of these gas shocks I have on my engine hatch.
The two shocks have the numbers--- RB8795066 356/94
I have no idea what to make of these numbers --- I tried all kinds of google searches {although I'm not very internet savy} but couldn't find anything that helps identify neither the brand nor the specs.
So, now I'm going out of my mind figuring this out --- I can't stand running across something I can't figure out {it's an OCD thing I have}

If anybody is reading this that can help, please weigh in before I finish pulling "all" my hair out

RNGRDVE
Well-known member
try this
http://www.ebay.com/itm/StrongArm-4...t-Supports-Boot-Liftgate-Struts-/330848820588
or this
http://www.amazon.com/s/ref=nb_sb_noss?url=search-alias%3Daps&field-keywords=http%3A%2F%2Fwww.ebay.com%2Fitm%2FStrongArm-4686-L-R-2-Rear-Hatch-Gas-Lift-Supports-Boot-Liftgate-Struts-%2F330848820588#/ref=nb_sb_noss?url=search-alias%3Daps&field-keywords=strongarm+4686&rh=i%3Aaps%2Ck%3Astrongarm+4686
Use bing next time.
forgot to add I dropped the suffix off the pn and searched that way.
Kurtster
Well-known member
try this
http://www.ebay.com/itm/StrongArm-4...t-Supports-Boot-Liftgate-Struts-/330848820588
or this
http://www.amazon.com/s/ref=nb_sb_n...ords=strongarm+4686&rh=i:aps,k:strongarm+4686
Use bing next time.
forgot to add I dropped the suffix off the pn and searched that way.
Thanks man,
Even though I still couldn't figure out the actual spec pressure of the shocks --- I just ordered a couple of brand new ones from Amazon -- I suppose if they're brand new and the part numbers match, I don't really need to know the pressure spec
Thanks again RNGRDVE, very much appreciated....
On another note, I'm hoping to get my new foam for the engine hatch tomorrow according to fedex tracking.....
I have just finished having yet MORE red powder coating done --- this time it's for the engine hatch hardwares {shock mounts / 30 acorn nuts / 30 fender washers / 4 finish washers}.
So, hopefully by Monday I'll have some pics and progress to report with that.
After I can put the hatch stuff behind me then I can start cutting holes in my dash for some added amenities for the passenger side.
Kurtster
Well-known member
Got the new foam for the sun pad ----
Cut it to shape...
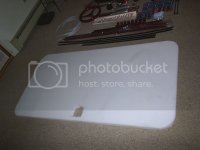
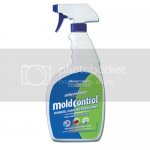
Even though this is "supposedly" marine grade I still sprayed an anti mold agent on it.
Concrobium, Iv'e used it before and it does work quite well.
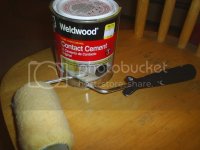
To apply the foam to the plywwod, I used a basic roll-on glue.
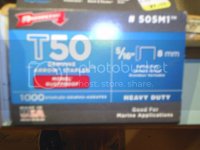
Finally got my 5/16 Monel rust-"proof" staples.
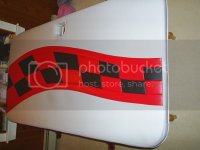
The finished product..
The piping being a seperate piece, was quite difficult to staple and keep it as straight as it came out -- along with keeping the top seam also as straight and symmetrical all the way around the parameter of the pad.
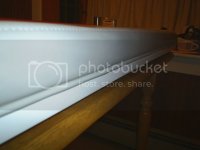
Getting the piping around the hinges to look good {and neat} was especially challenging.
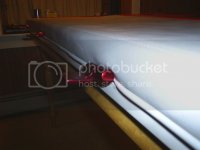
Ahh, the underside --- well, it maybe the underside, but I want it to look as good as the rest of the boat.
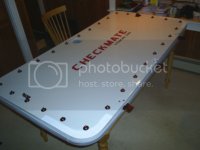
I did spend some time playing around with some lettering --- the "vision 221" is a dry transfer decal from Checkmate Ohio and the "CHECKMATE"
is just some leftover lettering from my last project.
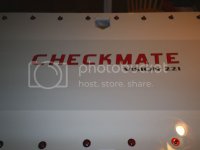
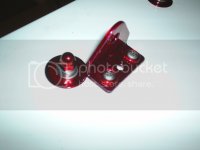
Close up of powder coated hardware..
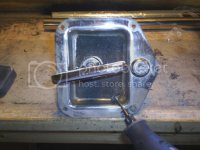
Hatch lever was in pretty dirty grungy condition, so out came one of my favorite tools.... the dremmel grinder/polisher
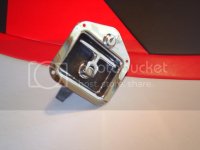
Polished up like new...
All in all, the swim pad and the hatch underneath came out really good --- but it took waaayyy too long -- I spent the whole weekend just on this, but it was worth it.
Now I need to have one of my buddies help me lift this thing into place this week --- then I can finally get into the interior.
Cut it to shape...

Even though this is "supposedly" marine grade I still sprayed an anti mold agent on it.
Concrobium, Iv'e used it before and it does work quite well.

To apply the foam to the plywwod, I used a basic roll-on glue.

Finally got my 5/16 Monel rust-"proof" staples.

The finished product..

The piping being a seperate piece, was quite difficult to staple and keep it as straight as it came out -- along with keeping the top seam also as straight and symmetrical all the way around the parameter of the pad.

Getting the piping around the hinges to look good {and neat} was especially challenging.

Ahh, the underside --- well, it maybe the underside, but I want it to look as good as the rest of the boat.

I did spend some time playing around with some lettering --- the "vision 221" is a dry transfer decal from Checkmate Ohio and the "CHECKMATE"
is just some leftover lettering from my last project.

Close up of powder coated hardware..

Hatch lever was in pretty dirty grungy condition, so out came one of my favorite tools.... the dremmel grinder/polisher

Polished up like new...

All in all, the swim pad and the hatch underneath came out really good --- but it took waaayyy too long -- I spent the whole weekend just on this, but it was worth it.
Now I need to have one of my buddies help me lift this thing into place this week --- then I can finally get into the interior.
Gimme Fuel
Well-known member
Looks amazing Kurtster!
