-
Welcome to the Checkmate Community Forums forums.
» Interact with over 10,000 Checkmate Fanatics from around the world!
You are currently viewing our boards as a guest which gives you limited access to view most discussions, articles and access to our other FREE features.
By joining our free community you will be able to:
» Post topics and messages
» Post and view photos
» Communicate privately with other members
» Access our extensive gallery of old Checkmate brochures located in our Media Gallery
» Browse the various pictures in our Checkmate photo gallery
Registration is fast, simple and absolutely free so please, join our community today!
If you have any problems with the registration process or your account login, please contact support by clicking here or by using the"contact us" link at the bottom of the page.
You are using an out of date browser. It may not display this or other websites correctly.
You should upgrade or use an alternative browser.
You should upgrade or use an alternative browser.
1988 Vision redo
- Thread starter Kurtster
- Start date
Kurtster
Well-known member
So, decided to do some interior stuff this weekend......
This is a pic of the dash from last year before I started any of the work.
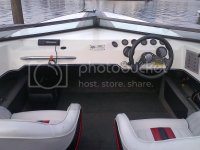
Some of the items I had already started last November when the overall project was started.
Anyway this weekend out came the drills and files, but first taping and drawing the things to come...
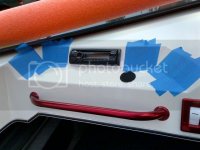
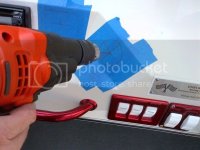
Next, do the pilot holes... {aways a little scary taking a drill to a boat dash}
Next, the hole saw {oh oh, no turning back now}
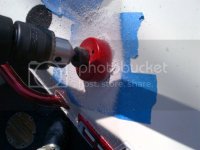
Ahhhh, I do like a nice clean hole........... wait,...what
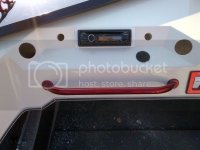
So, here we have on the far left a new hour meter, then just to the left of the radio a 12v recep, then just to the right of the radio is a "fake" 12v recep, --it's actually a MP3 player connection, then to the far right is a clock
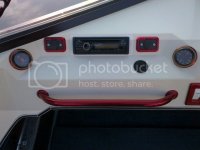
This is a complete view of the new and updated dash {without the new steering wheel}
The boat now has an aircraft feel to the cockpit -- and the passenger has more of a feeling of involvement to the dash.
A lot different from the original dash.
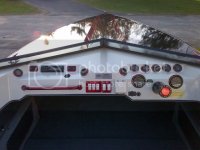
This is a pic of the dash from last year before I started any of the work.

Some of the items I had already started last November when the overall project was started.
Anyway this weekend out came the drills and files, but first taping and drawing the things to come...

Next, do the pilot holes... {aways a little scary taking a drill to a boat dash}

Next, the hole saw {oh oh, no turning back now}

Ahhhh, I do like a nice clean hole........... wait,...what


So, here we have on the far left a new hour meter, then just to the left of the radio a 12v recep, then just to the right of the radio is a "fake" 12v recep, --it's actually a MP3 player connection, then to the far right is a clock

This is a complete view of the new and updated dash {without the new steering wheel}
The boat now has an aircraft feel to the cockpit -- and the passenger has more of a feeling of involvement to the dash.
A lot different from the original dash.

Viper 1
Well-known member
Looks Really Great
Dear Kurt You are doing a Awesome Job there on your Checkmate Vision Dash My Friend. You are going to have a one of a Kind Vision that You can Be Very Proud of for Many Years to Come. I Hope You have a Great Summer My Dear Friend. Best Wishes Always Your Friend Sammie Action Marine
Dear Kurt You are doing a Awesome Job there on your Checkmate Vision Dash My Friend. You are going to have a one of a Kind Vision that You can Be Very Proud of for Many Years to Come. I Hope You have a Great Summer My Dear Friend. Best Wishes Always Your Friend Sammie Action Marine
Gimme Fuel
Well-known member
That looks awesome! I always wanted to put more gauges in front of the passenger, but I haven't been able to trust anyone to pay attention and know what they mean yet. Can't have that problem with a clock and hour meter though!
Kurtster
Well-known member
That looks awesome! I always wanted to put more gauges in front of the passenger, but I haven't been able to trust anyone to pay attention and know what they mean yet. Can't have that problem with a clock and hour meter though!
I'm not sure if I even trust most of my friends to read a clock or an hour meter ........
However, there is the occasional girl who always seems to need to know when exactly 1 hour is up........

........Oh yes i did

Gimme Fuel
Well-known member
I'm not sure if I even trust most of my friends to read a clock or an hour meter ........
However, there is the occasional girl who always seems to need to know when exactly 1 hour is up........
........Oh yes i did


Another reason why "slut red" paint belongs on your boat!
ram750
Member
I feel some spoiler hate  It was off but before going for the first ride I bolted that thing on !
The first ride was a little sketchy , power steering belts starting slipping the first time I got on plane and then kept getting worse and worse till at one point it would slip 1500rpm and on .... still did 56mph on GPS but wouldn't dare go any faster without the steering assist !
It feels actually a little more honest then my Senator did , those feel more stable. Anyways if all is good I will put it back in the water wednesday night to try the new belts and get some top speed reading. I think my prop is to big for the boat ...
BTW nice job on the gauges , I need to put a radio on mine but I am scared of drilling or cutting into the dash ! ... I like what you got going on to cover the access holes in the side storage compartment in the cabin.
The first ride was a little sketchy , power steering belts starting slipping the first time I got on plane and then kept getting worse and worse till at one point it would slip 1500rpm and on .... still did 56mph on GPS
It feels actually a little more honest then my Senator did , those feel more stable. Anyways if all is good I will put it back in the water wednesday night to try the new belts and get some top speed reading. I think my prop is to big for the boat ...
BTW nice job on the gauges , I need to put a radio on mine but I am scared of drilling or cutting into the dash ! ... I like what you got going on to cover the access holes in the side storage compartment in the cabin.
Kurtster
Well-known member
I need to put a radio on mine but I am scared of drilling or cutting into the dash ! ...
Don't be scared, just measure once and cut twice
Only kidding, -- it's always a little un-nerving to drill into a dash.
Just make sure your using real sharp cutting tools {brand new bits} and don't try to hurry anything.
Measure "many" times and cut once
Last night I did a couple of things before it got too dark to go any further.
The area around the engine compartment vent in the cockpit had a little ugly damage around it {scratches and a big gouge}, apparently caused by mechanics leaning into the engine area with big frikin belt buckles....
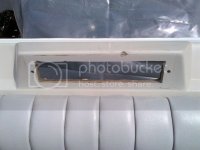
So, out came my trusty Marine Tex {I love that stuff} and some 1500 grit wet paper and "a fillin and a sandin I go".
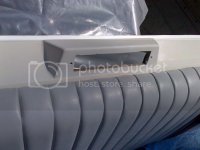
Next, buff and shine...
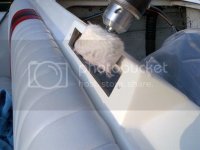
Now I can put the grill back on {powder coated ofcorse}
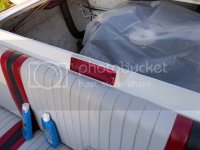
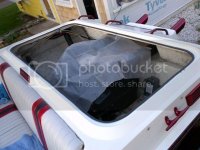
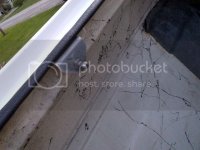
Next......the hatch landing area and the bottom gas shock mounts.
BEFORE
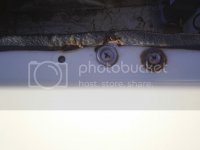
Next....fill in extra holes and chips with Marine Tex
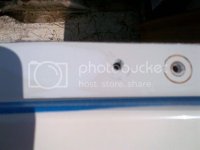
Next, run a quick roll of white awl grip...
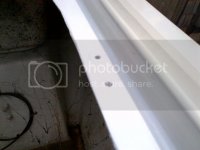
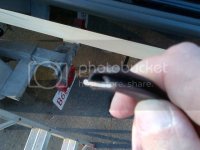
Next the new flex edge, --- you might want to use a tin cutter or equivilent when using the Taco flex trim because it does have metal inside --- here I'm cutting an end piece because the end cut that Taco did was a little sloppy.
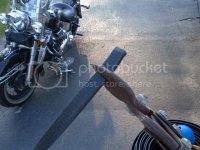
You can see here that the trim has a harpooned inside edge that'll grab nicely eliminating the need for any adhesive.
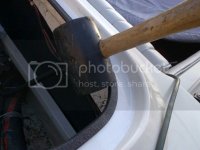
This Taco flex trim goes on real well with just tapping with a rubber mallett --- once it's tapped on it stays quite secure.
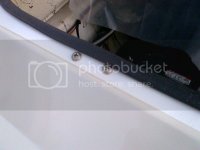
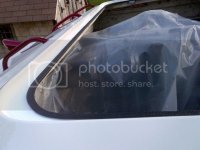
Nice clean look.....
Don's89 Senator
Well-known member
It keeps getting better and better. Your doing a great job. Attention to details is a real plus.

Kurtster
Well-known member
Nice job sorting out all the little stuff.
It looks like I'll need to stick to the little stuff like this for a few days.
I had to have an X-Ray on my hand yesterday and found a hairline fracture.
It's been bothering me quite a bit for a few months and just hasn't been getting better ---- {hey it only took me 4 months to go to the doctor, that's pretty fast for me
Apparently I did it while re-rivoting the top deck of the boat to the hull back when I was doing the new rubrail, --yes I used a manual industrial strength gun on about 50 rivots
 .
.Anyway, it's all good, --- It's a good oppertunity to relax and do a bunch of little detail stuff that needs to be done eventually anyway.
The doctor told me to leave the splint on for a week to ten days {ya right} --- I'll have it off by friday
Kurtster
Well-known member
Did some simple easy stuff this weekend...
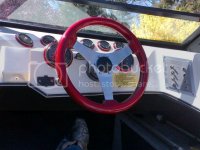
Started with the steering wheel, -- before I put the adapter hub on I had to clean up the edge of the primary hub with a painters brush and some black awlgrip. {oh that OCD crap }
}
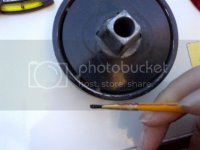
Ahh, much betterer..
Notice the "square" shaft, this was a PITA to deal with regarding getting the wheel I wanted and having it fit -- remember previously in this thread I had to custom fabricate a "special" hub adapter.
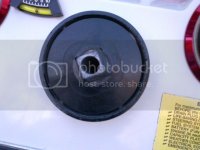
It was all worth it --- I have the wheel I want --- real nice carbon fiber soft padded easy grip color matched wheel.
Next, the windshield screw mount covers...
I decided to just refinish the old ones, -- I won't bore anyone with that process --- it was just some sanding / priming / finish coat, and they came out pretty nice.
BEFORE
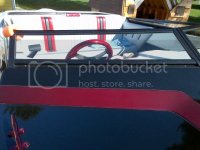
AFTER
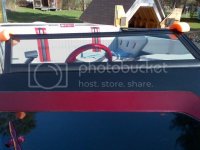
BEFORE
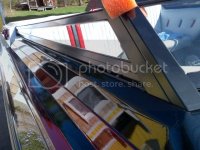
AFTER
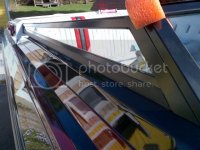
Next, the cockpit 60 inch grab rails, the old ones were kinda scratched up, -- so I made up a couple of replacements using a larger diameter rail {1 inch instead of the original 7/8 inch -- then ofcorse red powder coat.
BEFORE
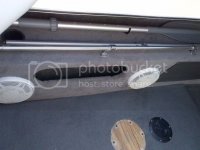
AFTER
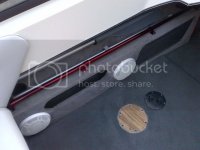
BEFORE
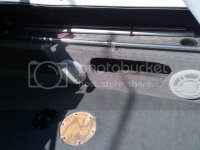
AFTER
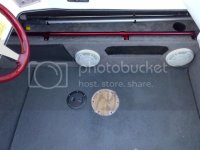
So, I think tonight I'll move onto starting the refinishing of the outdrive {It's only a light duty Alpha but it still deserves to look good }
}
Started with the steering wheel, -- before I put the adapter hub on I had to clean up the edge of the primary hub with a painters brush and some black awlgrip. {oh that OCD crap
 }
}
Ahh, much betterer..
Notice the "square" shaft, this was a PITA to deal with regarding getting the wheel I wanted and having it fit -- remember previously in this thread I had to custom fabricate a "special" hub adapter.

It was all worth it --- I have the wheel I want --- real nice carbon fiber soft padded easy grip color matched wheel.

Next, the windshield screw mount covers...
I decided to just refinish the old ones, -- I won't bore anyone with that process --- it was just some sanding / priming / finish coat, and they came out pretty nice.
BEFORE

AFTER

BEFORE

AFTER

Next, the cockpit 60 inch grab rails, the old ones were kinda scratched up, -- so I made up a couple of replacements using a larger diameter rail {1 inch instead of the original 7/8 inch -- then ofcorse red powder coat.
BEFORE

AFTER

BEFORE

AFTER

So, I think tonight I'll move onto starting the refinishing of the outdrive {It's only a light duty Alpha but it still deserves to look good
Kurtster
Well-known member
Hey, I have a pair of shoes like those!
I really really like gettin my monies worth out of my shoes......and my duct tape.

RNGRDVE
Well-known member
Hey, I have a pair of shoes like those!
I really really like gettin my monies worth out of my shoes......and my duct tape.
With the amount of $$$$ you've been spending on the boat the shoes have taken back burner. you won't need the shoes soon anyway.
paulsboats
Well-known member
Looks great Kurt!
Kurtster
Well-known member
So, need to clean up the look of the outdrive a little.
This can be one of those projects that the difficulty is really up to "how far or how perfect do you want to be" and that'll determine the difficulty and the time spent.
I'm not looking for perfection nor do I have the availability to spend too much time on this --- but I do want it to look respectable.
This is what I have to start with..
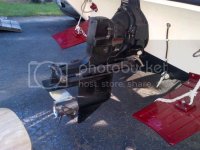
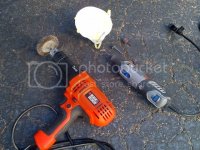
Now the essentials to start with {missing in the pic is the always important safety goggles}
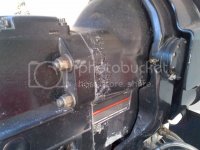
Closer look at the corrosion..
Start grinding away the crud
Tune in tomorrow........same bat time / same bat channel
This can be one of those projects that the difficulty is really up to "how far or how perfect do you want to be" and that'll determine the difficulty and the time spent.
I'm not looking for perfection nor do I have the availability to spend too much time on this --- but I do want it to look respectable.
This is what I have to start with..

Now the essentials to start with {missing in the pic is the always important safety goggles}

Closer look at the corrosion..

Start grinding away the crud

Tune in tomorrow........same bat time / same bat channel
Kurtster
Well-known member
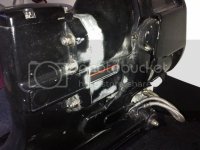
Did a little more grinding and cleaning on the OD --- almost ready to do some sanding on the entire drive {need to dull up the remaining enamel}.
Then after that an ammonia wash down.
Then a careful "dobbing" of some acid metal prep {only on the bare metal areas}.
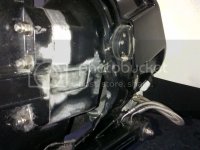
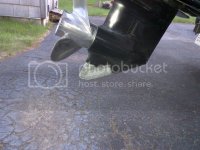
Obviously theres a reason for the corrosion and the pitting, and it's always sooooo important to find the root cause.
This boat never does and never did sit in the water for any length of time {only on occasion over nite on a weekend or two} so electrical currents from nearby docked boats is not the problem, so it must be a problem with this boat.
I can't say if the zincs were always kept new yearly from the previous owner, but they were new last year.
I do know of an area in the engine compartment where rain water was draining into an area that occasionally submerged a partial run of the main wiring --- that could be suspect and will be fixed.
Also will chase as much of the wiring in the boat as possible looking for loose connections / shorts / bad grounds / etc...
The pitting from the corrosion will get a smoothing over with either some Marine Tex or maybe some Splash Zone Epoxy {whatever I have the most of in my shop--either is as good as the other}
Then after that an ammonia wash down.
Then a careful "dobbing" of some acid metal prep {only on the bare metal areas}.


Obviously theres a reason for the corrosion and the pitting, and it's always sooooo important to find the root cause.
This boat never does and never did sit in the water for any length of time {only on occasion over nite on a weekend or two} so electrical currents from nearby docked boats is not the problem, so it must be a problem with this boat.
I can't say if the zincs were always kept new yearly from the previous owner, but they were new last year.
I do know of an area in the engine compartment where rain water was draining into an area that occasionally submerged a partial run of the main wiring --- that could be suspect and will be fixed.
Also will chase as much of the wiring in the boat as possible looking for loose connections / shorts / bad grounds / etc...
The pitting from the corrosion will get a smoothing over with either some Marine Tex or maybe some Splash Zone Epoxy {whatever I have the most of in my shop--either is as good as the other}
