-
Welcome to the Checkmate Community Forums forums.
» Interact with over 10,000 Checkmate Fanatics from around the world!
You are currently viewing our boards as a guest which gives you limited access to view most discussions, articles and access to our other FREE features.
By joining our free community you will be able to:
» Post topics and messages
» Post and view photos
» Communicate privately with other members
» Access our extensive gallery of old Checkmate brochures located in our Media Gallery
» Browse the various pictures in our Checkmate photo gallery
Registration is fast, simple and absolutely free so please, join our community today!
If you have any problems with the registration process or your account login, please contact support by clicking here or by using the"contact us" link at the bottom of the page.
You are using an out of date browser. It may not display this or other websites correctly.
You should upgrade or use an alternative browser.
You should upgrade or use an alternative browser.
78 Predictor Full Restoration
- Thread starter Adambomb
- Start date
Adambomb
Member
Keith is worried about finishing the boat, but we're actually moving along nicely. We've accomplished a lot since my last post. Here's the update. First Keith and I finished up the floor in the bow area by glueing the plywood down just like the first section we installed, except there's no stringer underneath this one. I picked up a larger plastic puddy scraper at the hardware store which worked great for filling in, and creating a good transition from floor to hull with the hull and deck puddy. Next Keith cut a piece of mat, and we spread on the polyester resin. 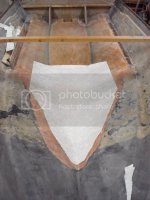
and here's the finished floor, I like the new improved size of it, there's more room under the bow, the cockpit will have a little more depth, and the shape looks like you're riding on a bullet.

Next we turned our attention back to the transom, for the cross brace and knees. First we had to measure my new 19 gallon fuel tank and the splash well to make sure the knees didn't get in the way of anything. here's a shot of everything glued in.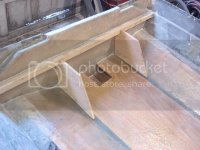
next we cut out all the fiberglass and dry fit it.
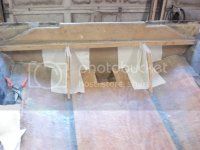

And here's a shot after the resin had set up and we did a little grinding
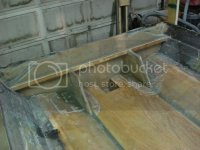 Next we decided we had enough muscle to flip the boat ourselves to do some work on the pad, and gelcoat the bottom of the boat. We started by attatching cables to the bow ring and through the drain plug. Then we jacked the boat up until we had enough room to clear the floor and the ceiling when we rotated it.

After a few minutes of swearing and wrenching, the boat was flipped.

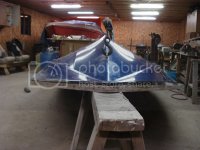
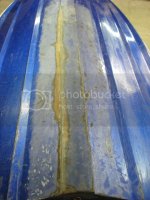
Here's a look at what we had to deal with. Someone had smeared some sort of epoxy all over the pad to patch a few gouges.
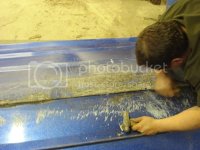
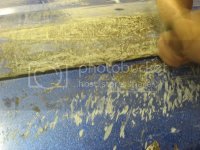
And here's a shot after we cleaned everything up, patched the gouges layed up more glass to seal it back up and sanded everything back down.
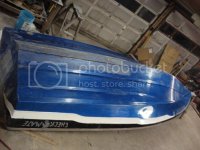
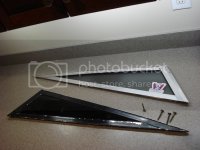
Right now we are working on sanding that beautiful blue metalflake gelcoat to prep for the new black gelcoat. But inbetween I got a little sidetracked on a warm day and removed the windshield and started cleaning off the black spray paint someone had covered it with, the first one turned out great. I used a aircraft aluminum stripper called tal-strip which I have to give credit to my friend mjm351 for showing me, the stuff bubbles the paint right up, I wiped it off with a rag and hosed the windshield down with water. Here's how it turned out, the sticker you see in the corner of the glass is Keith's local union sticker, he put that on there before I was even done cleaning the windshield.


and here's the finished floor, I like the new improved size of it, there's more room under the bow, the cockpit will have a little more depth, and the shape looks like you're riding on a bullet.

Next we turned our attention back to the transom, for the cross brace and knees. First we had to measure my new 19 gallon fuel tank and the splash well to make sure the knees didn't get in the way of anything. here's a shot of everything glued in.

next we cut out all the fiberglass and dry fit it.


And here's a shot after the resin had set up and we did a little grinding
 Next we decided we had enough muscle to flip the boat ourselves to do some work on the pad, and gelcoat the bottom of the boat. We started by attatching cables to the bow ring and through the drain plug. Then we jacked the boat up until we had enough room to clear the floor and the ceiling when we rotated it.
After a few minutes of swearing and wrenching, the boat was flipped.


Here's a look at what we had to deal with. Someone had smeared some sort of epoxy all over the pad to patch a few gouges.


And here's a shot after we cleaned everything up, patched the gouges layed up more glass to seal it back up and sanded everything back down.


Right now we are working on sanding that beautiful blue metalflake gelcoat to prep for the new black gelcoat. But inbetween I got a little sidetracked on a warm day and removed the windshield and started cleaning off the black spray paint someone had covered it with, the first one turned out great. I used a aircraft aluminum stripper called tal-strip which I have to give credit to my friend mjm351 for showing me, the stuff bubbles the paint right up, I wiped it off with a rag and hosed the windshield down with water. Here's how it turned out, the sticker you see in the corner of the glass is Keith's local union sticker, he put that on there before I was even done cleaning the windshield.


Last edited:
GOFAAAST
Member
Lots of hard work yes but it will all payoff when you guys have her out on the water and the boat will be like new again.
If you want the windshield trim to look like chrome just use some #0000 steel wool and some mothers mag wheel polish apply it with a toothbrush then steel wool it and wipe with a rag to buff it clean.
Be sure to sand the boats bottom with a flat pad sander like a Rockwell jitterbug, esp where you have glassed your repairs to keep it true.
Shes going to be a looker that's for sure, thanks for the update looks awesome!
CheckmateFever
Well-known member
You guy's are kickin' a$$, looks great!! Won't be long now and we'll be back on the water!! I can't wait to see'er done!! 

Don's89 Senator
Well-known member
Nice job.. I was wondering what holds down the windshield.. I have to remove mine this spring.
Nice job.. I was wondering what holds down the windshield.. I have to remove mine this spring.
Don those are T-bolts, I just ordered 18 new ones from Mike @ CM. I snapped two in half trying to remove them.

HANK PREDICTOR
New member
Awesome Stuff
You are coaching me through my first rebuild. Thanx for the detailed step by step process. I'm still drilling rivets but your last additions have me motivated to get started once again.
May I ask where is a good supplyer for the materials being used. I'm gonna get it into full swing soon.
Thanx again and Keep on Rockin

Adambomb
Member
Spring is here, the lakes are looking better every day, so Keith and I have been very busy trying to finish up the Predictor. We've got the gelcoat on, the top on, seat boxes done, transom brace done, old guage holes patched, new guage holes drilled, new storage rail and back seat tabs glassed in, primer done and on and on!
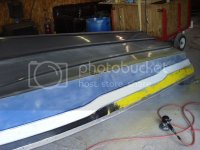
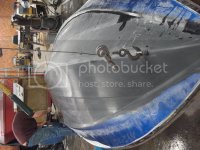
Here's a look at the first couple passes with a very fine foam roller. the Gel went on nice, we ended up with a consistant orange peel that I was able to DA and wet sand out then clean up the scratches with 1000 grit wet, then buff that to shine. it turned out pretty nice! I could have gone crazy with the wet sanding and shined it up even better, but after months of grinding and sanding the boat I decided to let it go since the fish will see it more than me.

Here's a couple shots of the gel before wet sanding.
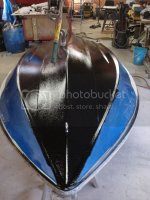
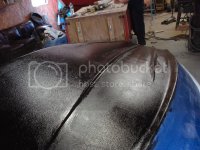
This is after I took out all the orange peel.
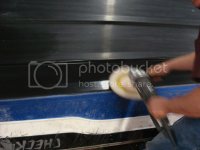
And this is after some buffing
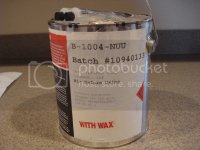
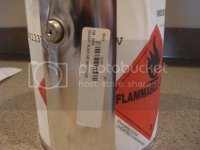
This is the product we used, I ordered it from Jamestowndistributors.com for about 120, I also googled up a promotional code for free shipping wich saved on haz mat costs.
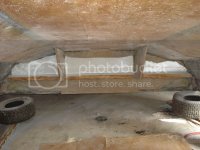
while the boat was flipped, I did some of the more unpleasant glass work. To glass the bottom half of the transom brace, we jacked the boat up a bit, I crawled under and went to work.
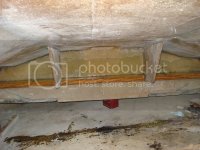
Next we flipped the boat back over, same way we flipped it the first time.
Here's a look at the first couple passes with a very fine foam roller. the Gel went on nice, we ended up with a consistant orange peel that I was able to DA and wet sand out then clean up the scratches with 1000 grit wet, then buff that to shine. it turned out pretty nice! I could have gone crazy with the wet sanding and shined it up even better, but after months of grinding and sanding the boat I decided to let it go since the fish will see it more than me.

Here's a couple shots of the gel before wet sanding.


This is after I took out all the orange peel.


And this is after some buffing

This is the product we used, I ordered it from Jamestowndistributors.com for about 120, I also googled up a promotional code for free shipping wich saved on haz mat costs.


while the boat was flipped, I did some of the more unpleasant glass work. To glass the bottom half of the transom brace, we jacked the boat up a bit, I crawled under and went to work.


Next we flipped the boat back over, same way we flipped it the first time.
Adambomb
Member
Next step was to clean up the top deck. Heres Keith cutting out part of ths splash well that sits over the transom. It was cracked and not worth saving. our plan is to glass the top deck right to the transom.

Next we flipped the top deck, and did the repairs to the splash well, patching poorly made holes for cables cut out by previos owners.
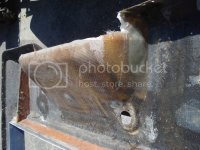
Next we layed down a peice of mat to behind the dashboard to cover the old guage holes, we also patched any holes from underneath that wern't necessary, like the second fuel breather hole.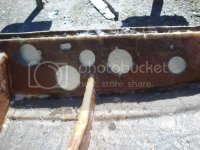
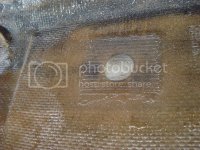
All this we were able to do ouside, since the we had a week of 70- 80 degree weather! Next we put in the missing storage rail, and the battery box
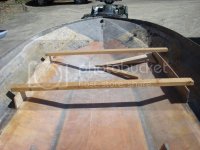
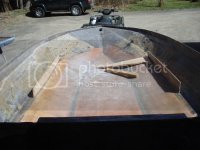
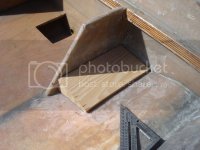

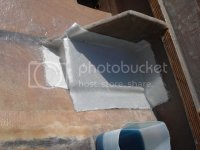

While we were doing that we patched any unecessary holes in the top deck with a series of patches to fill the void from the inside out.
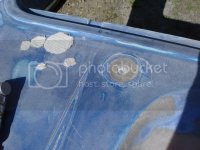

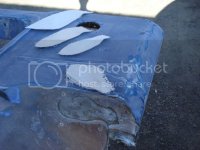

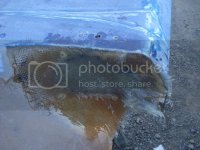

Next we flipped the top deck, and did the repairs to the splash well, patching poorly made holes for cables cut out by previos owners.

Next we layed down a peice of mat to behind the dashboard to cover the old guage holes, we also patched any holes from underneath that wern't necessary, like the second fuel breather hole.


All this we were able to do ouside, since the we had a week of 70- 80 degree weather! Next we put in the missing storage rail, and the battery box


While we were doing that we patched any unecessary holes in the top deck with a series of patches to fill the void from the inside out.


Adambomb
Member
To finish patching the old guage cut outs, I chopped up some fiberglass mat scraps as fine as I could and mixed it with resin to create a sort of puddy. 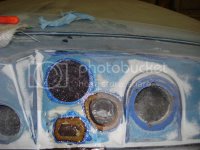
After that hardened I went back over it with a layer of hull and deck puddy, and finished with a thin layer of body filler to fill the low spots and smooth everything off. Next we reinstalled the top deck and fastened it back together with stainless nuts and bolts instead of the orignal rivets. I also started sanding the rest of the boat to prepare for the black paint job.
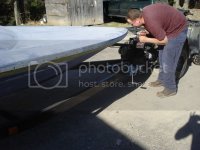
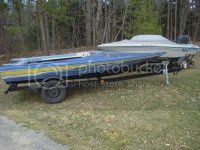
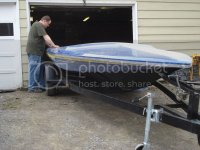

After that hardened I went back over it with a layer of hull and deck puddy, and finished with a thin layer of body filler to fill the low spots and smooth everything off. Next we reinstalled the top deck and fastened it back together with stainless nuts and bolts instead of the orignal rivets. I also started sanding the rest of the boat to prepare for the black paint job.


Adambomb
Member
Now that we had the deck back on, we were able to line up the seats to create the seat boxes. here's the mock up.
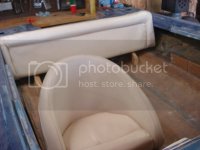
Once we knew where they needed to be, we cut out the panels and glued and screwed them together.
Once the glue hardened, we put a layer of mat on the inside of the box. We plan on leaving one side open for storage and easy seat change outs. the inside will eventually get a gel coated after it's installed

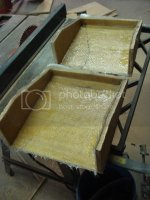
Next we secured the boxes to the hull, leveled them off and applied weight.
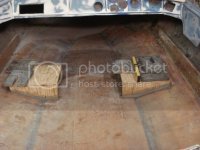
after they hardened down, we put a layer of mat over everything.
I also included another layer on the inside connecting the boxes to the floor
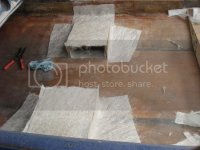

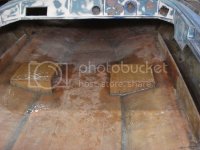
Next we glassed the deck to the transom. Here's a before and after..
Before

After
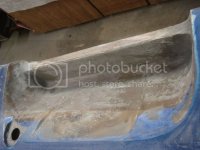
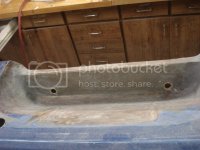
After that we drilled the drain holes and installed the brass sleeves, which we sealed with Sikflex.


Once we knew where they needed to be, we cut out the panels and glued and screwed them together.

Once the glue hardened, we put a layer of mat on the inside of the box. We plan on leaving one side open for storage and easy seat change outs. the inside will eventually get a gel coated after it's installed


Next we secured the boxes to the hull, leveled them off and applied weight.

after they hardened down, we put a layer of mat over everything.
I also included another layer on the inside connecting the boxes to the floor


Next we glassed the deck to the transom. Here's a before and after..
Before

After

After that we drilled the drain holes and installed the brass sleeves, which we sealed with Sikflex.


cturboaddict
Active member
Looks great man! Isnt sanding that crevice in the splashwell fun???

jumbofordman
Well-known member
Wow, that is a super fantastic job, thanks for making the manual I'll be following when my Predictor needs this job in a couple of years.
I also started sanding the rest of the boat to prepare for the black paint job.
Nice job ... but are you sure you want to paint that black? Just my windscreen area is black and I touched it in 84° sun and it just about burned my hand off. If it retains heat like mine, you definitely won't be able to crawl or walk barefoot on it.
HANK PREDICTOR
New member
Predictor Restoration
Looks as though everything is coming together fine. Yaw'll are doing a great job and I find it very helpfull in my restoration. I finally got the deck off so there is no turning back on it now. Thanx again for all of the progress reports and the guiding captions to go along with it.
Hank
Looks as though everything is coming together fine. Yaw'll are doing a great job and I find it very helpfull in my restoration. I finally got the deck off so there is no turning back on it now. Thanx again for all of the progress reports and the guiding captions to go along with it.
Hank
