-
Welcome to the Checkmate Community Forums forums.
» Interact with over 10,000 Checkmate Fanatics from around the world!
You are currently viewing our boards as a guest which gives you limited access to view most discussions, articles and access to our other FREE features.
By joining our free community you will be able to:
» Post topics and messages
» Post and view photos
» Communicate privately with other members
» Access our extensive gallery of old Checkmate brochures located in our Media Gallery
» Browse the various pictures in our Checkmate photo gallery
Registration is fast, simple and absolutely free so please, join our community today!
If you have any problems with the registration process or your account login, please contact support by clicking here or by using the"contact us" link at the bottom of the page.
You are using an out of date browser. It may not display this or other websites correctly.
You should upgrade or use an alternative browser.
You should upgrade or use an alternative browser.
A Star(liner) is (re)Born
- Thread starter Mark
- Start date
- Status
- Not open for further replies.
Mark
Well-known member
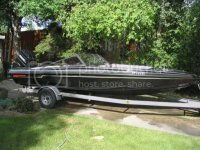
With the inside glass work competed, it was time to do something about the outside. 18 years in the Florida sun does a number on black gelcoat. Though it was heavily oxidized, the hull hardly had a scratch on it. I don't think it ever spent much time tied up to a dock. I wetsanded with 1000, then 1500 and compounded it and it still looked chalky. After trying a bunch of things I got a recommendation from a local fiberglass shop to try Aqua-buff. This is what they use to prep their molds. I found it the net and it is very effective. You apply it, mist it with water, and buff at high speed(2500+RPM). It will not work at lower speeds, in fact I did it at 3000 RPM. It is basically a water soluble paste with suspended silica sand. I think with Aqua-buff you could eliminate the wetsanding altogether. First time over use Aqua-buff 1000 and then Aqua-buff 2000. I then used a finishing compound, followed by Race Glaze polish. It was a time consuming and a bit messy(residue) procedure but I managed to bring the gelcoat back to an almost showroom condition. Black doesn't photograph well because of the glare of the flash, but maybe the reflection of this Tim Horton's(a Canadian obsession) coffee cup will tell the story.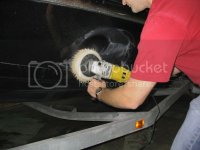



cooperider
Well-known member
Aquabuff, I buy that by the 5 gallon bucket. Good stuff.
That Tim Hortons cup looks better in the reflection than it does in the pic.
Great looking pics.
That Tim Hortons cup looks better in the reflection than it does in the pic.
Great looking pics.
bdusted440
Active member
How about some finished pics > It looks sweet sofar. Ive been there .
Mark
Well-known member
One of the biggest challenges of this project was finding all the missing parts at a reasonable price. Stainless steel hardware has gone through the roof. I went around to marinas and asked if they had old stock of any sort. I was able to find a lot of pieces that way. Most of the hardware has changed over the years and almost every thing I did I had to customize to make it work.
Mike at Checkmate is also a good source, but for Canadians, by the time you add shipping, exchange, brokerage and taxes you've bought some very expensive parts. The two stern cooler latches ended up costing me over $150. But I was not able to find anything else that was going to fit. I also went to a scrap yard that had a bunch of fiberglass hulls. That was probably my best bang for the buck. Among other things, I got this semi-rigid rubrail off of two different hulls(a Starliner needs 50') for $50. The insert I bought brand new, making the whole thing look new when it was all said and done. Of course the screw holes were not going to line up, so I plugged the old holes with epoxy soaked wooden dowels. I also resealed the seam between the hull and deck with 3M 5200 to keep the water out.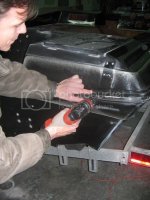
Mike at Checkmate is also a good source, but for Canadians, by the time you add shipping, exchange, brokerage and taxes you've bought some very expensive parts. The two stern cooler latches ended up costing me over $150. But I was not able to find anything else that was going to fit. I also went to a scrap yard that had a bunch of fiberglass hulls. That was probably my best bang for the buck. Among other things, I got this semi-rigid rubrail off of two different hulls(a Starliner needs 50') for $50. The insert I bought brand new, making the whole thing look new when it was all said and done. Of course the screw holes were not going to line up, so I plugged the old holes with epoxy soaked wooden dowels. I also resealed the seam between the hull and deck with 3M 5200 to keep the water out.

Mark
Well-known member
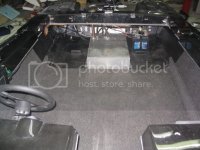
Once all the hardware was installed on the outside, I re-did all the wiring, rigging, steering and gauges on the inside. The steering wheel is a brand new factory model that I got from SCT. It was off his last Pulsare, he had gone with an aftermarket one. Shannon is a great guy, he sent me the wheel w/o any exchange of funds and said "if you like it, send me $20 plus shipping". So I stiffed him! ....just kidding, thanks again Shannon! If you ever re-carpet make sure you use marine carpet or it will never follow the contour of the hull.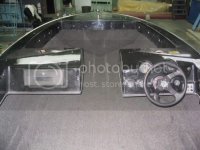

Mark
Well-known member
Now to power this beast. These hulls take big power if you want a rocket ship. Having sold the Bridgeport, I decided I wanted something that wouldn't cost a fortune to run, but would still be fun to drive. A DFI was beyond the budget, so a small block V6 is what it was going to be. I prefer Yamaha to them all but I could not find a used one in this size range. I found this 1992 2.5 200 XRI at a Merc dealer a couple of hours away. Compression and leak-down were perfect and I figured I had a cherry.
When I got it home I discovered it needed a new swivel shaft, bottom yoke, bushings, seals, motor mounts, stator and voltage regulators. The marina covered the parts but I still had to do the labor myself. The last thing I needed at this stage in the project was a big motor job.
The Detwiler is a great jack plate, but to my surprize 8" isn't quite enough for the small V6. The bow still felt a little heavy. Nevertheless this setup was good for 64 MPH, and there was more to come.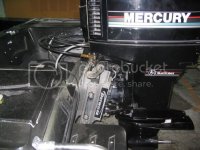

Mark
Well-known member
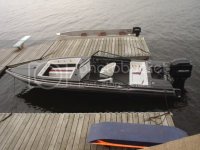
Lake of the Woods, Ontario is a boaters paradise. A 100 mile long lake, 1000's of islands and bays. And because all the cottages are on the water and most on islands, you go everywhere by boat; Pizza Hut, Safeway grocery story, Walmart, etc. We are talking big money here and beautiful boats. Many times I would pull up to a dock next to a 25' Searay or Cobalt and people would walk right by them, look at the old Checkmate and ask if I would ever consider selling it. There is no doubt about it, these classics are head turners.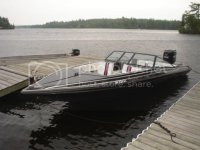

cooperider
Well-known member
<BLOCKQUOTE class="ip-ubbcode-quote"><div class="ip-ubbcode-quote-title">quote:</div><div class="ip-ubbcode-quote-content">Originally posted by Mark:
Hey coop,
When are you going to post one of your projects from beginning to end, and show us amateurs how it is really done? </div></BLOCKQUOTE>
I am saving up to start this Predictor project. I will have a camera to document it all. I never had a digital camera till recently so, while I do have a lot of pics of old projects, I have never took pics from start to finish.
I do have a friend of mine that does work with video, and he wants to put together a video of a project, styled after shows like American Chopper, Rides, Etc. He is just doing it for fun, and to use as something to show future employers. So it should be interesting.

bdusted440
Active member
Nice looking mate.Coop you have to start anouther one and finish the one you have going .LOL

Mark
Well-known member
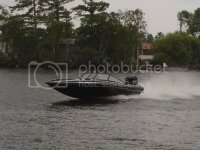
As I mentioned earlier, it didn't seem 8" setback was quite enough for the 2.5 Merc. I think it might be with a heavier 3.0 or a DFI. I came up with an inexpensive way to add spacers. I picked up a 2' piece of 3" by 3" heavy walled aluminum square tubing. Cost $20. Cut it into 2 one foot lengths and drilled it according to the motor bolt pattern. You must be very careful you get the holes exactly right or you could mount your motor crooked. The extra 3" made a big difference in getting the bow up. It will now run 65 MPH any day of the week, and on a good day I've seen 69 MPH. Next year I hope to break the elusive 70 MPH barrier.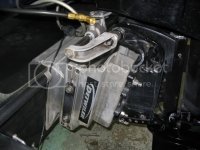

- Status
- Not open for further replies.


