• Welcome to the Checkmate Community Forums forums.

    You are currently viewing our boards as a guest which gives you limited access to view most discussions, articles and access to our other FREE features.
    By joining our free community you will be able to:

    » Interact with over 10,000 Checkmate Fanatics from around the world!
    » Post topics and messages
    » Post and view photos
    » Communicate privately with other members
    » Access our extensive gallery of old Checkmate brochures located in our Media Gallery
    » Browse the various pictures in our Checkmate photo gallery

    Registration is fast, simple and absolutely free so please, join our community today!

    If you have any problems with the registration process or your account login, please contact support by clicking here or by using the"contact us" link at the bottom of the page.

A Star(liner) is (re)Born

Status
Not open for further replies.
The more i look at you're boat I think a starliner is in my future.
thumb.gif
 
thumb.gif
All I Can Say is WOW!! Very nice to see how you did everything. Very well documented...It's nice to see projects from start to finish like that. It is a classic and it looks great!
 
Super job,it looks fast just setting still! I really like the pic shot from the front at the dock. That is one wicked looking boat
thumb.gif
 
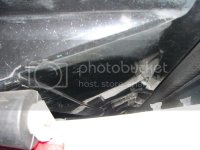
Well, it is time to update this old thread. Three years ago when I reclaimed this Starliner there were holes drilled right into the core (to mount pumps and the like) by the moron who owned it before me. I dried the core with acetone, injected epoxy and figured I had it beat. When I was cleaning the hull this fall I discovered a huge bulge in the hull right in front of the transom. It was 14" by 42" and ran right into the V pad. I knew right away it was a seperated core. I was not excited about cutting open my new floor but I had no choice. Its a bit hard to see the bulge on the photo since it is a black boat...but you get the idea.
DSC03006.jpg
 
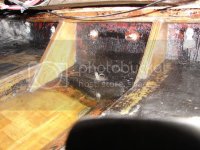
I had to cut out the rear starboard floor and stringer to get at the whole area. Using a diamond cutting wheel I carefully cut out the core until I found good solid attachment to the outer hull. I had to go 2/3 into the core of the pad as well.
DSC03001-1.jpg
 
Next I built a jig to push the outer hull back into shape. It was time consuming to make sure it was perfectly flat. There would be no second chance if I screwed it up once the glass cured inside.
DSC03021.jpg
 
I consulted with Coop on what to do next and read his article on repairing a core. What an amazing resource this guy is. Imagine being able to email the guy who built your boat as to how to fix it. He's always willing to lend advice. Kudos to ya Coop!
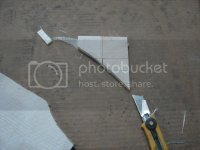
End grain balsa is cool stuff. Light as a feather and you can cut it with a utility knife.
core3-1.jpg
 
I put down 2 layers of mat, then the balsa (wetted out) and weighted it down till it cured. Then mat/cloth/mat. You can also see a little plastic block glassed in at the very bottom to attach the bilge pump. No holes in this core!
core3-7.jpg
 
Then I thought...I've got this thing opened up and the fiberglass materials handy...a good time to throw in some transom knees. I also beefed up the cross piece that runs the length of the transom by running another piece of 3/4" plywood under it. That gave me something to tie the knees into as well. The grunt work is done, now just to put everything back in place.
core-2.jpg
 
Great job. Looks like its all supposed to be there. Ah the joys of older boats and the fun of putting them back together. :thumb:
 
Looks great mark,
Im gonna be doing the same thing except on both sides of the pad once it warms up enough in new hampshire to work with glass, which should be sometime next june:rof: were you able to work the whole section at once or did you do it in multiple pieces?
 
The balsa in the pad section is a seperate since it sits a little lower and the hull balsa comes over top. However I repaired the whole thing in one go. Remember balsa core is already a bunch of little pieces held together by mesh...so it doesn't really matter how you lay it in. You could easily glass the whole repair at the same time which is far superior for strength and integrity.
 
The balsa in the pad section is a seperate since it sits a little lower and the hull balsa comes over top. However I repaired the whole thing in one go. Remember balsa core is already a bunch of little pieces held together by mesh...so it doesn't really matter how you lay it in. You could easily glass the whole repair at the same time which is far superior for strength and integrity.

You noticed that by tearing it out? Thats pretty good.

The side you replaced then was the second step in putting balsa in the bottom. The pad balsa gets put in with the first side that they put in. So when the have the hull tilted one way they do the bottom and the pad, then turn the hull and do the remaining bottom with some overlap of the glass.


I love how you braced the bottom. Good thinking.

And thank you for the kind words earlier.
 
Nope, I have no gelcoat left. I did last go around and by the time you get the gas tank, battery, oil tanks and seat box in you can't see it. Not going to worry about it this time.
 
Nope, I have no gelcoat left. I did last go around and by the time you get the gas tank, battery, oil tanks and seat box in you can't see it. Not going to worry about it this time.

Looks very good Mark :thumb: I know alot of work went into that baby

Question for ya ,Did your last application of resin have a wax additive.
If not, it will stay sticky will it not?
 
I just put a heat lamp on it for a couple of hours and it cured tack free. I mixed the last coat a little hot as well.
 
Status
Not open for further replies.
Back
Top