• Welcome to the Checkmate Community Forums forums.

    You are currently viewing our boards as a guest which gives you limited access to view most discussions, articles and access to our other FREE features.
    By joining our free community you will be able to:

    » Interact with over 10,000 Checkmate Fanatics from around the world!
    » Post topics and messages
    » Post and view photos
    » Communicate privately with other members
    » Access our extensive gallery of old Checkmate brochures located in our Media Gallery
    » Browse the various pictures in our Checkmate photo gallery

    Registration is fast, simple and absolutely free so please, join our community today!

    If you have any problems with the registration process or your account login, please contact support by clicking here or by using the"contact us" link at the bottom of the page.

Sam I am's 89 Starliner Restore (Discussion Thread)

Status
Not open for further replies.
Sounds like you've got it figured out. As for the fuel, if it smells like its gone bad I would sneak a couple of gallons at a time into the used oil container at WalMart. The one around here has it sitting out behind the auto center and you can just walk over and dump it. If its not bad smelling I would dump a gallon or two in with each fill up on my car. Is a 300XS what you're planning on running? Eventually I'd like to hang one on mine. What kind of speed would you expect with one? 75'ish?
 
Is a 300XS what you're planning on running? Eventually I'd like to hang one on mine. What kind of speed would you expect with one? 75'ish?

If the 2100's are getting well into the 90's with an average of upper 80's, I would guess that a Starflite (restored) should get into the 80's.

HD
 
Is that $20K including paint?

If you are having the boat painted (which I think you mentioned that), my guess is $25K with a used 300XS.

I hope you come in less!

HD
Well then...Just kick me in the balls on a monday morning, hotdaddy! ;)

I got a suggestion from one of the guys at work...there's a few technical colleges around that will do the paint and possibly the prep for free as long as I pay for the materials...thinking about going that route. It might not be pro calibre, but it will be a helluva lot better than I can do, myself.

While I really like the idea of it...still not sure about the 300XS...it seems a little...extreme?:eyecrazy: Also, the hull is only rated to 250 per the plate...I don't want insureance problems. I originally thought the starflites and starliners were 300 hp hulls? Anybody know what the story there is?

I've been looking at 250 Pro XS's on craigs and there seem to be a few of those running around. I've dismissed the Yamaha SHO 250 as there have been reported problems of "making" oil...i.e. gas is slipping past the rings(?) and getting into the oil. Not sure hat the pathology of the problem fuel/oil actually is, but no thanks.

I would think a 250 Pro XS would push this hull to the low to mid 70's and 300XS should approach the low to mid 80's.

Sam
 
I would think a 250 Pro XS would push this hull to the low to mid 70's and 300XS should approach the low to mid 80's.

Sam

Yup, that is what I get with my Etec 250. I thought it was going to be faster but it is what it is. The Merc 250xs might be a smidgen faster but not by much. There is nothing wrong with 75 anyway... it feels fast.
 
Long before your resto project is complete, in fact hopefully by Memorial Day, I should have a Starliner with a 250 Pro Xs bolted on the transom. I will certainly share any and all successes or failures, as I try to go as fast as the hull will go.
 
I believe the Flites were rated for a 300 and the Liners a 250, but I heard that some of the early Liners were plated for 300. Someone also posted in an old thread that Checkmate will send you a 300hp plate for your Liner. All of this is based on what I've read on here, not from my own experience.
 
Mine is plated for the 250 and I happen to have the Pro Xs with several years of warranty left on it so my choice is simple.
 
Well then...Just kick me in the balls on a monday morning, hotdaddy! ;)

Anytime! :rof:

I have learned from experience, projects like these easily end up 25 to 50 percent over budget. If you are lucky!!!!

On top of that I always add 25% to my estimate when discussing money with the Wife. That way I can tell her how well I budget when I come in close!

I really like the technical school idea. It is amazing how talented some of those kids are. I bet you that they rarely get to work on boats.

HD
 
I think the Starfamily was all rated for 300 and plated for 250.
As for how Hd does budget projection, I do the same thing but fix it from the back end instead of front.
Whatever it cost I just tell my wife it was half as much.
 
Split the hull...now I just need some muscle.

Made a lot of progress the past couple of days. Most of that was documented in my last update, but tonight I split the hull. I was expecting this to be a huge undertaking, a lot of cussing and maybe it would let go. Nope. I used Badbk's floor jack idea and it took about 5 minutes. Since it went so smooth and I'm done early, I've popped a brew :cheers:, going to get cleaned up :) and see if Mrs. Sam I am wants to wrestle :devil:.

Oh yeah, went to bigger picture format to capture more detail.

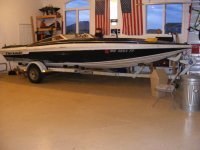
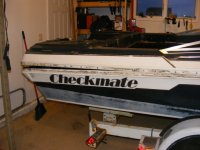
Here's the cleaned up garage. If I'm going to perform surgery on this old mate, I gotta have an O.R. It's tight, but it fits. I have a 3 stall garage and I was hoping to get this all done in the 3rd stall. I now realize that's pipe dream. When John Lamon saw the situation, he probably summed it up correctly: "This project is going to take over your entire garage."

DSCF3947.jpg

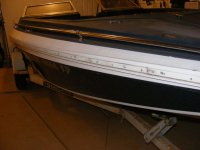
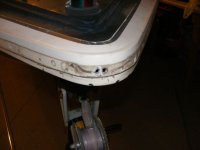
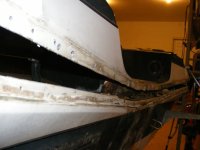
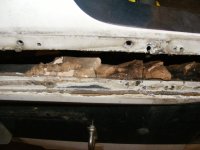
Here's the side minus the rub rail, insert, rivets, screws and more rivets. I hope I didn't need to save that stuff, because it went to the dump this morning. Also, I was secretly pleased I only broke one drill bit removing the rivets. I should have taken a picture, but there were a lot of instances where the "shaft" of the rivet was still above the surface of the rivet head. My finish nail punch and a hammer took care of that problem very well. After that, the drill bit had a secure spot to seat when drilling. It went a lot faster after I got smart about that little detail.

DSCF3943.jpg

DSCF3944.jpg

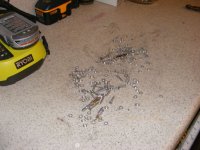
Here's some of the left overs. I learned a valuable lesson: when performing this task, don't wear flip flops. The aluminum is hot and sharp. Ouch.

DSCF3950.jpg

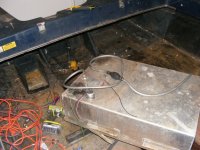
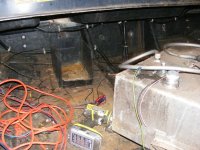
Next came tank removal. You can't see it but there's 15 gallons of fuel in there. At 7 lbs per gallon, the tank was a little awkward to handle. As previously mentioned the siphoning took care of the weight and I slipped 10 gallons into the Tahoe tonight, then topped it off with 91 and some STP fuel treatment. Hope it works.

DSCF3945.jpg

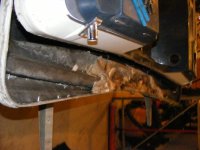
I'm not sure if the photo shows it, but the floor under the battery box is completely rotten. Almost all the way through.

DSCF3946.jpg
 
Pop goes the stern...

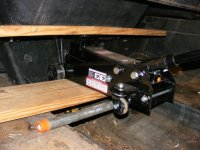
Here's the BadBk method of hull splitting. It works like a freakin' champ. Important to use a large board on the splash-well to disperse the forces. I wasn't too worried since I'm going to make this a lipless splash well. The port side popped first and then I discovered the remains of a stubborn rivet. One wack with the nail punch and hammer and the starboard popped too.

DSCF3949.jpg

DSCF3951.jpg

DSCF3954.jpg

DSCF3952.jpg

DSCF3955.jpg

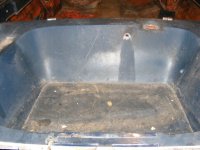
I wanted some good "before" pics of the splash well. Once it gets cut, I'll compare the "after" so everyone can tell me how awesome I am.

DSCF3958.jpg

DSCF3959.jpg

DSCF3960.jpg

That's it for tonight. I'm on the road for the next 3 days so don't expect anything until next week.
 
It doesn't look like you have any cracks where the top motor bolts went through the transom?

Those type of cracks are pretty common although they don't necessarily mean anything is structurally deficient.

HD
 
that's awesome sam! man you aint effin around either........i know you are set on all red but after seein that first pic of it in the garage and knowing a bit of your history, i cant help but picture that boat RED, WHITE & BLUE.......thanks for all the pics
 
It doesn't look like you have any cracks where the top motor bolts went through the transom?

Those type of cracks are pretty common although they don't necessarily mean anything is structurally deficient.

HD

No cracks but if you look closely you can see the remnants of an old repair under the bolt holes.
 
Let the real fun begin, grinding fiberglass out..... today I did some more grinding/fiber-glassing on mine and used my full face respirator for the first time, lol, HIGHLY recommended.

When you do your lipless splashwell, save the bottom piece that you have now, will come in very handy when you're glassing it back in. I kinda just cut and hoped I got it straight and by golley it was pretty good. I duct taped the original bottom(edges trimmed to only a flat piece) into "place" and put a few strips of fiberglass down to keep it in place for the rest. It gives you a nice flat bottom piece and fills the majority of the space. If you're pickin up what I'm putting down, kinda scatter brained just typing....
 
Looking great but I had a question. In the pictures it looks like it is setting on a roller trailer. If so are going to to the complete restro on the trailer? If I remember correctly Jeff (ballardnboyz) did his on his roller trailer and it caused hooks in the bottom of the boat. it would be a shame for you to do all this work and end up with hooks in the botttom of the boat.
 
I think he mentioned building a cradle for it. What about jacking it up and setting it down with some strips of 3/4 ply or 2 by or 1 by between the rollers and the boat.
 
when I did mine I worked some 2x4 supports under the boat as temporary bunks, havent blueprinted the hull or anything, but think that at least minimized any hooking.
 
Thanks, everyone. I'm going to build a rack after the demo is complete. Also, I never would have attempted this restore without the forum. After watching how the forum helps out...I gained the confidence to try. I've always said half the battle to success is just being dumb enough to try. The other half is being smart enough to pull it off!
 
I think he mentioned building a cradle for it. What about jacking it up and setting it down with some strips of 3/4 ply or 2 by or 1 by between the rollers and the boat.
a large dolly with bunks works great..and a big help if you want to roll it around at all
 
Status
Not open for further replies.
Back
Top