• Welcome to the Checkmate Community Forums forums.

    You are currently viewing our boards as a guest which gives you limited access to view most discussions, articles and access to our other FREE features.
    By joining our free community you will be able to:

    » Interact with over 10,000 Checkmate Fanatics from around the world!
    » Post topics and messages
    » Post and view photos
    » Communicate privately with other members
    » Access our extensive gallery of old Checkmate brochures located in our Media Gallery
    » Browse the various pictures in our Checkmate photo gallery

    Registration is fast, simple and absolutely free so please, join our community today!

    If you have any problems with the registration process or your account login, please contact support by clicking here or by using the"contact us" link at the bottom of the page.
the fun of refinishing a predictor

Status
Not open for further replies.
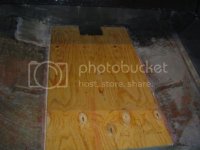
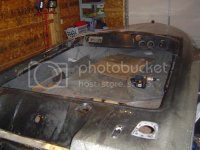
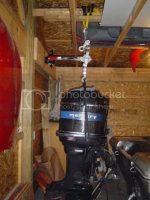
it dint take me long at all to pull everything off. the motor is sold. new one will be in my possession next week. notice all the dust fron the vaccume on the dash and carpet.whoops. im going to tack up a bunch of drop cloth to keep the rest of the garage clean. im starting the sanding and grinding in a couple days.
DSC01039.jpg
DSC01035.jpg
 
<BLOCKQUOTE class="ip-ubbcode-quote"><font size="-1">quote:</font><HR>Originally posted by illMATTic:
so i purchased a small inexspnsive shop vac. i went right out and started using it yesterday. i pulled it out of the box and sucked up the very large pile of dust i had swep up. just as fast as it was picking it up.... it was going right out the backside of the vacume and all over my garage. well.... apperently they do not come pre assembled.
brickwall.gif
sure enough the wheels, filter and instructions were inside the vacume amidst all the garbage. i have never cussed so much in my life.
zx11pissed.gif
<HR></BLOCKQUOTE>

Oh that is to funny.
 
<BLOCKQUOTE class="ip-ubbcode-quote"><font size="-1">quote:</font><HR>Originally posted by illMATTic:
so i purchased a small inexspnsive shop vac. i went right out and started using it yesterday. i pulled it out of the box and sucked up the very large pile of dust i had swep up. just as fast as it was picking it up.... it was going right out the backside of the vacume and all over my garage. well.... apperently they do not come pre assembled.
brickwall.gif
sure enough the wheels, filter and instructions were inside the vacume amidst all the garbage. i have never cussed so much in my life.
zx11pissed.gif
<HR></BLOCKQUOTE>


L.O.L. NOW THAT REALLY SUCKS....NO PUN INTENDED....
devil.gif
 
damn i have been lazy. i just didnt want to go out and see the mess i had made with the vaccume. i finaly went out and picked up some supplies to get started on the floor. man, the west system epoxy is not cheap. its a good thing i know a guy..... i can get it at a price.
icon_cool.gif
i picked up a gallon of resin and the nessesary parts to go with it.
 
Matt... You ought to get it CHEAP... It's MADE right near you!
bounce.gif


Like the other guy's said... and I'll add that it's the BEST on the market and EASY to work with!!!
thumb.gif
 
I'm a West System dealer and it is made a 1/4 mile from our marina. It dosen't get any cheaper if your close, but it works great and like you said you get what you pay for.
 
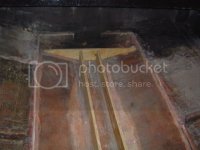
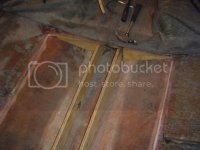
well i got a couple more here. now keep in mind this isnt done. it finaly warmed up here.
i still have to build a bit around the bilge area.
DSC01123.jpg
dont worry im going to cut that part out to let water flow. i figured i would put two stringers in. cant hurt.
DSC01121.jpg
here i ran the stringers 10" up where i cut a portion of wood to block off the water flow to the front. the front half is pretty solid yet.
DSC01122.jpg
 
Excellant job .looks great giving me insentive but its pouring outside and my yard is soft was going to pickup my other enchanter and park the black one at my friends shop .have to weld broken shock mount on van. caught hell last week for messing up lawn with the black. later Oc
 
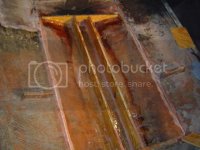
well i have the stringers and some braces glassed in. how many layers of glass should i do? this is one layer.

this is hard working at these angles. my legs and knees are killing me.
glass1.jpg
 
When I did my floor last summer I did 2 layers of glass mat on everything. I used an old bed comforter that I folded to match the angles and topped it off with an old bed pillow to kneel on.
icon_smile.gif


1984 Predictor 1968 Mercury 1250SS I-6 125 HP
 
Went throught the exact same thing with my 83 exciter get all that foam and rotten stringers out dead weight. I used 3/4" cabnet grade for my stringers and glassed it all in . And useed 1/2 salt treated for the seat boxes you look like me 5 months ago .... Good luck ....
 
thumb.gif

Great info and pics!!
I am faced with the same job this year.
I have already saved all of your pics for reference!! Thanks!!

Lookin GOOD!!
 
you may want to replace the whole floor... i didnt. i did just as much as i could get away with not wrecking all the carpet i had just put in last year. keep in mind, this is the first time i have ever done this. ask me if it worked in the fall.

ILL
 
icon_biggrin.gif

I pulled the carpet out last Fall so will have full view of the entire floor. In fact, I do think the whole floor should be replaced. I am planning on setting up a thread like this one so everyone can see what I have. Love to get advice and comments from other members!!
 
Start doing your floor now if you want to run it anytime this summer. It’s a very time consuming project. If you think something will take about 2 hours to do, it will really take 5 hours to actually do.

Remove the motor before you take out the floor. Get a good shop vac with replaceable filters and a good face respirator with replaceable filters; this is a dusty project. Take your time and make sure everything is right the first time. I replaced my floor up to the toe board under the dash. I put a splice on the center beam and bonded the new section to the hull with kitty hair and glassed it in. I replaced the foam and also enlarged the bilge to hold a bigger pump (800gph), and a float switch.

If you take out the flotation boxes in back, now is the time to check your wiring. It’s easy to get to with the boxes out. My engine wiring harness fell apart along with the control harness and I didn’t have to replace my boxes; that made it tougher to run the new harness. It’s also time to replace your original nylon thru the hull bilge fitting to a stainless steel one. My original nylon one had snapped off inside the hull at the nut. So I drilled it out from the outside and replaced it. It was a long reach inside with the box there.

1984 Predictor 1968 Mercury 1250SS I-6 125 HP
 
Was wondering about taking the motor off first. What is the reason? Is it because you are removing support by removing the floor etc and do not want too much stress on the transom? I am not sure what condition the transom is in. I hope that the trailer will keep the hull in check during this process. I am guessing that after the floor and stringers are removed the hull might want to flex.
Thanks!
Great Info!
thumb.gif
 
Status
Not open for further replies.
Back
Top