• Welcome to the Checkmate Community Forums forums.

    You are currently viewing our boards as a guest which gives you limited access to view most discussions, articles and access to our other FREE features.
    By joining our free community you will be able to:

    » Interact with over 10,000 Checkmate Fanatics from around the world!
    » Post topics and messages
    » Post and view photos
    » Communicate privately with other members
    » Access our extensive gallery of old Checkmate brochures located in our Media Gallery
    » Browse the various pictures in our Checkmate photo gallery

    Registration is fast, simple and absolutely free so please, join our community today!

    If you have any problems with the registration process or your account login, please contact support by clicking here or by using the"contact us" link at the bottom of the page.

Transom replacement and probbly more on a Maxxum 281

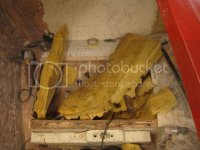
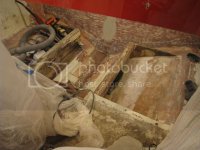
Well... I bought a new boat this summer, and I thought it only needed an interior. The more i crawled around cleaning the more I found. I ended up pulling the motor out to go threw it for the winter, and found a rotted transom under an exhaust tip. :pissed: So I did what anyone would do...I cut it out this weekend. I had to take the windshield off to fit it in the garage... but it made it... barely but it made it.
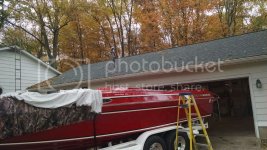
resize_zpsqcwdtxrt.jpg
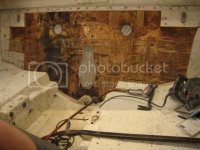
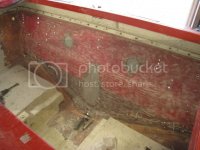
Here is what i started with. IMG_5815_zpsn6zbyecu.jpg
Their are a couple of tools that made this go much easier. One is a scraper tip for an air chisel i picked up at my local Napa. The other is a 4 3/8 saw blade that I adapted to a grinder. I had to turn down the lower mandrel on a lathe to fit the blade. It's a little scary :eyecrazy:and I have it on a cheep harbor freight grinder so i can stall it out instead of it getting away from me.
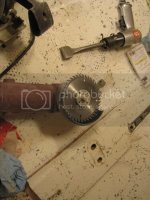
IMG_5827_zpsyobtbbz2.jpg

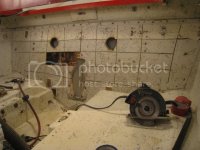
So here is the scariest part... taking a saw to your boat! Just be careful to set the depth of the saw.
IMG_5820_zpsrljcxq5u.jpg
Once that is over. Its a matter of prying off the pieces while trying to be careful not to damage the gel coat on the outside. Once the skin, and majority of the wood is off, I scraped the remainder off using the air chisel after cutting it again with the hand saw.
 
Last edited:
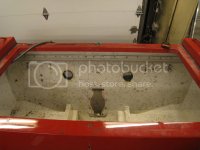
Hear is the transom after the skin is off. You can see the dark spot that is where it is all wet on the left exaust port.
IMG_5822_zpsoukcrwks.jpg
This is the bonding agent between the skin and transom
IMG_5828_zpscvproprs.jpg
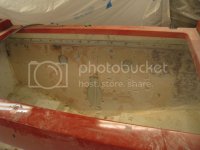
And here is after all the putty is ground off and tabbing around the edges cleaned off.
IMG_5838_zpseqoxd1ti.jpg
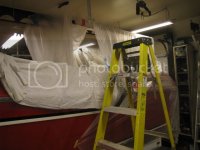
I did forget to mention that i put a tent over the back of the boat to try and contain some of the dust.
IMG_5835_zpsdulhmwmm.jpg
SO MUCH DUST! So far i have about 24 hours in it. I am planning on using vinylester on the transom. Once the transom is bedded in and tabbed i plan on doing the floors in the back and the gas tank cover at the least. I wont be able to get any materials till late next week so that is going to slow me down a little bit. In the mean time i will pick up some wood and try to get it fitted and fill in some holes that are no longer in use.
 
Last edited:
you are doing it the right way ! good luck..also ck stringers real good while you are in there, also bulkhead forward of engine
 
Looks great! I take it that those exhaust tips weren't sealed?
Hopefully you caught all the rot and it did not get a chance to move into the stringers.
Looking forward to this thread.
 
you are doing it the right way ! good luck..also ck stringers real good while you are in there, also bulkhead forward of engine

Thanks. I plan on checking the stringers after I get the transom in place and at least beded and taned in. I don't want anything to move on me. The bulkhead infront of the engine is trash. I will probly pull the floor and tank to check the stringers and replace the bulkhead. It looked like the foam isent holding the tank from the little I can see. I'll know more once I get the tank cover off.
 
Looks great! I take it that those exhaust tips weren't sealed?
Hopefully you caught all the rot and it did not get a chance to move into the stringers.
Looking forward to this thread.

The tips look like they were sealed at some point. Im not sure when though or if someone took them off and didnt reseal them. I was amazed that the wood was still so wet down in their. And yea I'm hopping the stringers are still good myself :cheers:
 
The tips look like they were sealed at some point. Im not sure when though or if someone took them off and didnt reseal them. I was amazed that the wood was still so wet down in their. And yea I'm hopping the stringers are still good myself :cheers:

Funny, I'm redoing my stringers and hoping that my transom is good.
 
I replied to your thread on oso, I'm sailtexas186548 over there

Thanks, good info! I have been considering getting a scale for mixing. The grinding is definitely the worst part. I ground that using a hard grinding disk made for aluminum works pretty good too and will last most of the job.
 
Thanks. I plan on checking the stringers after I get the transom in place and at least beded and taned in. I don't want anything to move on me. The bulkhead infront of the engine is trash. I will probly pull the floor and tank to check the stringers and replace the bulkhead. It looked like the foam isent holding the tank from the little I can see. I'll know more once I get the tank cover off.
probably find the foam full of water, my 251 was soaked, must have added 100 lbs to the boat
 
Thanks, good info! I have been considering getting a scale for mixing. The grinding is definitely the worst part. I ground that using a hard grinding disk made for aluminum works pretty good too and will last most of the job.

Get a digital scale that reads grams, mine has a max capacity of 5kg but I never need more that three. It's just a kitchen scale, that I put under a clear sheet of plastic to keep it clean. Goes right back in my kitchen when I'm done
 
I got started back on the project this week. This is where I left off with the tabbing all ground out.
IMG_5838_zpseqoxd1ti.jpg

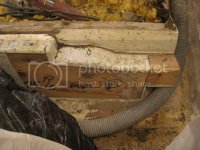
I decided to remove the old style motor mount so I can put in modern motor mounts that are through bolted. I decided to just cut around the mount with a saw and try to pry them off.... It didn't work out quite like that. When I couldnt pry it off, I tried to cut benind it with a chain saw. I hit what I thought was a bolt. So I cut the glass off the front ot the mount.
IMG_5863_zpsaix7gah1.jpg

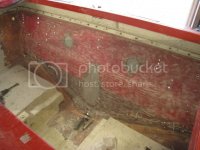
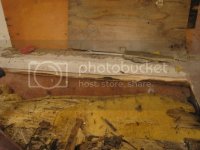
What I failed to notice is that their is the nail heads in the face of the mount :brickwall: So I thought the bolt heads were on the other side of the sringers. So the floors had to come out, which they were wet anyway.
IMG_5860_zpsklj1xevo.jpg

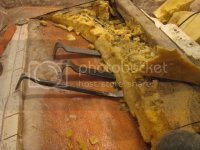
Then out came the foam... I started by cutting around the edges with a sawzall. Then I pried the foam out using flat bars.
IMG_5866_zpsuonzzvsu.jpg
It came out in pretty big chunks. IMG_5867_zps0nzbjvlh.jpg
The rest i cleaned up using a vibrating tool dont know what their name is.... Low and behold once I had cleaned it all up NO BOLTS!!! ****...Well then I noticed the nails. Pulled the nails and pried them off. IMG_5876_zpspfhn5di8.jpg
So thats where it is for now.. I will probly clean the edges up tomorrow..
 
Are you going to sister up any extra wood to the stringers to beef up your new mounts that you are through bolting?
 
Looks like you are on the right track, i did my transom in my 90 maxxum 2 years ago, didnt need stringers but pulled up floor to inspect foam and stringers, also ended up having to replace my gas tank. Just take your time and think things thru. Have you ever thought about a pour in transom, little pricey but well worth the money. I have done 2 checkmates so far with pour in transims and doing another 2 this winter. Great stuff plys you can do stringers also if you wanted with it.
 
Back
Top