-
Welcome to the Checkmate Community Forums forums.
» Interact with over 10,000 Checkmate Fanatics from around the world!
You are currently viewing our boards as a guest which gives you limited access to view most discussions, articles and access to our other FREE features.
By joining our free community you will be able to:
» Post topics and messages
» Post and view photos
» Communicate privately with other members
» Access our extensive gallery of old Checkmate brochures located in our Media Gallery
» Browse the various pictures in our Checkmate photo gallery
Registration is fast, simple and absolutely free so please, join our community today!
If you have any problems with the registration process or your account login, please contact support by clicking here or by using the"contact us" link at the bottom of the page.
You are using an out of date browser. It may not display this or other websites correctly.
You should upgrade or use an alternative browser.
You should upgrade or use an alternative browser.
Transom replacement and probbly more on a Maxxum 281
- Thread starter justintocars
- Start date
justintocars
Member
So I haven't done an update for a while... I hate fighting with photo-bucket to up load pics and it's a bit of a deterent... Anyway I have the ribs bedded and glassed in.
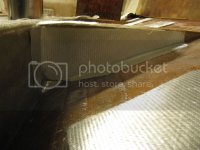
With two layers of bi-ax they should be plenty stout.
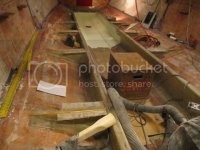
Before I put the floor down I wanted to smooth out the cabin floor so I put down a layer of putty... Its probably going to need another coat though.
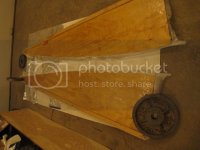
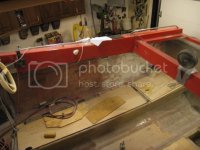
I also got the floors cut that go on the outside of the stringers in the rear, and the ones for the cuddy. I added a ledge to the seat base in the cuddy to try and incorporate some boards that can be used for more sleeping room in the future. The bulkheads for the tank are cut too... just waiting on the tank for final placement.
 http://s1082.photobucket.com/user/justintocars/media/IMG_6046_zpsjmyzoilp.jpg.html

With two layers of bi-ax they should be plenty stout.

Before I put the floor down I wanted to smooth out the cabin floor so I put down a layer of putty... Its probably going to need another coat though.
I also got the floors cut that go on the outside of the stringers in the rear, and the ones for the cuddy. I added a ledge to the seat base in the cuddy to try and incorporate some boards that can be used for more sleeping room in the future. The bulkheads for the tank are cut too... just waiting on the tank for final placement.

 http://s1082.photobucket.com/user/justintocars/media/IMG_6046_zpsjmyzoilp.jpg.html
justintocars
Member
So progress has been slow the last month. Their is always so much to get done in the spring! I have the last coat of putty put in the cabin. I still needs final sanding but i figured i was going to drip stuff all over it anyway.
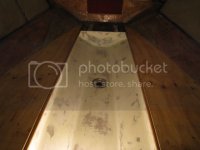
Floors on the side have been bedded down with west 404 and VE. The gas tank bulkheads are also in place. I glassed them in with two layers of 1708.
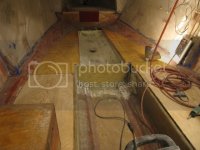
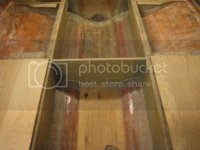
I am going to finish putting in a drain hole with a plug for the gas tank compartment. I am not going to use any foam for the tank. I plan on bedding in the tank with some 404 also, and screwing the sides into the stringers. That still makes me cringe to think about. I will probably screw it in and let everything set, then pull the screws and fill the holes with resin then put it back together. The new tank fits good and I still need to paint it.
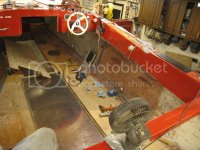
I have also been working on the seat bottom for the back seat. but dont have any pics of it yet.

Floors on the side have been bedded down with west 404 and VE. The gas tank bulkheads are also in place. I glassed them in with two layers of 1708.


I am going to finish putting in a drain hole with a plug for the gas tank compartment. I am not going to use any foam for the tank. I plan on bedding in the tank with some 404 also, and screwing the sides into the stringers. That still makes me cringe to think about. I will probably screw it in and let everything set, then pull the screws and fill the holes with resin then put it back together. The new tank fits good and I still need to paint it.

I have also been working on the seat bottom for the back seat. but dont have any pics of it yet.
Last edited:
Sam I am
Well-known member
So I haven't done an update for a while... I hate fighting with photo-bucket to up load pics and it's a bit of a deterent...
I feel your pain on that issue. What I've started doing is using the photobucket app to upload pics from my mobile device. It's a lot faster and simpler than when using a computer. When I'm ready to post, I'll then open up photobucket in another browser tab and simply copy image links in.
If I didn't have a bunch of pics in photobucket already, I'd be done with it...sounds like imgur kicks photobuckets ass...the con is everybody thinks so too and the high traffic on imgur can bog it down a lot.
Diplomat82
Well-known member
Looks great! Your work is top notch. I wish mine was on the same level.
jumbofordman
Well-known member
I feel your pain on that issue. What I've started doing is using the photobucket app to upload pics from my mobile device. It's a lot faster and simpler than when using a computer. When I'm ready to post, I'll then open up photobucket in another browser tab and simply copy image links in.
If I didn't have a bunch of pics in photobucket already, I'd be done with it...sounds like imgur kicks photobuckets ass...the con is everybody thinks so too and the high traffic on imgur can bog it down a lot.
I have just as much trouble uploading into photobucket from my mobile device as with my computer. Their site is just bogged down now. A few years ago it was the place to go, but now everything seems to take forever to operate on their site.
JUPITER PULSARE
Well-known member
Nice job! It brings back fond memories (well, not really) of many boat restorations that I've done! lol I've reached my limit for one lifetime!
justintocars
Member
Thanks everyone!
Photo bucket isent as bad as it was. The new computer helps and i found that chrome has an add on to stop autoplay veidoes. It seemed to help since the bucket runs a ton o videos.
I am near the right town... But this is enough glass work for a lifetime....
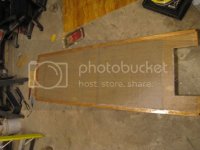
I got the board that covers the gas thank coated on the bottom. Covered it with 2 layers of 17 one 90* bias and one 45*. hopefully that will be enough to stiffen it. Plus the layer it will get over the top.
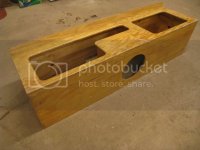
The seat bottom is done other than sanding the top and bottom, and coating with gel. Will be kind of an experiment to see if I can shoot gel . lol
A side project, that has been taking some of my time... When i de-winterized the Enforcer I noticed the rear hatch was a little weak. So i Glassed a new one up. I will get it in sometime....
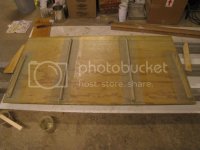
Photo bucket isent as bad as it was. The new computer helps and i found that chrome has an add on to stop autoplay veidoes. It seemed to help since the bucket runs a ton o videos.
amazing job...you should take up boat building !!!
I am near the right town... But this is enough glass work for a lifetime....
I got the board that covers the gas thank coated on the bottom. Covered it with 2 layers of 17 one 90* bias and one 45*. hopefully that will be enough to stiffen it. Plus the layer it will get over the top.

The seat bottom is done other than sanding the top and bottom, and coating with gel. Will be kind of an experiment to see if I can shoot gel . lol

A side project, that has been taking some of my time... When i de-winterized the Enforcer I noticed the rear hatch was a little weak. So i Glassed a new one up. I will get it in sometime....

justintocars
Member
Painted the gas tank and hoping to get it in soon.
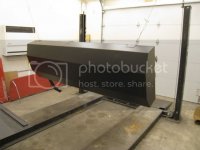
I plan on installing a mounting plate for the seats in the floor over the tank. But to do that I need seats... and mine were rotted where the bolts go through. So we started making seats, and then i can figure out where the final location will be.
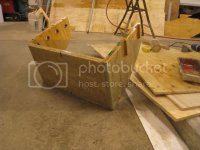
It still amazes me how one project leads or relies on another lol

I plan on installing a mounting plate for the seats in the floor over the tank. But to do that I need seats... and mine were rotted where the bolts go through. So we started making seats, and then i can figure out where the final location will be.

It still amazes me how one project leads or relies on another lol

