-
Welcome to the Checkmate Community Forums forums.
» Interact with over 10,000 Checkmate Fanatics from around the world!
You are currently viewing our boards as a guest which gives you limited access to view most discussions, articles and access to our other FREE features.
By joining our free community you will be able to:
» Post topics and messages
» Post and view photos
» Communicate privately with other members
» Access our extensive gallery of old Checkmate brochures located in our Media Gallery
» Browse the various pictures in our Checkmate photo gallery
Registration is fast, simple and absolutely free so please, join our community today!
If you have any problems with the registration process or your account login, please contact support by clicking here or by using the"contact us" link at the bottom of the page.
You are using an out of date browser. It may not display this or other websites correctly.
You should upgrade or use an alternative browser.
You should upgrade or use an alternative browser.
Transom replacement and probbly more on a Maxxum 281
- Thread starter justintocars
- Start date
ontherocks83
Active member
Dumb question, but are you putting foam back in? or better yet is there a purpose to the foam?
illMATTic
Well-known member
Dumb question, but are you putting foam back in? or better yet is there a purpose to the foam?
The foam is there to keep the boat from going to the bottom.
ontherocks83
Active member
The foam is there to keep the boat from going to the bottom.
eh, that's what insurance is for.
So do most people put it back and or what type do they put back? Is there any that doesn't absorb water?
P.s. JIC, the project is looking amazing. Can't wait to see the finished product

Closed cell foam is what he should use, it doesn't absorb water. http://www.uscomposites.com/foam.html
Diplomat82
Well-known member
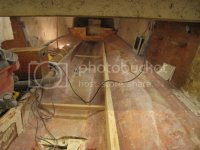
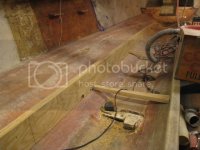
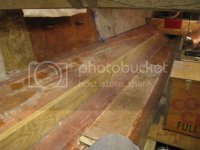
A little more on the stringers.... The original stringers are made from 1-1/8,
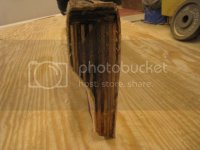
No one in the area has 1-1/8 plywood. So I decided to make it out of 3 sheets of 5/8 that run top to bottom. Apparently Checkmate likes to build with overkill and so do I.The wood is cut at a 45* at all the joints and they are staggered so no one joint is closer than 24" The 45s are to the right on the center board and to the left on the outside boards. They are glassed together with 1-1/2 oz mat.
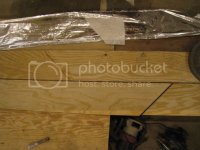
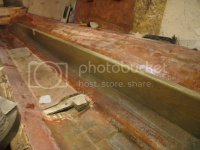
Looks like they added a "cap" to the top of the stringer. Any clue why?
justintocars
Member
eh, that's what insurance is for.
So do most people put it back and or what type do they put back? Is there any that doesn't absorb water?
P.s. JIC, the project is looking amazing. Can't wait to see the finished product
Yea I plan on putting foam back in... I dont think any of the foam will keep all the water out over time even if it is closed cell.
From what I understand insurance will cover the boat but YOU pay for the recovery and EPA fines. I hevent checked my insurance on that one yet...just what I heard.
I have no Idea why they caped the stringer like that.
One of these days I will figure out how to do multiple quotes too.
justintocars
Member
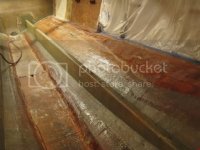
I have been pretty busy on this thing lately.. no time to post. I glassed in the drain holes and and reinforced the area where the gas tank filler neck cuts threw half the stringer. I reinforced it with 1808 sandwiched between a piece of 3/4.
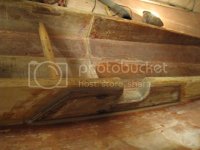
Decided to make my own bedding compound out of Vinyl ester resin and silica. I kept reading just to mix it to the consistency of peanut butter. BAD IDEA... mixed it to a gel consistency that would hold its shape. Added hardener @ 1%. It shrank and didn't set up consistently after 2 days. So I cut the stringer back out and ground everything clean AGAIN.
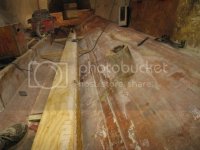
So yesterday I bedded the stringer in again... used a bonding material that I got from a member of another forum. It says core bond but I think it's a generic name. I'm pretty sure its a 3m product of some kind. I added enough silica for it to hold its shape and mixed the harder @ 1.5%
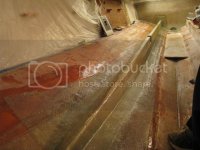
When bedding the stringer I created a radius at the bottom so the glass would lay better. I cut some bondo spreaders to form the radius.
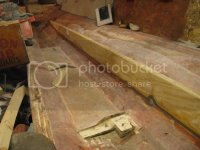
This time everything set up. Today I ground the excess bedding off and scuffed the putty to get better adhesion. Tomorrow we Glass.

Decided to make my own bedding compound out of Vinyl ester resin and silica. I kept reading just to mix it to the consistency of peanut butter. BAD IDEA... mixed it to a gel consistency that would hold its shape. Added hardener @ 1%. It shrank and didn't set up consistently after 2 days. So I cut the stringer back out and ground everything clean AGAIN.

So yesterday I bedded the stringer in again... used a bonding material that I got from a member of another forum. It says core bond but I think it's a generic name. I'm pretty sure its a 3m product of some kind. I added enough silica for it to hold its shape and mixed the harder @ 1.5%
When bedding the stringer I created a radius at the bottom so the glass would lay better. I cut some bondo spreaders to form the radius.

This time everything set up. Today I ground the excess bedding off and scuffed the putty to get better adhesion. Tomorrow we Glass.
justintocars
Member
justintocars
Member
justintocars
Member
justintocars
Member
justintocars
Member
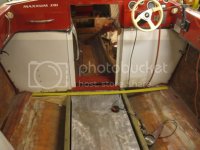
It seems that rebuilding a boat is a lot more like rebuilding a car than I thought. Its always the small stuff that takes forever! The front compartment is coming together.... slowly
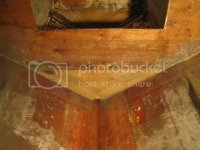
I am still not sure weather to use foam or not... It only gives about 600 Lb of flotation in this boat, and seems to cause more problems than its worth. Only thing it seems to do is act as sound deadening.
Going to need a new gas tank and put the old one in to figure out the sizing and placement and weather I can move it around some.

justintocars
Member
Photo bucket SUCKS! One of their stupid popups froze chrome and I lost an half hours worth of a post.
justintocars
Member
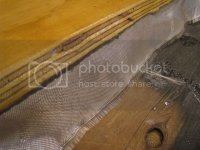
I bought a bunch of 2oz surfacing cloth for waterproofing stuff. Figured it would be light weight, lay on sharp corners and be generally easy to work with. I was wrong! Stuff is a PIA! you can not wet anything and then lay it down it just bunches up and stretches. The easiest method i have found to use the stuff is coat the piece with resin and then let that dry. Then come back and lay the surfacing cloth, then wet it out. I have been taping the other side to pull it taunt before putting resin on it. The only good thing about it is you can trim the edges with a razor blade. Still not wort it... but I have 25 yards, so Ill use it.

justintocars
Member
So now that all the floor panels are glassed on the back I have all of them in.
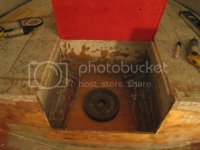
The seat compartment at the front was just tabbed originally. I decided to make it a structural piece and put two layers of 1708 and a layer of tabbing on it. I did all that so I can tie the stringers and front storage compartments, box thing, together. It bothered me that theirs noting their. I keep seeing pics of boats that have been stuffed, and broke in twp, and I know I can't drive and will probably beat the hell out of this thing. So tying them together will give me a little piece of mind, less storage, but pice of mind.. lol
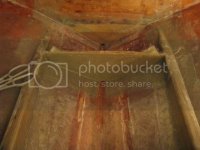
The floors for the cabin area are glassed in, and below the gas tank is bedded. Speaking of bedding I have been using west 404 lately. It doesn't spread as good as the premix. But Im too lazy to drive to toledo to get the premix from Glass Dave...from oso.
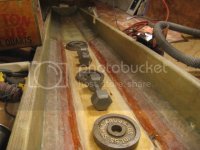

The seat compartment at the front was just tabbed originally. I decided to make it a structural piece and put two layers of 1708 and a layer of tabbing on it. I did all that so I can tie the stringers and front storage compartments, box thing, together. It bothered me that theirs noting their. I keep seeing pics of boats that have been stuffed, and broke in twp, and I know I can't drive and will probably beat the hell out of this thing. So tying them together will give me a little piece of mind, less storage, but pice of mind.. lol

The floors for the cabin area are glassed in, and below the gas tank is bedded. Speaking of bedding I have been using west 404 lately. It doesn't spread as good as the premix. But Im too lazy to drive to toledo to get the premix from Glass Dave...from oso.

justintocars
Member
The stringers for connecting the main stringers and front box are in.

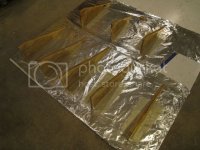
I'm not using foam so I am putting 5 ribs in per side to suport the floor. Cut the ribs to fit and laid a flange on what will be the top for better adhesion to the floor. They also have two coats of resin and the dreaded cloth where the the water Chanel is. I will probly bed them in and put two layers of tabbing on them too.
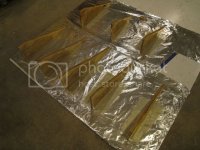

I'm not using foam so I am putting 5 ribs in per side to suport the floor. Cut the ribs to fit and laid a flange on what will be the top for better adhesion to the floor. They also have two coats of resin and the dreaded cloth where the the water Chanel is. I will probly bed them in and put two layers of tabbing on them too.

Diplomat82
Well-known member
The stringers for connecting the main stringers and front box are in.
I'm not using foam so I am putting 5 ribs in per side to suport the floor. Cut the ribs to fit and laid a flange on what will be the top for better adhesion to the floor. They also have two coats of resin and the dreaded cloth where the the water Chanel is. I will probly bed them in and put two layers of tabbing on them too.
This is a great idea. I'm also not adding the foam back in and will think about adding a couple of small ribs.
My floor under the tank was completely rotted and I'm thinking about not adding it back in. I don't think, on my boat, that it really serves a purpose.
By the way your glass work looks really professional....I wish I had that kind of skill. I keep getting air bubbles popping up as it cures.
justintocars
Member
This is a great idea. I'm also not adding the foam back in and will think about adding a couple of small ribs.
My floor under the tank was completely rotted and I'm thinking about not adding it back in. I don't think, on my boat, that it really serves a purpose.
By the way your glass work looks really professional....I wish I had that kind of skill. I keep getting air bubbles popping up as it cures.
Thanks! Its not skill it's just crappy pictures lol. I have the same problem with bubbles... Seems like the more I lay the worse it gets. I measure the weight of the cloth and mix the resin to match the weight of the cloth plus the amount the roller sucks up. I am using 6" rollers for trim work that I got at lowes. I was using the foam ones then found the mat/cloth rollers work better without falling apart. You can lean on them more. I also roll the resin on the back of the 1708 before I lay it. It helps to break down the binders of the mat and pre saturates the materal. Works much better that way. I also use a bondo spreader to squeeze out the air after i have it rolled down,then roll back over it to make sure it is laying down good. It will look awesome and then after it cures theirs always some air bubbles that pop back up.

