• Welcome to the Checkmate Community Forums forums.

    You are currently viewing our boards as a guest which gives you limited access to view most discussions, articles and access to our other FREE features.
    By joining our free community you will be able to:

    » Interact with over 10,000 Checkmate Fanatics from around the world!
    » Post topics and messages
    » Post and view photos
    » Communicate privately with other members
    » Access our extensive gallery of old Checkmate brochures located in our Media Gallery
    » Browse the various pictures in our Checkmate photo gallery

    Registration is fast, simple and absolutely free so please, join our community today!

    If you have any problems with the registration process or your account login, please contact support by clicking here or by using the"contact us" link at the bottom of the page.

1988 Vision redo

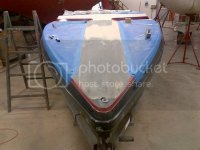
Looking great! As far as graphics go, I like the ones on the red CM best...but that's me. With the lines of that Vision being kind of flat/sharp, Im thinking a domed raised are would look a little out of place. Can you pull of something to the __/''''''''''''\__ profile there and have it just be a flat taper down to the bow with the sides just decreasing in height? That would just take a lot of filler but look neat. It is hard to see what hard lines you have in that pic. I am assuming you have something going like a rounded hump.

Thanks GF ---- actually, the profile your suggesting is very much like what Checkmate did in their 1989 model --- I understand exactly what your sayin regarding the flat/sharp lines of this model, but I want to try and make sure it looks different {at least a little different} than how Checkmate filled it with their '89 model.
Yes it is a "rounded hump" style, -- however keep in mind that what you see in the picture will actually be grounded/sanded down another 3/4 inch per most of the length so the hump height will be lessoned considerably.

As you know {and a lot of other guys in this forum know} -- it's very difficult to find where to draw the line between having a custom look and still keeping the original/traditional look that the manufacturer intended.
Believe me --- I'm staying awake at night struggling with the dilemma of where to draw that line :yell:

I want to make sure people will still know this is 100% CHECKMATE without having to look at the name --- but that they will say something like ----- "hey, I know that's a Checkmate, but I've never seen one exactly like that"
 
Here's what the raised center area looks like on my starfire if it's any help.

222510_3417723782212_644661360_n.jpg

644116_3417723382202_194395949_n.jpg
 
Also,
I've been in touch with the upolsters trying to figure out a design for the sun pad.

Has anybody here ever seen this {the older guys like me might remember this from early 60's TV}
I'm just hoping nobody used it on their boat yet;)

The uposterer said she can stitch that into the pad and have the word CHECKMATE just above it or below it...

sunpadlogo.jpg
I'm old enough, but I don't remember it. Should look great, "The Untouchables"? That's going to be difficult to stitch and keep it all flat. Can't wait to see it.:thumb:
 
Gonna look a lot better without the hatch.

Thanks Jetmate, it served no purpose at all other than being a source of leaks and rattles, and it just didn't look good to me {too small of a boat to have a forward hatch window in my opinion}.

The guys at the shop will be sanding and grinding the filler down a bit more over the weekend, then the sanding and stripping of the entire boat will begin probably by the end of next week.
 
Took it easy this weekend and did some simple bench work.
Still struggling with the steering hub, whereas I can't find a hub for the old style square shaft ride guide steering system, that will allow the newer 6 bolt, smaller center Dino style wheels.
However at the end of the season I was able to hook up with Wildman and get a custom made hub from him and I used it for the last couple of runs of the year.
But that hub is a 6 inch long extender and it just doesn't feel perfect while driving --- it's a little high and puts the hands too far from the dash controls and causes me to sit a little far back.
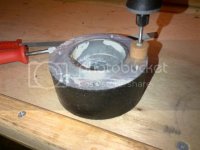
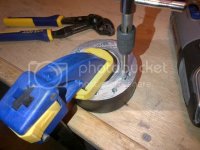
So, I did what I should've done in the first place --- go to the bench.

A little surface grinding
visionproject22.jpg
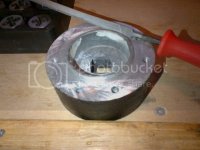
A little filing of the center hole size
visionproject17.jpg
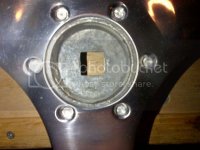
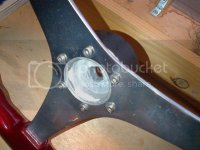
Check center fit and mark six holes
visionproject18.jpg
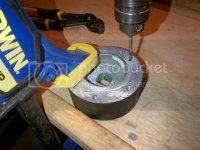
A little drilling
visionproject19.jpg
A little tapping
visionproject20.jpg
Final fit check
visionproject21.jpg
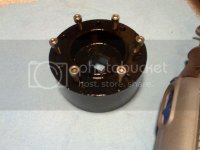
Re-machined 1 3/4 inch long hub that fits the ride guide square steering shaft and accepts old style 7 hole mount ride guide wheels --- and now also accepts the newer six hole mount Dino style wheels.
visionproject16.jpg
 
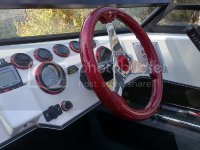
Adding some guages to the dash, and hour meter guage and a passenger side clock.
Need to match the guage style and guage bezel style to what Checkmate pu in originally.
Matching the new guages to the originals is not a problem --- they are the basic garden variety VDO's.
HOWEVER --- as you can see in the picture, there is a light brown or tan dressing kind of thing happening between the guage black bezels and the red custom bezels.
This tan dressing seems to be made from a somewhat rigid kind of gasket type of material.
Ahhh, the problem is I can't find this bezel dressing {or whatever it's called} anywhere, --- I've talked to VDO and Lavorsie and a couple of other vendors but none of them even know what I'm talking about.
I need to get at least two of these for 2 1/16 guage size -----

Does anybody know what these are and where I can get a couple?

dash-2.jpg
 
Some more simple bench-top work over the weekend.

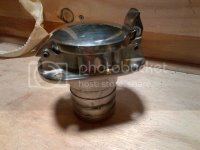
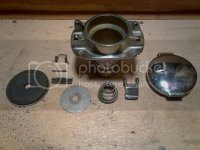
In the effort to change every exposed chrome/stainless/aluminum piece on the boat to a burgandy powder coat, I need to dismantle some of the parts such as the "fliptop" fuel fill cap.

In that fusion coating or powder coating incorperates a high heat baking temp and a spraying process, it's necessary to remove any materials that would be damaged by high heat, such as the rubber flat ring seal under the fuel fill cap , or the rubber flappers inside the exhaust tips , or the plastic mounting flange of the bow nav lite , etc.... and because of the spraying process, small hard to reach items such as the spring hinges of the fuel fill cap need to be parted out.

visionproject23.jpg

visionproject24.jpg

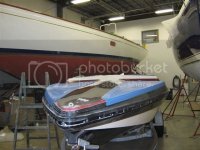
While I'm doing this simple easy bench-top work in my shop, the glass and paint guys at the restore shop are still sanding / grinding / prepiping / primming.....

I'll be checking on Manchester Marine shop progress this week to see how their work has progressed.

I should note, ---- the shop doing the custom glass layup and the new paint job {Manchester Marine} are among the best boat people I've ever dealt with --- these guys just live and breath boat reworking and restorations, their ability to form glass / spread gel coat / rebuild super structures / etc.. is nothing short of amazing ---- they absolutly love what they do and they are awesome with their customer service --- great bunch of guys {oh but they are not cheap}.
There are boats shipped from all over the country to this place for their services, and I would highly recommend this place to anybody looking for the highest quality of painting / gelcoating / custom glass working / marine carpentry / etc...
Here's a link....

http://www.manchestermarine.com/index.html
 
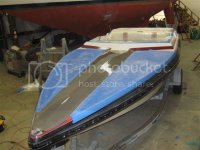
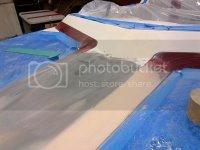
Still working on the shape of the forward deck filler.

As you can see, the craftman doing the layup {name is John} is getting the final shape dialed in..... getting that crease to run down the center "perfectly" and keep it's height decreasing symetrically down to a flat at the very front where the nav lite goes is a real challenge, --- but it will be perfect when he's done --- exactly the way I originally designed/invisioned the custom change.
Like I said previously, these guys are perfectionists and awesome craftmen --- almost can't wait to do another custom rebuild with these guys on my next project {hoping for a 80's Enforcer} --- but that's a thread for another day/year.

visionproject25.jpg

visionproject27.jpg

visionproject26.jpg
 
Tomorrow I'm delivering a box full of chrome / aluminum / stainless parts to the powder coating shop to be done in burgandy red {to match the red highlites in the cockpit and to match the exterior red gel striping.

Items being powdercoated are...

Cleats {qty 4}
Nav lite housing
fliptop fuel fill
exhaust tips
rear {stern} grab rails {qty 2}
engine compartment air vents {qty 2}
fuel tank air vent
stern lite fixture
grab rails next to swim pad {qty 2}
hatch hinges {qty 3}

....possibly the windshield frame {undecided}
....possible addition of bow rail
 
I've searched around quite a bit for "just the right" rubrail replacement.

The original being an aluminum rail with a semi rigid black insert, my original intent was to have the same type and size as the original, however Checkmate themselves don't have that style / type anymore -- so they sent me what they have as a replacement, --- it was disappointing to see the ugly oversized look it was gonna present.
I then realized that a rub rail on a performance boat shouldn't be an eye catching feature, rather, it should be almost invisible or "blend in" {my opinion}.
So I went on a rub rail design hunt at local shops and on-line.
Ended up using Taco Marine that Redstrat turned me onto.
I've looked at probably over a hundred different styles of rubrail applications and here is what I've come up with.

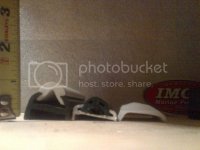
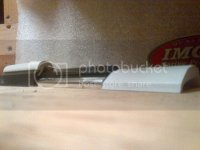
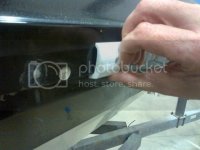
The pictures show --- in the middle is the original --- on the left is what Checkmate suggested --- on the right is what I'm gonna use {the pictured sample is white but I'm gonna use black.

As you can see the one I decided to use is 1/4 inch flusher to the hull as the original and 9/16 inch flusher than what Checkmate suggested.

The one used is a one piece {no insert} rigid exposed screw style --- getting that hard rigid material to perfectly bend around the bow nose will not be fun to do {heat gun and patience} :o

visionproject28.jpg

visionproject29.jpg

On my way to the shop now to double check the fit.
 
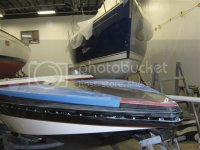
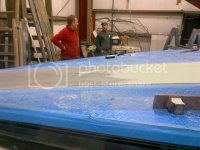
The shaping of the glass layup is coming to it's finished stage.
The two guys in the pic are .... on the left is sort of the design consultant, he's the guy that tells me if something can be done or not, then he'll advise to the optional methods .... the one on the right {John} is the glass / gel / paint specialist {and he is really really a perfectionist}.
The cool thing about this shop is, there is a specialist for every aspect of a restore/rebuild --- when it comes to the stick on graphics, there is a specialist just for that --- when it comes to the painted on lettering, there will be a specialist to make the stencil {but John will shoot the paint} --- when it comes to the rub rail, it will be the rub rail specialist to install it ...etc....
One boat may eventually have 4 or 5 guys doing their thing on the resto.
Naturally I will be doing all the engine and drive work myself, and I will be {and have been} the interior guy, and I'll also be doing all the electrical.
Upholstery will be myself and a professional stitcher.

visionproject31.jpg

visionproject32.jpg

visionproject30.jpg

Ahhh, and the new style rub rail fits perfect {the actual replacement will be black}.

visionproject33.jpg
 
Hope to be shooting primer all over this thing by end of next week.

As many of you know, there is always a "can of worms" that opens up eventually during these projects......
I came across one last nite, -- I had to remove the hatch hinges in order to have them powder coated --- ohhhhh, the water soaked and rotted wood base under the hatch pad, and the broken/damaged fiberglass encasement around the hinge mounting screws ---- just added more work to be done on my plate :mad:
 
Back
Top