• Welcome to the Checkmate Community Forums forums.

    You are currently viewing our boards as a guest which gives you limited access to view most discussions, articles and access to our other FREE features.
    By joining our free community you will be able to:

    » Interact with over 10,000 Checkmate Fanatics from around the world!
    » Post topics and messages
    » Post and view photos
    » Communicate privately with other members
    » Access our extensive gallery of old Checkmate brochures located in our Media Gallery
    » Browse the various pictures in our Checkmate photo gallery

    Registration is fast, simple and absolutely free so please, join our community today!

    If you have any problems with the registration process or your account login, please contact support by clicking here or by using the"contact us" link at the bottom of the page.

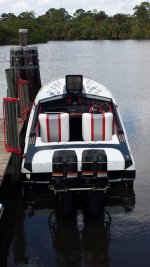
Another 2800SX Resto

Ok, let the guy with the most seat time behind a 2800SX outboard voice his oppinions. 1st, as cool as the 400R's would be for the 2800, they're too much weight for the boat to handle...expecially with the amount of setback built into the floatation box on Spencer's new toy (if I remember it was 30"). Even twin 300XS's (3.2L's) are a bit much when running alot of setback (as SCT can attest). In snotty water the bow would be all over the place. (In calm lake water they would be outstanding and snap you're neck off with accelleration and great top end speed!) You have to remember, the 2800SX outboard has a relatively narrow beam and was built very light, easily 500lbs less than the 2800 they're building today. That being said, twin 2.5L 200's, 245 carb motors, 260's or 280's are the best choice for the 2800SX Outboard. Even my 2800 with twin 2.4's had outstanding accelleration and a topend speed of 72mph! I've changed my setup since then and I'm getting close to finishing the re-rig with twin 1994 2.5L Mercs and CLE gearcases (just waiting on new U-FLex front ram steering and a few other parts before I get her wet again). I'm looking forward to seeing Ramification's 2800 get
finished correctly. Max took alot of shortcuts and lacked the attention for detail that this boat badly needs. With some much needed attention, there will now be a running 2800 in the Northeast..as well as the Southeast!!!
 

Attachments

  • 2800 RR 2014.jpg
    2800 RR 2014.jpg
    91.1 KB · Views: 39
  • 2800 LAUNCH RR 2014.jpg
    2800 LAUNCH RR 2014.jpg
    115.2 KB · Views: 34
  • 2800 at dock A.jpg
    2800 at dock A.jpg
    106.7 KB · Views: 38
Last edited:
The good, the bad and the... well... it is a boat

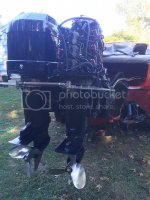
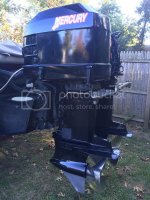
I got into finishing up the port motor today as planned. The mid section went right on without any issues (didn't think there would be) and got the steering wing and tie bar reattached. From there I pulled out the lower unit and unwrapped it from the bag it was in and found the two center bolts on the lower were sheared off. I decided to install it anyway to test fire the engine. Hooked her up to the hose on the port engine and she fired on the 4th crank. The first thing I noticed was the very high idle (1600 rpms) when I went back to start adjusting the idle, I saw water pouring from both T-stats. When I saw that, I shut her down and did some minor idle adjustment and will get it all dialed in when the new T-stats and gaskets get here.

On to the starboard engine... I was able to get about a half crank out of the dead battery. The batteries and switches are setup for port and starboard engines. One battery designated for each engine. I stuck my battery charger on for about an hour and gave it another shot. I cranked maybe 8-10 times and she didn't want to fire. The last two, half dead battery, cranks had a shot of starting fluid and she still didn't fire. I am thinking there is no spark, but hoping it is a fuel issue. At that point I was out of patience and decided to call it a day before I broke something. I left the charger on the batteries for the night and will mess with it further tomorrow. I hope it is a quick fix:irked:

763C75C8-11D5-4CDA-96BA-4CA53FAEC0C0_zpsikiht7oa.jpg

D53AD799-A619-448D-A8D4-1744DEA7B5AF_zpsajvjhp7o.jpg
 
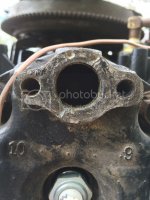
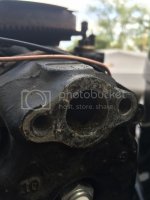
Pulled the T-stats off that were leaking on the engine that runs and found this... Is it worth trying to repair this? Main question is will a quick JB Weld type repair hold?

E2F2F807-1B90-4123-865F-F74AA6630D03_zpsv9af3yhx.jpg

D8A9AFBD-B410-4E83-8877-DCE864D695B5_zpseregmpfy.jpg
 
Spence, get a flat smooth block bigger than the flat gasket area and use a piece of cloth backed 220 grit and clean the surface. Don't apply too hard of pressure when sanding. Keep the block flat to the surface. Once u start to get a clean surface you will be able to tell if the gasket will seal. Go slow, let the sanding cloth do its job. From what I can see in your picture it doesn't look that bad. You have 3 digs in the gasket surface. I doubt it will effect the seal. JB can fill the hollow spots. I doubt the heat in that area will be high enough to damage it. If I lived just a bit closer I could stop by and give you a hand tomorrow but I have a grand child arriving. My first one, so I don't want to miss the birth. Permatex or high temp silicone will definitely take care of any small scratches.

Jim
 
i agree with Jim. Sand down, fill low with JB, sand lightly to smooth and should be good to go. We have done this on pitted intake manifolds at the shop for years and always had success.
 
Any progress?? What's the latest new on your 2800? I've been busy surfing every day off for the last couple weeks with all the Hurricane Joaquin swell so my boats been on the back burner..gonna get busy this week now that the swell has faded!
 
A quick update- having a few days off for Thankagiving gave me the time to work on a the boat. I did a survey of the cabin and have plans all drawn up for the layout. I am working on the electrical setup and layout, which is going to be the most involved portion (at least for me). I will be starting on the frame work of the cabin next weekend and get all of the electrical components ordered. I will be setting the cabin up with two house batteries, inverter/charger, shore power plug, 110v outlets, TV, frig and a lot of LED lighting. Once I finalize all of the design drawings for the layout and wiring, I will post up some pics.

Yesterday, Demag was nice enough to come over and give me a hand doing some trouble shooting on the engines. After giving the port engine the all clear, we did trouble shooting on the starboard engine. I have ordered all the necessary parts for the repair and hope to tackle that next weekend as well. I also found a local place to reseal the steering rams, but they were closed over the holiday- Demag is going to drop them off for me this coming week since it is near his house.

I hope to be posting substantial progress updates within the next two weeks!

Happy Thanksgiving everyone:cheers:
 
I will be starting this week on the cabin fabrication and assembly. I have the drawings done and the wood material here- I am waiting on epoxy and glass. I will seal all of the wood on all sides with epoxy prior to install and I have a few pieces I am going to glass into the hull.

Along with the other items I tackled this weekend, I installed the new pins to hold the seat bases up.
436C6DB4-330F-484A-92CE-E88906BE9818_zpsf1qxk6we.jpg

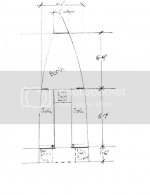
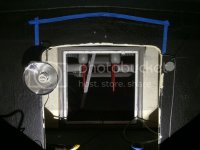
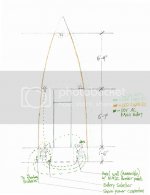
Here are the layout drawings and pictures of the bulkheads I will be modifying.

img20151129_21460263_zpsqx7nksus.jpg


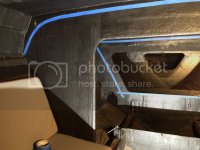
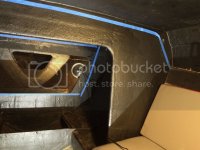
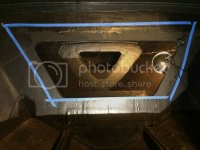
The entrance bulkhead will only be cut for additional entry height.
CD52335C-8F66-480C-A0AB-A8D482DDD54D_zpsmisrd3rr.jpg

The next bulkhead forward gets all cut minus the top portion above the tape and below/behind the sofa.
F0AD1CC1-72DA-420E-8AE4-19AFC6D88C93_zpsim3491jx.jpg
A19BA801-F0AA-43C0-B319-E52A570D01BF_zps82idhgmk.jpg

The next bulkhead forward gets opened up a little for the entrance to the berth.
989EB256-D6A7-43A4-8F39-D3985457036A_zpslndehexo.jpg

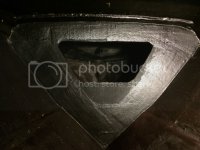
The most forward bulkhead gets cut out, minus the section below the berth, and a new one will be installed about 20" forward.
8FC22BEE-FE87-487C-B72E-4FE92BD42DAC_zps5j3en1cy.jpg
 
Moving on to electrical. Once I finalize the fabrication of the interior, I will jump right into the electric. I am going to be plugging away and ordering things here and there in my spare time.

Here is the main electrical plan.
img20151129_21470951_zpsmeaitbml.jpg

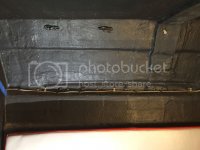
This is the area I will be mounting the upper LED strip lights
DBFA9FF9-D389-4722-BC53-163A07D759F2_zpsrlbanmxl.jpg

I will fabricate a piece to hide the lights on both the upper and lower lights. Here is a quick sketch to show how it will be done.
img20151129_21484527_zpspu9mnahz.jpg

A more specific diagram showing the routing of the main wires and panels.
img20151129_22054578_zpsjuabt0vw.jpg

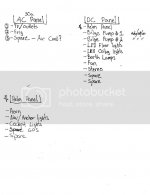
Here is the breaker panel layout. Now I can calculate how much power I will need to scale everything properly as well as what how many breakers I will need.
img20151129_21501978_zpsrp3twzhd.jpg

This is where the main portion of the electrical will be.
There will be a main door, which will open to the breaker panels. The breaker panel wall will be removable and behind it will be- The Inverter/Charger, Galvonic Isolator, Main Grounding Buss and digital TV antenna. I am going to see how much room I have left and may install an AC unit next winter...
55D02EB3-9E2C-46C9-A5AA-1F733A288448_zpsmngqog9t.jpg

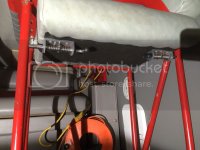
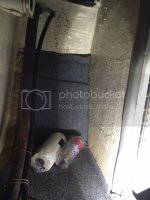
This is where the two batteries with a selector switch and frig will be located. The batteries will sit down on the floor with the frig located on a shelf above them. It will be setup to have the frig and shelving easily removable should the batteries to be accessed.
C4EFF135-C15A-48F0-A947-2ACA337F37D8_zpst4hxywei.jpg

I will post update pictures as I make progress.:cheers:
 
Oh boy!! This is going to be fun!! Someone else is going to experience things that I went through on this iconic Checkmate model! Let the itchin begin! Stop drawing pictures and start cutting, grinding and glassing!!:bigthumb:
 
Remember to keep the inverter as close as possible to the batteries. I mounted a 27" led flat screen on a stainless piano hinge to the ceiling. Folds flat to the headliner when not in use. That was my solution to when Toni asked what we were going to do at the lake when it called for possible rain...
 
Back
Top