• Welcome to the Checkmate Community Forums forums.

    You are currently viewing our boards as a guest which gives you limited access to view most discussions, articles and access to our other FREE features.
    By joining our free community you will be able to:

    » Interact with over 10,000 Checkmate Fanatics from around the world!
    » Post topics and messages
    » Post and view photos
    » Communicate privately with other members
    » Access our extensive gallery of old Checkmate brochures located in our Media Gallery
    » Browse the various pictures in our Checkmate photo gallery

    Registration is fast, simple and absolutely free so please, join our community today!

    If you have any problems with the registration process or your account login, please contact support by clicking here or by using the"contact us" link at the bottom of the page.

Enforcer Floor resto

Why did you wait to do the three layers on different days?


Looks like a nice job by the way.

I'm on the night shift at work (4pm to 2am) so I only had time for one lay up each day. I could've done all three in one day it just didn't work out time wise. Thanks!!!
 
What kind of tools did you use for your destruction phase and shaping the new parts?

I rarely see this in descriptions of restorations, but I think a lack of the right tools probably held me up more than anything while replacing my floor. I wish I knew what the pros use. Buying new tools cost me almost as much as the floor materials.

I wound up using a Craftsman mini circular saw for the majority of cutting, a wood chisel, a 15-inch pry bar, a 36-inch wrecking bar, a Harbor Freight multi-tool (like a Fein MultiMaster)(don't bother, the blades wear out too fast), a thick butcher knife (to cut out the foam), an angle grinder with a KwikTools C7 Bad Blade (to cut close to the edge) and a quick pass with a sander hooked up to a mini shop vac.

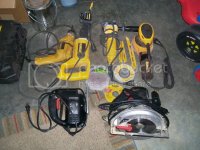
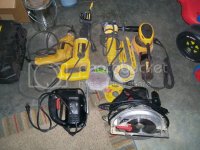
That's a great point!!! I will take some pictures of the tools used, but here we go;
Dewalt 4 1/2" grinder w/ a variety of cutting disc
Dewalt sawzaw
Skil Skil saw
Dewalt drill 3/8" and 1/2" drive
5 gallon Shop vac
3 different size wood chisels
wood wedges
two different size crow bars
32 oz framing hammer
I'm sure I left something off.
Oh yeah I used contractors paper to trace the transom out since mine came out in pieces.
100_1941.jpg
 
Last edited:
I'm on the night shift at work (4pm to 2am) so I only had time for one lay up each day. I could've done all three in one day it just didn't work out time wise. Thanks!!!

AAAHHH stupid work always gets in the way. I am sure it will be fine as long as it was scuffed well. :thumb:

I like the clamping system. It looks ike you really thought it out.
 
What kind of tools did you use for your destruction phase and shaping the new parts?

I rarely see this in descriptions of restorations, but I think a lack of the right tools probably held me up more than anything while replacing my floor. I wish I knew what the pros use. Buying new tools cost me almost as much as the floor materials.

I wound up using a Craftsman mini circular saw for the majority of cutting, a wood chisel, a 15-inch pry bar, a 36-inch wrecking bar, a Harbor Freight multi-tool (like a Fein MultiMaster)(don't bother, the blades wear out too fast), a thick butcher knife (to cut out the foam), an angle grinder with a KwikTools C7 Bad Blade (to cut close to the edge) and a quick pass with a sander hooked up to a mini shop vac.

That's a great point!!! I will take some pictures of the tools used, but here we go;
Dewalt 4 1/2" grinder w/ a variety of cutting disc
Dewalt sawzaw
Skil Skil saw
Dewalt drill 3/8" and 1/2" drive
5 gallon Shop vac
3 different size wood chisels
wood wedges
two different size crow bars
32 oz framing hammer
I'm sure I left something off.
Oh yeah I used contractors paper to trace the transom out since mine came out in pieces.
100_1941.jpg
Im glad you did this...It might save someone time and trouble down the road!:bigthumb::cheers:
 
BTW, I removed my bow rails like you did. I had to use an impact driver for about half the screws.

I needed help to remove my bow rails. Do you have any pictures of your Enforcer resto?
 
BTW, I removed my bow rails like you did. I had to use an impact driver for about half the screws.

I needed help to remove my bow rails. Do you have any pictures of your Enforcer resto?

Sorry, no pictures. As a beginner, I'd probably just be showing the wrong way to do things. So far I haven't destroyed anything :). Maybe I'll do some "after" pictures next spring. But I only have "before" pictures of the outside of the boat.

I'm only replacing the floor, some cross members and the side panels.

I cut out new side panels that are a little different from the originals. I'm installing recessed cup holders and have rounded the ends of the openings.

This started as a "carpet replacement" job. The floor was previously patched over the whole cockpit with 3/4" non-glassed plywood. When I ripped that up I saw why the patch was there. It would have bothered me just to patch over it again knowing that rotten wood was still underneath, so the original floor had to come up too. Taking up the 3/4" patch means a replaced rear seat base made from Starboard is now 3/4" too short. So I cut out a spacer from 3/4" ply to go under it. I'll glue it to the base, smooth out the seam with putty and paint the whole thing.

During the spring I'll paint the whole boat, put graphics on the hull, remove the windshield, install either a stubby clear Lexan windshield or wind deflectors, customize the dash, install a new steering wheel and gauges, and probably a bigger motor (300?).
 
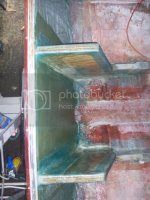
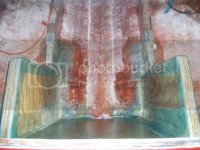
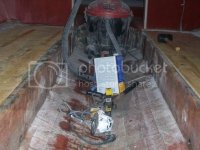
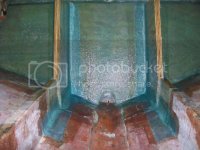
My work schedule is crazy, went from four tens to four twelves and two tens on the weekend. So with that being said, my resto will be slower. I was hoping to have the floor in place before Thanksgiving. Anyway I finally got the knees/stringers embedded in PL Premimum this morning. I'll use some hull and deck putty to form a fillet around the knees prior to glassing. I still have to finish glassing the angled piece at the top. Here's a few pictures:

100_1944.jpg

100_1946.jpg

100_1947.jpg
 
My work schedule is crazy, went from four tens to four twelves and two tens on the weekend. So with that being said, my resto will be slower.
Dont start slacking on me now brother!!!!:poke: I'll have to start calling you @ 2am for a wake up call and motivation to work on the boat, LOL!
 
LOL!!! I'll do my best, but 2pm to 2am M-TH and 10's Sat and Sun kinda kills the mometum.


Dam that brings back some bad memories. I had a contract job for a while and had to work 6PM - 6AM 6 days a week and sometimes 7. I made good money that year, but it wasn't worth it. When you're not working or sleeping you just feel like a zombie; no time for family and no time for projects.

I think it's great that you're doing as much as you are with a schedule like that.


I was on 4-10s M-TH, but we got a shipment due out in Dec. That's why the schedule got crazy. The job we're working on is schedule driven, so what the client wants the client gets. Btw I work for one of the largest Engineering firms in the US. We design petro/chem and pharmy(Pharmaceutical) plants.
 
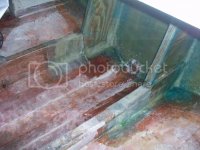
I glassed the knees/stringers in w/ 1708 this morning,next I'll add 1708 where the two are joined together. After that I'll seal the edges with glass and mat. Here's some pictures:
100_1960.jpg
100_1961.jpg
 
A little update, I've got the new stringers glassed to the existing ones and have got the floor cut and fitted for both sides, still need to cut the new floor that fits over the gas tank. I've got a bunch of small items to do on the top of the transom and glass the edges of my knee braces. I'm thinking of adding another layer of 1708 where the knees and transom meet, probably overkill but the motor hangs two feet off the transom.

Between my work schedule and husband/dad duties along with other obligations makes it hard to work on the mate. But who's complaining I'm happy to have a job in this enconomy and a wife that's understanding. I'll post a few pictures later.

Hey Robbie, any thoughts of adding some left-to-right bracing above and below the engine mount holes? Box that baby in!! :bounce:
 
Hey Robbie, any thoughts of adding some left-to-right bracing above and below the engine mount holes? Box that baby in!! :bounce:

Yep got that on my to do list, also got a buddy that's fabricating a aluminum plate to go against the inside. The bolt holes (10 total) go to the top of the transom,stops below the angled piece might be kind of hard to box it in. I'll add the horizontal brace on both sides of the knees.
 
My work schedule is only allowing two hours a day to work on the mate. I've got a long holiday weekend coming up so maybe I can get the floor installed over that period. I've got all the floor pieces cut and hoping to have those resin and glassed on the bottom side over the weekend. I've got the knee edges glassed in yesterday. As promised some pictures of my progress.

100_1987.jpg

100_1988.jpg

100_1989.jpg

100_1990.jpg

The floor cut and fitted for both sides
100_1985.jpg
 
You might want to make sure you have drain holes towards the back of those stringers in case any water gets in behind there it can drain out....I've seen the bad effects of that
 
You might want to make sure you have drain holes towards the back of those stringers in case any water gets in behind there it can drain out....I've seen the bad effects of that

Good catch!!! I'll do that, Thanks!!!
 
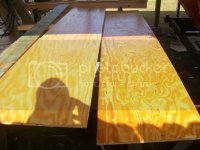
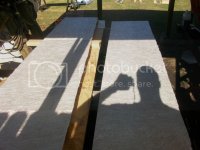
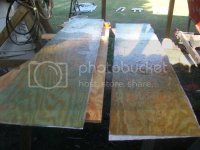
Over the past few days I added two coats of resin to the floor pieces and today I added a layer of mat on the bottom side. I'm hoping to have the floor in place over the long holiday week. Here's a few pictures:

100_1992.jpg
100_1995.jpg
100_1996.jpg

100_1994.jpg
100_1998.jpg
 
  • Like
Reactions: JW
Back
Top