-
Welcome to the Checkmate Community Forums forums.
» Interact with over 10,000 Checkmate Fanatics from around the world!
You are currently viewing our boards as a guest which gives you limited access to view most discussions, articles and access to our other FREE features.
By joining our free community you will be able to:
» Post topics and messages
» Post and view photos
» Communicate privately with other members
» Access our extensive gallery of old Checkmate brochures located in our Media Gallery
» Browse the various pictures in our Checkmate photo gallery
Registration is fast, simple and absolutely free so please, join our community today!
If you have any problems with the registration process or your account login, please contact support by clicking here or by using the"contact us" link at the bottom of the page.
You are using an out of date browser. It may not display this or other websites correctly.
You should upgrade or use an alternative browser.
You should upgrade or use an alternative browser.
I'm starting to like Jet drives
- Thread starter wickedrister
- Start date
T
TheNerd
Guest
VERY nice, I like the rainbow flake.
wickedrister
Active member
justincase
Well-known member
I like it!!! what goes on the hull to pump on that? a boot?

wickedrister
Active member
Transom Seal
It's called a transom adaptor, it's an aluminum housing that bolts to the transom and seals around the bowl. They seal with rubber gaskets at the transom and bowl but semi perm marine sealer is often used, it also has the mounting points for the steering cable, forward reverse cables and the drain plug hole is in it. It will go on before the diverter, I was just sticking it together to see how crazy it was going to look
It's called a transom adaptor, it's an aluminum housing that bolts to the transom and seals around the bowl. They seal with rubber gaskets at the transom and bowl but semi perm marine sealer is often used, it also has the mounting points for the steering cable, forward reverse cables and the drain plug hole is in it. It will go on before the diverter, I was just sticking it together to see how crazy it was going to look

justincase
Well-known member
It looks sick! i like it
wickedrister
Active member
Looking good just needs a big set of chrome tubes
I have a set of Basset long tubes to bolt on, they look just like the headers on your jet Red
wickedrister
Active member
wickedrister
Active member
Sterling Project
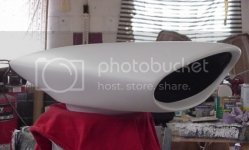
Well back to work now, vacation is over so little time for working on the boat. Did get all the plumbing and weiring done and I'm ready to fire the motor for the first time. Shooting for next week, painted the diverter controller last night and put the scoop on tonight for the first time to see how it looks. Wish it was way bigger but I'm happy with everything so far
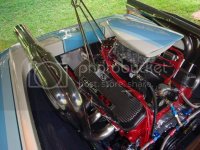
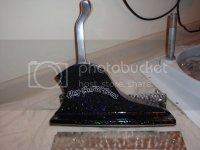
Well back to work now, vacation is over so little time for working on the boat. Did get all the plumbing and weiring done and I'm ready to fire the motor for the first time. Shooting for next week, painted the diverter controller last night and put the scoop on tonight for the first time to see how it looks. Wish it was way bigger but I'm happy with everything so far


wickedrister
Active member
Sterling Project
Ok this is my Sterling Jet update,
Seems that we forgot to put the oil pump shaft in when installing the pump, pick up & pan. 69Skeekcraft you know who you are, just kidding Chris "No Big Deal" We pulled the motor out and fixed the problem last week. Last night we finally adjusted the valves and fired it up for the first time. Got the timing set and ran it for 20 min at 2000 RPM. Cycled the RPMs up to about 3500 a few times during break in. The T-Valve must be stuck because no water went to the headers. They turned a lil cherry red at the bottoms toward the end of the run but I'm told that's not a problem. It's looking like everything is OK. The oil pressure and water temp was good and the dip stick looked good. Think we pissed the neighbors off some but like I said before "No Big deal" I personally liked that 20 mins of BBC noise in the neighborhood LOL! Only a few things left on the to do list before going to the lake so It's really close now! OK, so how fast should this thing run? I was told to expect about 66 mph but i say 78 to 83

Old Navy
Active member
Yes it does. My ball check valve would never open on the hose. On the lake with the water injected headers you will also have no water flow to them below (around) 2000 RPMS. The headers get really hot in no wake zones. No water at low RPMS eliminates the possibility of reversion.The check valve might not be stuck. It opens with pressure your water hose might not have the pressure that the jet pump will produce in the lake.
Boat looks good congrats,,
wickedrister
Active member
No water at low RPMS eliminates the possibility of reversion.
Thanks!
We sure don't want any damn old reversion

Don't want to see vanilla milkshake on the dip stick!
bigredinohio
Active member

 THAT'S SWEET!

wickedrister
Active member
Sterling Project
Thanks for all the guys!!
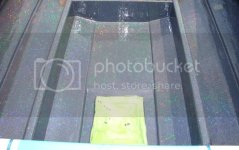
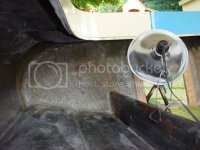
I worked on it all day Sunday, got the cables all routed, had to drill a hole in the back deck for the place diverter cable and cable seal. Hate to drill holes in vintage boats but when you need a through hole it's gotta be done. Rough sanded and prepped the floor for carpet, got the carpet cut to size and ready for glue, made a new bulkhead for under the dash and test fitted the seats, all 2 of them LOL! The carpet is a lil strange, it's the old school blue astroturf. That's what was in it so I went back with the same thing. I really like it, it's rather shiny LOL! Still need to change the break in oil and filters recheck the valve adjustment and timing. Hoping for test run number one this coming Sunday.
Fred
Thanks for all the
 guys!!
I worked on it all day Sunday, got the cables all routed, had to drill a hole in the back deck for the place diverter cable and cable seal. Hate to drill holes in vintage boats but when you need a through hole it's gotta be done. Rough sanded and prepped the floor for carpet, got the carpet cut to size and ready for glue, made a new bulkhead for under the dash and test fitted the seats, all 2 of them LOL! The carpet is a lil strange, it's the old school blue astroturf. That's what was in it so I went back with the same thing. I really like it, it's rather shiny LOL! Still need to change the break in oil and filters recheck the valve adjustment and timing. Hoping for test run number one this coming Sunday.
Fred
wickedrister
Active member
Sterling Project
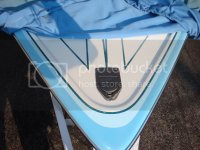
Carpet is in and done, I hate doing carpet LOL! Steering cable is connected to the pump and done. Side upholstered panels are in and done. Forward reverse cable is hooked up on both ends and done. Still planning to splash it Sunday OK let's see what's left. Check the wheel bearings, repack or replace as needed, install the new trailer tires, change oil and filters, adjust the valves, check the timing, fix the trailer lights, get a temporary registration, gas up and go, sounds easy!!!
Carpet is in and done, I hate doing carpet LOL! Steering cable is connected to the pump and done. Side upholstered panels are in and done. Forward reverse cable is hooked up on both ends and done. Still planning to splash it Sunday
 OK let's see what's left. Check the wheel bearings, repack or replace as needed, install the new trailer tires, change oil and filters, adjust the valves, check the timing, fix the trailer lights, get a temporary registration, gas up and go, sounds easy!!!
