-
Welcome to the Checkmate Community Forums forums.
» Interact with over 10,000 Checkmate Fanatics from around the world!
You are currently viewing our boards as a guest which gives you limited access to view most discussions, articles and access to our other FREE features.
By joining our free community you will be able to:
» Post topics and messages
» Post and view photos
» Communicate privately with other members
» Access our extensive gallery of old Checkmate brochures located in our Media Gallery
» Browse the various pictures in our Checkmate photo gallery
Registration is fast, simple and absolutely free so please, join our community today!
If you have any problems with the registration process or your account login, please contact support by clicking here or by using the"contact us" link at the bottom of the page.
You are using an out of date browser. It may not display this or other websites correctly.
You should upgrade or use an alternative browser.
You should upgrade or use an alternative browser.
Pulse170 Floor Restoration
- Thread starter Rob B
- Start date
- Status
- Not open for further replies.
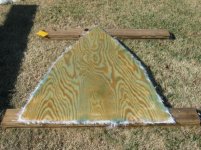
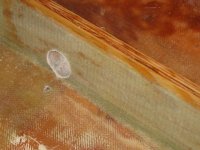
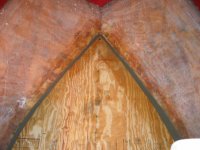
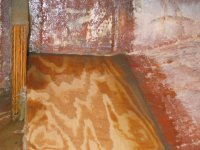
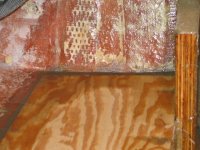
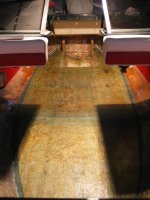
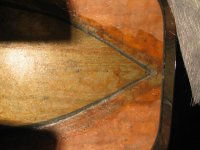
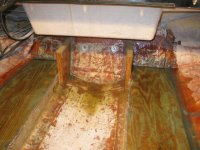
Today I got the floor installed. I used PL Premium to bond the floor to the stringers and around the sides I used Hull and Deck putty. That H&D putty is some good stuff, I also used it to blend the floor with the hull. I need to let the putty set before glassing the floor in place. Here are some pictures from today.
Attachments
yellowfiero88
Well-known member
Great looking job!
Great looking job!
Thanks!!! Even though this floor resto has been time consuming, it' also been a fun project. I'm hoping to get the floor glass in over the weekend.
yellowfiero88
Well-known member
My favorite projects are boats. There is a little bit of everything involved in them. Mechanical, body and paint, and wood working. When I take on a major project, its easy to get side tracked and loose focus. Adding a mix in like boats keeps me on track tho. Damn A.D.D!Thanks!!! Even though this floor resto has been time consuming, it' also been a fun project. I'm hoping to get the floor glass in over the weekend.
")
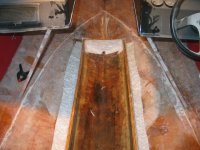
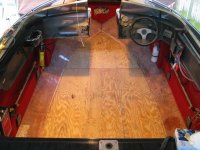
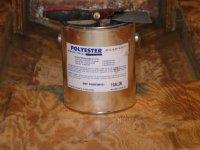
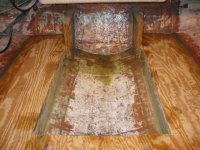
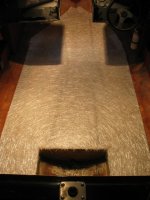
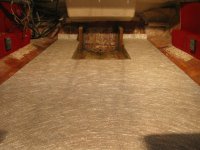
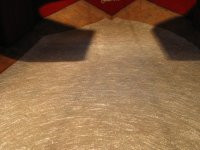
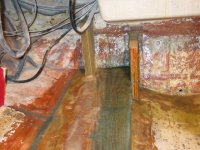
Today I had a chance to glass the floor in, using a 1/4" nap roller made life easier. Once the resin dries I'll add a strip of mat around the perimeter and the edges of gas tank/bilge area to completely seal the floor to the hull. Here are some pictures.
Attachments


Looks GREAT! 
Have you decided how you're going to attach the seat bases? I can't think of a way to do it without penetrating the wood and opening up the chance for wood rot again. I wonder if dipping the screws in resin before they're installed would cure that problem?
Have you decided how you're going to attach the seat bases? I can't think of a way to do it without penetrating the wood and opening up the chance for wood rot again. I wonder if dipping the screws in resin before they're installed would cure that problem?
Looks GREAT!
Have you decided how you're going to attach the seat bases? I can't think of a way to do it without penetrating the wood and opening up the chance for wood rot again. I wonder if dipping the screws in resin before they're installed would cure that problem?
Sure did. I'm going to do what Jallen355 did. I'll cut a 2x10 a bit bigger than the pedestal base bond that to the floor then glass in place. Second where the gas tank, battery,oil tank, seats and under the console attach to the floor, I'm going to glass in blocks of wood to attach too. That way nothing will penetrate the floor. See-this link for Jallen355 seat attachments using 2x10's. http://checkmate-boats.com/forums/showthread.php?t=11529&page=2. Thanks for the tip, Jallen355.
Last edited:
wizard8575
Active member
I love the work you are doing its getting me excited about doing my floor. Cant wait for spring.
JUPITER PULSARE
Well-known member
Looks GREAT!
Have you decided how you're going to attach the seat bases? I can't think of a way to do it without penetrating the wood and opening up the chance for wood rot again. I wonder if dipping the screws in resin before they're installed would cure that problem?
When I rebuilt my Pulsare floor, I glassed aluminum plates into the ply so I could "tap" the seat pedestall screws into the plates.
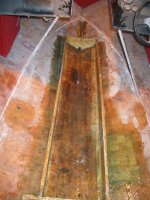
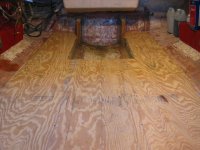
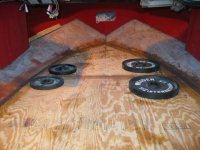
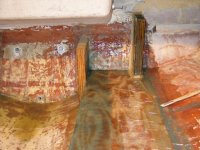
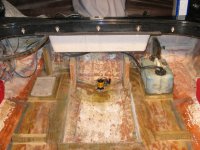
Tonight it was warm enough to continue glassing in the floor. I overlapped the sides where the gas tank sits. I'm sure this is overkill but after seeing the wood rot, I'm not taking any chances. I also added extra bracing connecting the floor to the transom, probably not needed as well but the 200 Merc hanging off the back is heavy. I've got the pieces cut out for the seat pedestals to sit on and for the rear bench seat, front seats and the console sides to attach to. I'm doing away with the aluminum angle that screws to the floor and seats. Here's some pictures.
Attachments
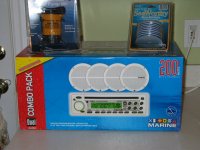
I got some more goodies today from Overton's. They were having a 15% off plus free shipping, so since I got the boat tore apart I'll add a new bilge pump and stereo system. I went thru loud stereos during the mid 80's early 90's so what I got was inexpensive yet will serve the same purpose just not as loud. Here's a picture.
Attachments

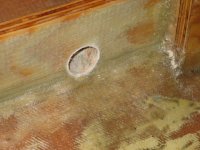
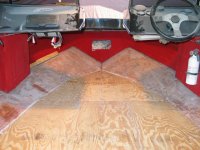
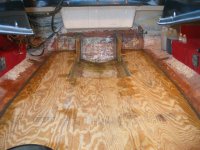
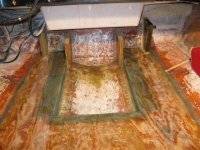
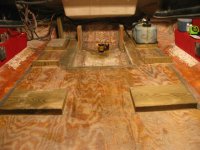
I got some more work done on the boat today in between Christmas shopping with the wife. I had decided not to use the angle brackets to attach the seats to the floor. Instead I glued some wood blocks in place then I'll glass them in. I added wood pads for the oil tank, battery and seat pedestals and will glass those in as well. I also mounted the new bilge pump. Here's some pictures of my progress and were I was double checking dimensions.
I had decided not to use the angle brackets to attach the seats to the floor. Instead I glued some wood blocks in place then I'll glass them in. I added wood pads for the oil tank, battery and seat pedestals and will glass those in as well. I also mounted the new bilge pump. Here's some pictures of my progress and were I was double checking dimensions.Attachments

- Status
- Not open for further replies.