-
Welcome to the Checkmate Community Forums forums.
» Interact with over 10,000 Checkmate Fanatics from around the world!
You are currently viewing our boards as a guest which gives you limited access to view most discussions, articles and access to our other FREE features.
By joining our free community you will be able to:
» Post topics and messages
» Post and view photos
» Communicate privately with other members
» Access our extensive gallery of old Checkmate brochures located in our Media Gallery
» Browse the various pictures in our Checkmate photo gallery
Registration is fast, simple and absolutely free so please, join our community today!
If you have any problems with the registration process or your account login, please contact support by clicking here or by using the"contact us" link at the bottom of the page.
You are using an out of date browser. It may not display this or other websites correctly.
You should upgrade or use an alternative browser.
You should upgrade or use an alternative browser.
1988 Vision redo
- Thread starter Kurtster
- Start date
Kurtster
Well-known member
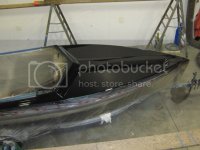
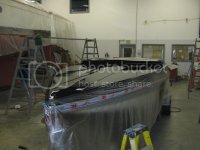
Finnally starting to put the finishing layers of black gloss on.
After this, there will be 2 more coats {total of 5} then a couple of clear.
Getting just the right shape and edge blending for the bow modification had proved to be much more difficult than anticipated.
That center piece was shaped / grinded / formed / and removed and started over again four times before we got it right.
Lots of mold release wax
Lots of PVA {poly vinyl alcohol}
Lots of thickend epoxy
Lots of balsa core {2 1/4 thick X 12ft X 20" wide}
Lots of glass mat
Lots of biaxial cloth {for blending the edges}
lots and lots and lots of sanding
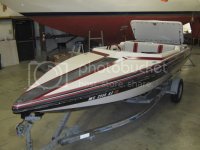
Again, the first pic is what we started with....
The next two pics are from yesterday.
Now we can finnally move on to the rest of the painting, then the rub rail, then reinstalling all the hardwares, then some interior finishing touches and in the water I go.


Kurtster
Well-known member
Ahh, somebody just e-mailed me and commented that previously in the thread I had the boat taped up for striping.
Hmmmm, --- somebody was actually paying attention
The problem was, --- I wasn't happy with the paint at that point so I took the tape off and wet sanded again and again and sprayed again and again.
We started this project last November knowing that my anal retentiveness was gonna cause delays and do-overs
Probably still gonna be late putting it in the water this spring
Retape tomorow.
Hmmmm, --- somebody was actually paying attention
The problem was, --- I wasn't happy with the paint at that point so I took the tape off and wet sanded again and again and sprayed again and again.
We started this project last November knowing that my anal retentiveness was gonna cause delays and do-overs

Probably still gonna be late putting it in the water this spring
Retape tomorow.
Don's89 Senator
Well-known member
It's getting better and better. Love it and thinking of that as my next boat. Keep it up . Looking good.
Kurtster
Well-known member
It's getting better and better. Love it and thinking of that as my next boat. Keep it up . Looking good.
Interesting, --- I almost bought a Senator instead of this for a restoration, --- price and distance was the only thing that kept me from buying it ---- I thought the Senator would've made a really kool "hot rod" restoration.
Don's89 Senator
Well-known member
I think your boat looks and is a hot rod. I'd like to have a bigger boat. Maybe someday. Might sell mine after new motor and bugs worked out. Or not.
Kurtster
Well-known member
Wow incredible ! very nice work and I like your taste !
Let me ask a question , not all vision came with a powered hatch ? looking to buy one right now without a lift. Most others ones I have seen had the actuator.
Thanks for the kind complement....
From what I understand from talking to the guys at Checkmate Marine Inc , the Vision didn't come with the powered hatch option until '89.
But that's not to say some Checkmate dealer may or maynot have added an actuator to a earlier model at time of sale.
I actually looked into installing one in my '88 and found plenty of resources to purchase one {including Checkmate Marine} --- generally I found the good ones to be around $400 to $500 {complete with rams and switches and wiring} --- some more some less --- they are expensive.
Good luck
Kurtster
Well-known member
Havn't retaped yet for the striping ---- been having trouble getting to the shop through all the snow we've been getting 
Anyway, the new rubrail and insert came in so we decided to get that installed right now.
This was not my original choice of rails, I was gonna use a lower profile non-insert style, but on further thought I think the added protection of the rubber insert is needed considering the people and boats that are around me where I hang out. {this one is the flushest and lowest profile I could get of this style}.
The stern seam where a red {slut red} powder coated end cap will be installed.
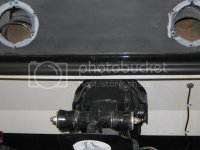
I used a semi-rigid rail so the bows hairpin curve and the aft corners were not much problem to shape/install with a heat gun.
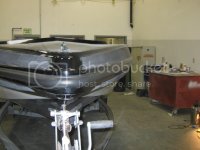
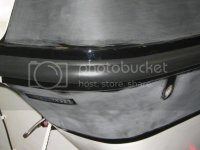
We did do a "tip and roll" of black Awlgrip of the flat surface before the rail was installed.
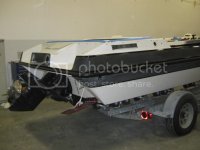
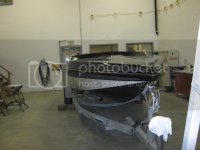
This weekend gonna work on the "fade from black to white" along the sides under the side windows.
And, definately retaping ---- first coats of striping by end of next week

Anyway, the new rubrail and insert came in so we decided to get that installed right now.
This was not my original choice of rails, I was gonna use a lower profile non-insert style, but on further thought I think the added protection of the rubber insert is needed considering the people and boats that are around me where I hang out. {this one is the flushest and lowest profile I could get of this style}.
The stern seam where a red {slut red} powder coated end cap will be installed.

I used a semi-rigid rail so the bows hairpin curve and the aft corners were not much problem to shape/install with a heat gun.


We did do a "tip and roll" of black Awlgrip of the flat surface before the rail was installed.


This weekend gonna work on the "fade from black to white" along the sides under the side windows.
And, definately retaping ---- first coats of striping by end of next week

Problem Child
Well-known member
Looking fantastic Kurt. Its coming together nicely and cant wait to see the finished product. What did you find out about the trim tabs ? Sorry if I missed it. Jeff
Kurtster
Well-known member
Looking fantastic Kurt. Its coming together nicely and cant wait to see the finished product. What did you find out about the trim tabs ? Sorry if I missed it. Jeff
No you didn't miss it ----- I hadn't posted the outcome of my investigative testing {I assume your referring to the seized rams}.
I did find out that the rams were seized due to direct contact of the hull cleaner "On/Off".
Previously in the thread, Paul {paulsboats] indicated to me that the "on/off" maybe to blame.....
So I took a small amount of on/off and sprinkled a little on one of the rams {the ram was already ruined} ---- low and behold it started pitting and corroding within 2 hours. {Paul obviously knows his stuff}.
So right now I am waiting for new replacements from EM.
On/Off is a great hull cleaner HOWEVER when not used properly it can ruin your day

Kurtster
Well-known member
What did you find out about the trim tabs ?
Actually a friend was just asking about the ropes holding the tab planes up ---- he wanted to know if I have a manual hand crank on the dash to raise and lower the tabs
 LOL
LOLI won't mention who was poking fun at me but his initials are Sammie from Action Marine
Problem Child
Well-known member
Yes Paul does know his stuff. That is what makes this forum great with alot of knowledge floatin around. Sammie sure does have quite a sense of humor and a great heart for helping others. The Vision is coming along nice and you will be sporting quite a nice mate this summer. 

Don's89 Senator
Well-known member
Yes Paul does know his stuff. That is what makes this forum great with alot of knowledge floatin around. Sammie sure does have quite a sense of humor and a great heart for helping others. The Vision is coming along nice and you will be sporting quite a nice mate this summer.
X2. He is doing a great job. Love those Visions.
ram750
Member
Thanks for the info , I have done my research to put one on if it was not equipped with the actuator and found it to be a little pricey just for show really...
Anyhow I am very honest I like the direction you are taking with the boat and if I get mine I promise to post pics of it on here ! and maybe do a little bit of the detailing to get it to my style , sort of like what you are doing.
Good luck and keep them pictures comin !
Anyhow I am very honest I like the direction you are taking with the boat and if I get mine I promise to post pics of it on here ! and maybe do a little bit of the detailing to get it to my style , sort of like what you are doing.
Good luck and keep them pictures comin !

SippyRat
Well-known member
All coming together nicely. Just wondering if your gonna take the rub rail back off or tape it up. To each is own but tapeing it up wont make for as clean and easy job.
was wondering the same thing myself. I would think you would want a seamless coat of paint and then install the rub rail. less chance of peeling this way.

