• Welcome to the Checkmate Community Forums forums.

    You are currently viewing our boards as a guest which gives you limited access to view most discussions, articles and access to our other FREE features.
    By joining our free community you will be able to:

    » Interact with over 10,000 Checkmate Fanatics from around the world!
    » Post topics and messages
    » Post and view photos
    » Communicate privately with other members
    » Access our extensive gallery of old Checkmate brochures located in our Media Gallery
    » Browse the various pictures in our Checkmate photo gallery

    Registration is fast, simple and absolutely free so please, join our community today!

    If you have any problems with the registration process or your account login, please contact support by clicking here or by using the"contact us" link at the bottom of the page.

Building twin outboards for my Convincor

This may be a bit extreme but... Is there a safe place to hit it for a very short zap with a blunt air chisel. I use this all the time to get splined fittings and old rusted rims off hubs when restoring old Chevy trucks. Works like magic or toss them and build a mountain motor located on the fast side of the transom . :poke:
 
Also, hitting the prop with a hammer covered in cloth isn't doing much.

When using a puller to removed interference (pressed fit) parts, tighten puller with tension and use a good 1.5-2 lb hammer give 3-4 raps on the end of the puller screw (impact along same axis as puller screw). Re-tension puller screw, remove wrench and hit again. That is how stubborn balancers are pulled. Also make sure you put some good grease or anti-sieze on the puller screw to prevent thread binding and galling. You wouldn't believe the actual pressure numbers you can exert with a fine pitch screw like that using only your own strength, so lubrication is very necessary. Also, do you own an impact wrench? Not a high powered one, one in the 250-300 in-lbs range (such as an 18v cordless one). Those can amplify the puller power also but essentially hitting the puller on the end with a hammer has the same effect.

As far as heat goes, MAAP gas will help but more than likely you will just melt the rubber hub inside the prop in order to get enough heat on the full length of the splines. Think about it, if you only heat the outer portion of the splines, only that portion will expand from heat and you will have to try pulling the cooler splines over the expanded heated section. That is the beeotch with using heat, you only want to heat the outer part you are removing, not the inner shaft otherwise if you heat both, they both expand and you get nowhere.

As a last resort, and that becomes a sacrificial prop, take a cut off wheel and start cutting the outer ring of the prop off at least one section between the inner ribs that connect the outer ring to the hub. You need to expose the length of the hub. Once you have the hub exposed, cut a groove in the full length of it but not all the way through into the inner shaft. Then use a chisel in your cut groove to split the hub along that cut. It should cleave as you work the chisel down the cut. That will take a lot of binding force off of the splines and allow it to slide off. Been there, done that, just not on a propshaft spline, but the method holds true for about anything like this situation.
 
I was talking to Demag Saturday and he indicated something similar Ron. Thanks, I'll try smacking the end of the puller and add a touch of grease to it as well.
 
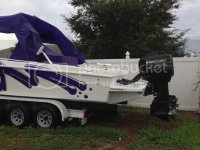
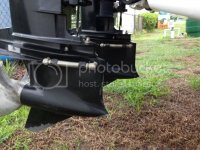
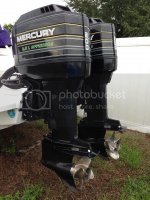
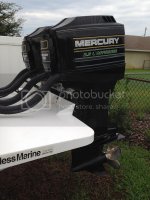
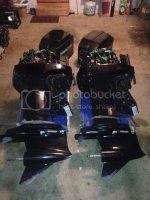
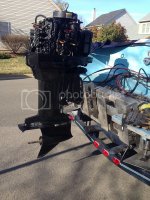
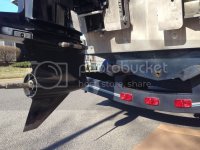
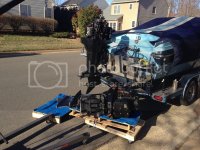
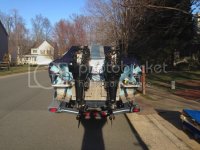
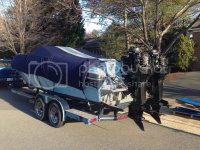
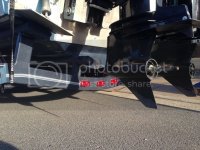
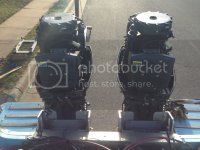
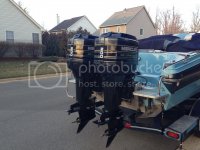
On another note I decided to buy some complete motors. They are low hour 1996 2.5L 200HP 25" motors with Bobs low water pickups and nose cones. The deal isn't done as they are in Florida and I have to get them shipped up to Virginia but we have a verbal agreement anyway. My brother happened to be passing though the Orlando area on his way to Key West and checked them out for me and said they looked and ran very well.
036E5C0E-96CE-4D91-A251-28AB17E5FC5B_zpssqtrg4ti.jpg
47E7A2C2-9F89-44B6-8F80-81EE35DA65FF_zps3aftjqrn.jpg
0BD91FBC-FC69-4DC6-8196-8CAF7592BCAC_zps50y3p5uw.jpg
F19FD523-1571-4139-AD21-A2D975009B41_zpsrlbyel45.jpg
 
Chris, You're making great progress! If those motors have been sitting for a while, you will need to go through the carbs. Have a professional do a good carb cleaning on both motors. You'll want to drain the fuel tank and start with fresh gas, preferably rec 90 fuel. Also, install new fuel filters and primer bulbs. The last thing you want is to fry a motor due to bad gas/dirty carbs, clogged fuel filters, etc. by taking short cuts. I would pull both lower units and inspect/change water pumps and replace gear lube. Looking forward to hearing about your 1st day on the water! Steve
 
Congrats Chris. Take your time and be meticulous with everything. It'll pay off big time when you're enjoying trouble free boating all season long.
 
HELL YES!!!!! Now were talkin'!!! I can't wait to see this thing on the water. Still plan on coming to Cumberland?

Yep, Cumberland is definitely on our list. It's been two years and I need a Cumberland fix.


Chris, You're making great progress! If those motors have been sitting for a while, you will need to go through the carbs. Have a professional do a good carb cleaning on both motors. You'll want to drain the fuel tank and start with fresh gas, preferably rec 90 fuel. Also, install new fuel filters and primer bulbs. The last thing you want is to fry a motor due to bad gas/dirty carbs, clogged fuel filters, etc. by taking short cuts. I would pull both lower units and inspect/change water pumps and replace gear lube. Looking forward to hearing about your 1st day on the water! Steve

Thanks JP. The motors were run around Christmas time so that means they'll be sitting for about five months. I like the idea of starting with a nice clean slate, so thank you for the suggestions. I'll run all new fuel lines up from the tank, bulbs, water separators, and fuel filters. I'll also heed your advice with the lower units.
 
Back
Top